
Flexible Shaft and Holder for a Rotary Tool
$18.85
It served me perfectly well for almost a year, but while working with it I found that it wasn't always convenient to use in certain situations. I mentioned the problem to an acquaintance, and he suggested a couple of accessories that fit my rotary tool. So today I'll be showing you both of them in my review.
There's not much to say about these, so this review will mostly consist of photos with brief explanations.
First, let me explain why I needed all this.
This winter, I ran into a problem: I needed to cut six or seven floor tiles.
Or rather, I needed to cut the grout lines between the tiles.
The grout lines were very narrow, and there was no way to get an angle grinder in there, so I had to use a rotary tool to cut several meters of grout. A thin diamond wheel worked well for this, but the front end of the rotary tool was too bulky to position the disc perpendicular to the floor. So although it was possible to make the cuts, it was very awkward.
A flexible shaft makes jobs like this easier because its front end is noticeably narrower than the rotary tool itself.
I'd seen flexible shafts for Dremels before, but they looked too small, and there was no guarantee they'd fit. Besides, a flexible shaft is best used with a rotary tool holder, so I looked for one of those too.
It turned out that both were available, and both fit my rotary tool, so I ordered them.
Now let's get to the review, where I'll fill in the rest and show you what these things are.
A couple of words about the packaging.
The holder came in a cardboard box wrapped in a sheet of polyethylene foam. That didn't help, though—the post had thoroughly battered the box.
The store listing for this item is Grinder Holder, priced at 12.99
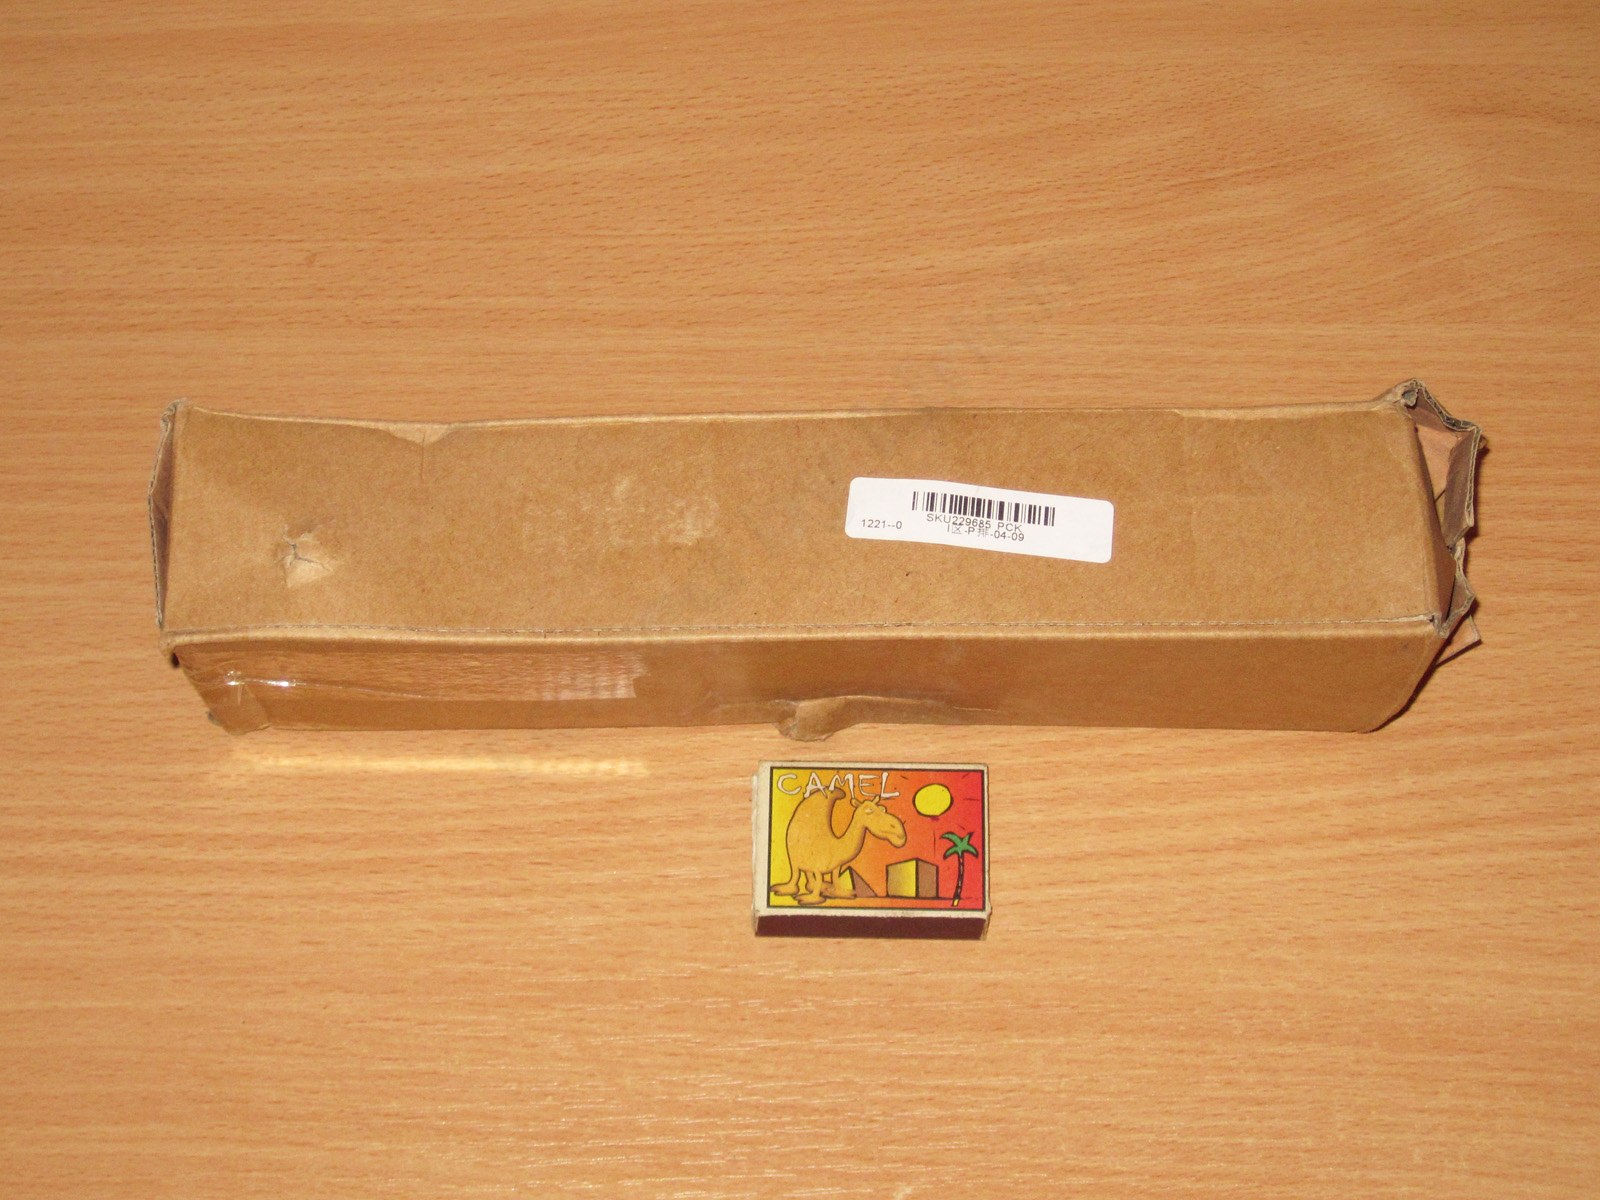
The flexible shaft was packaged much more simply: no wrapping or box, just a plastic bag. But it's even harder to damage :)))
The store listing for this item is 6mm Electric Grinder Extension, priced at 18.85

The front end of the flexible shaft was greased and wrapped separately in plastic.

Here's the holder. I'll describe each part in detail below, but I think most people can figure out how it works from this photo.

The tool is clamped in the holder at the top, and the whole assembly is secured with a screw and wing nut. The design turned out to be surprisingly convenient.

The minimum and maximum clamping diameters are about 37 and 43 mm.
A plastic spacer is also included. It lets you use a tool with a front-end diameter of about 24–27 mm. Since my rotary tool is large, I'll have to figure out how not to lose it, because I don't need it at the moment.
The top part is secured with a screw, so you can remove it and use the rest as a holder for something else.

The total length of the assembled unit is 260 mm.

The upper part swivels. The design is very simple: a ball clamped by the housing of the upper part.
Interestingly, they used a nut as a washer :). It’s not the prettiest solution, but it works.
But I have a much more significant concern here: the whole assembly is made of some material that looks like silumin, so I have some doubts about its reliability.
I tried tightening it hard; everything held and nothing broke, but the clamping mechanism still looks rather flimsy.
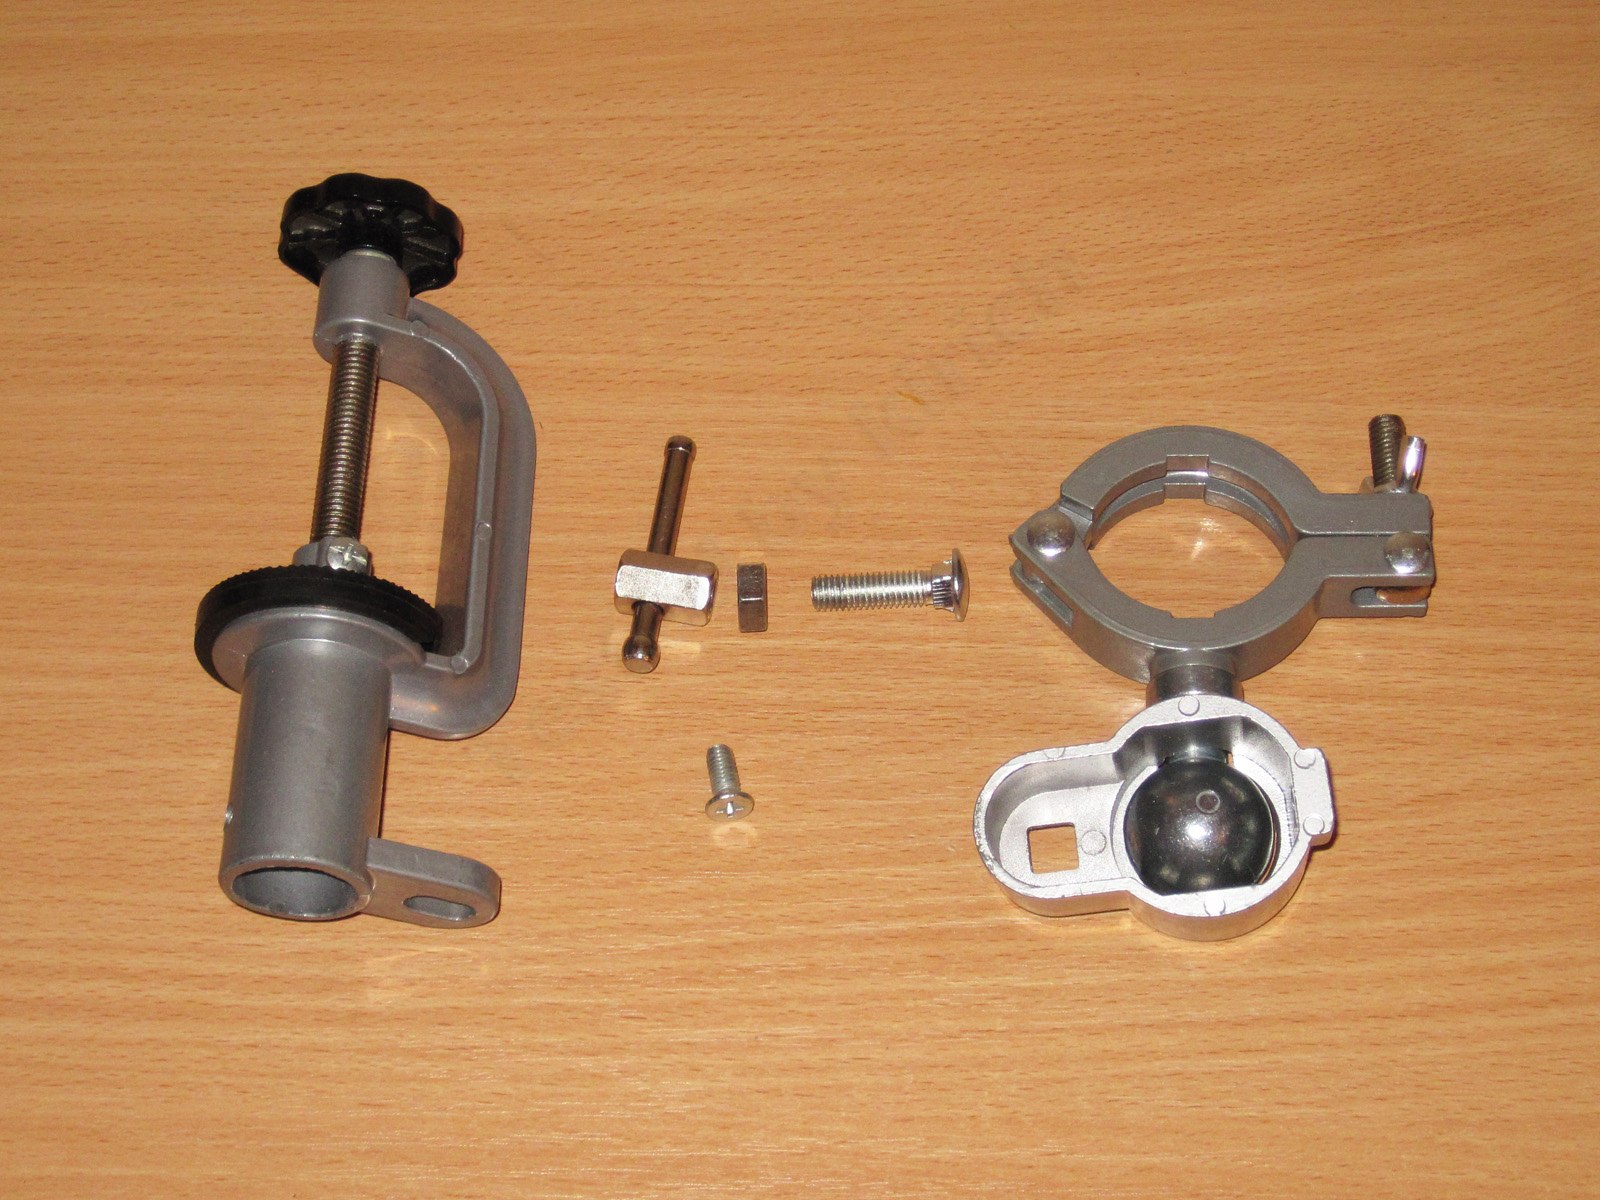
The lower part of the holder.

And here’s my second concern.
The screw section of the clamping mechanism isn’t hinged, so when you fasten the holder to the tabletop, it rotates along with the screw.
Why this is bad:
1. It’s less convenient to fasten; you have to hold the whole assembly more firmly while attaching it to the table.
2. Repeatedly installing and removing the holder can damage the underside of the tabletop.
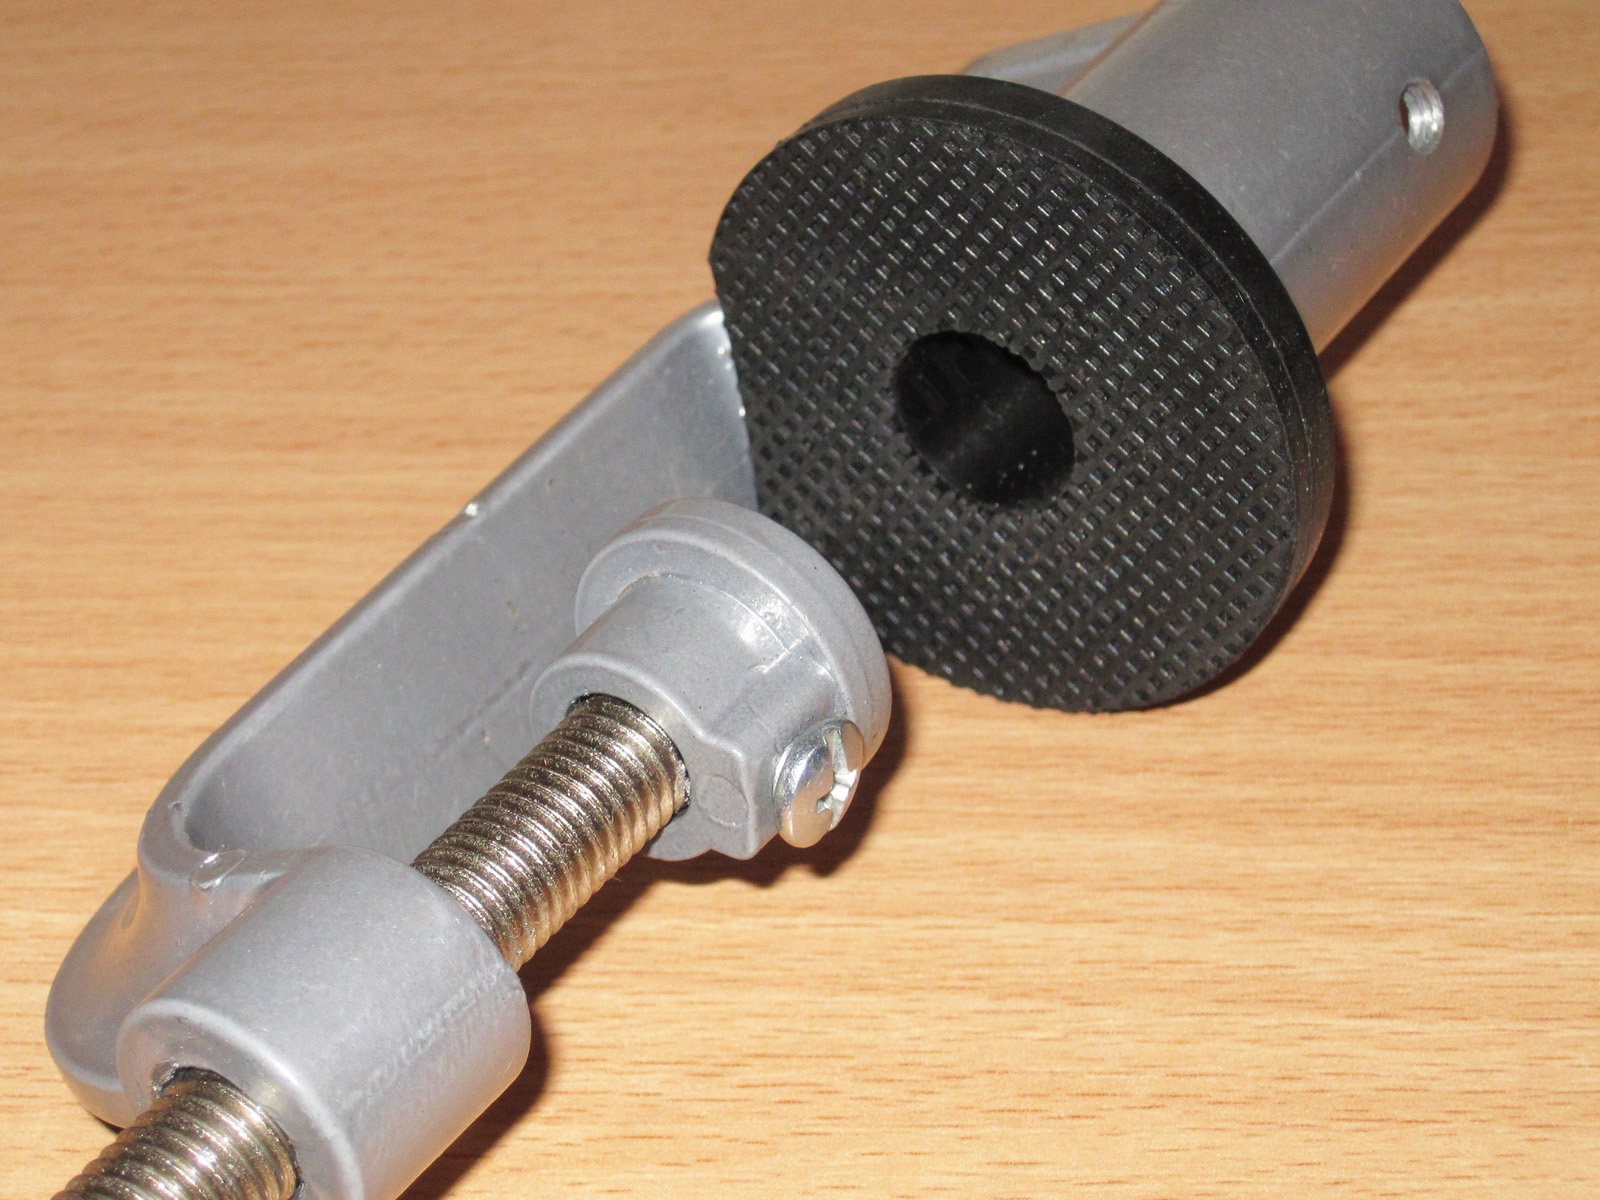
The maximum tabletop thickness is about 50-52 mm, which is no problem. For example, none of the tabletops in my home is thicker than 40 mm.

The flexible shaft. I didn’t weigh it, but it looks and feels pretty substantial in your hands.

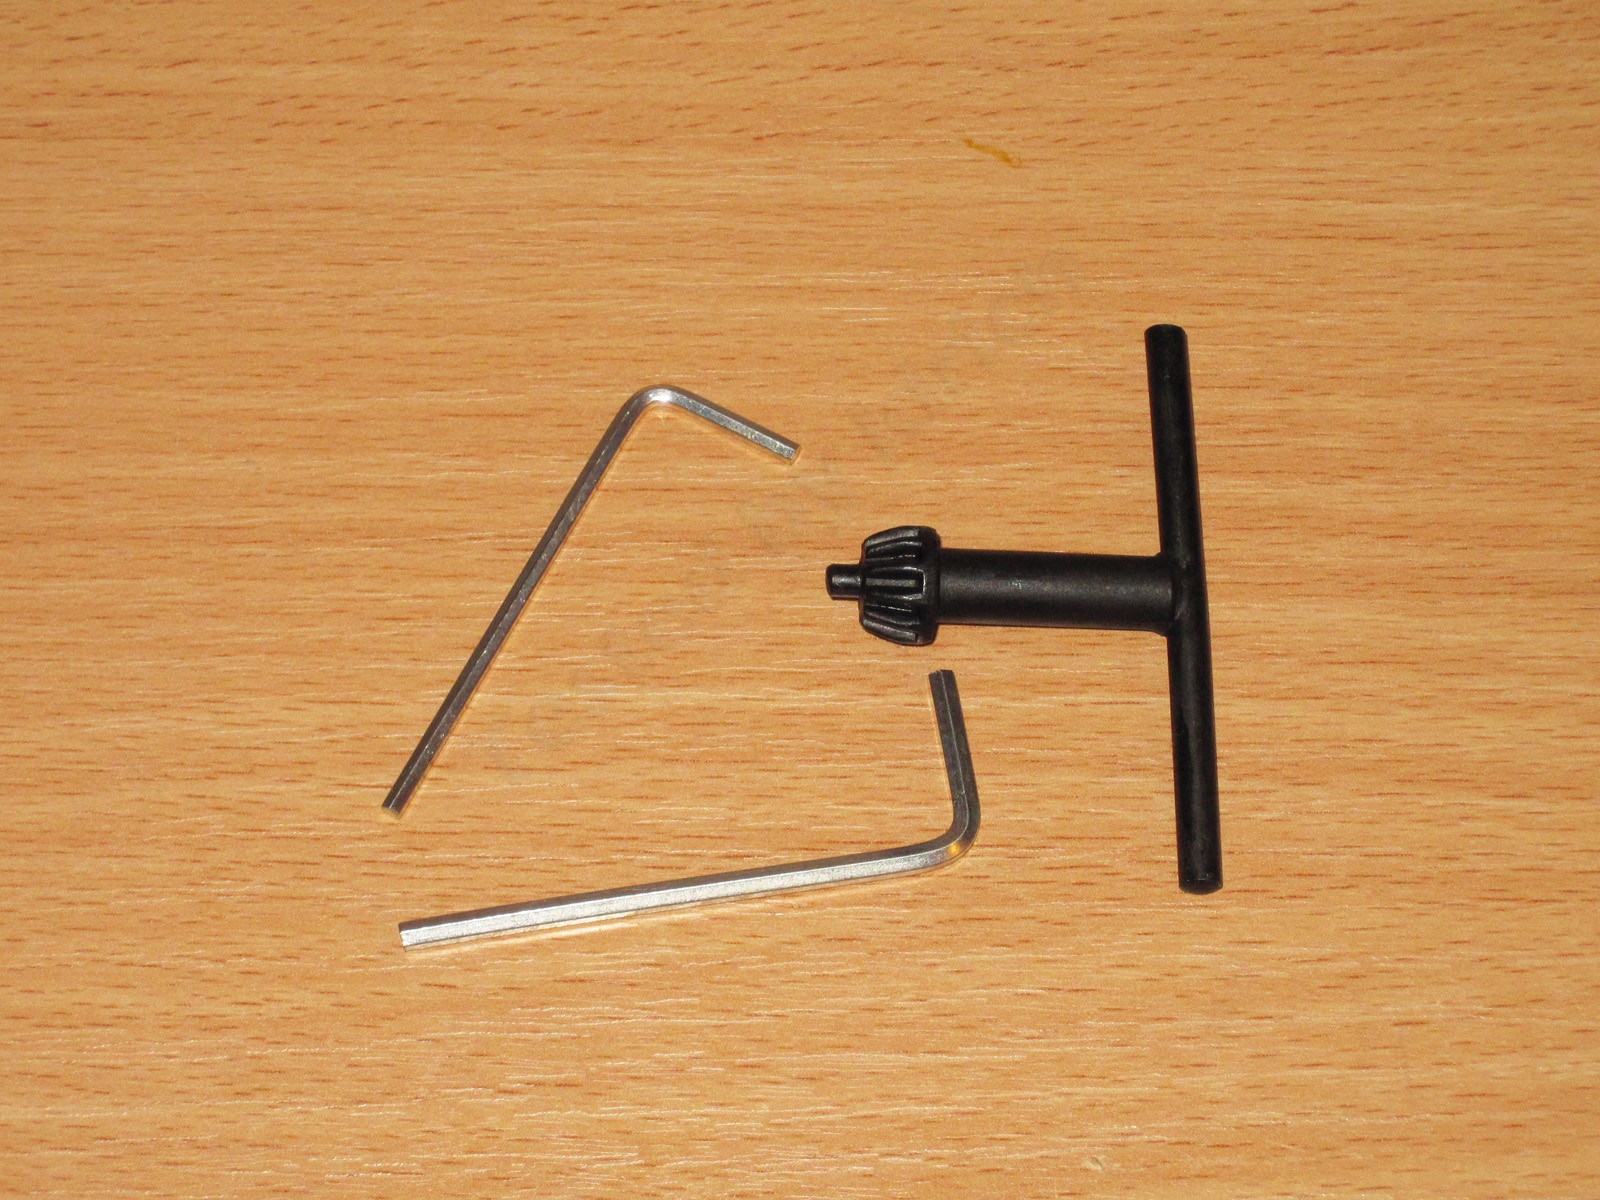
The package included a chuck key and a couple of small hex keys.
At first I didn’t know what the hex keys were for; I figured it out while preparing this review.
The front section with the chuck measures 110x26 mm.
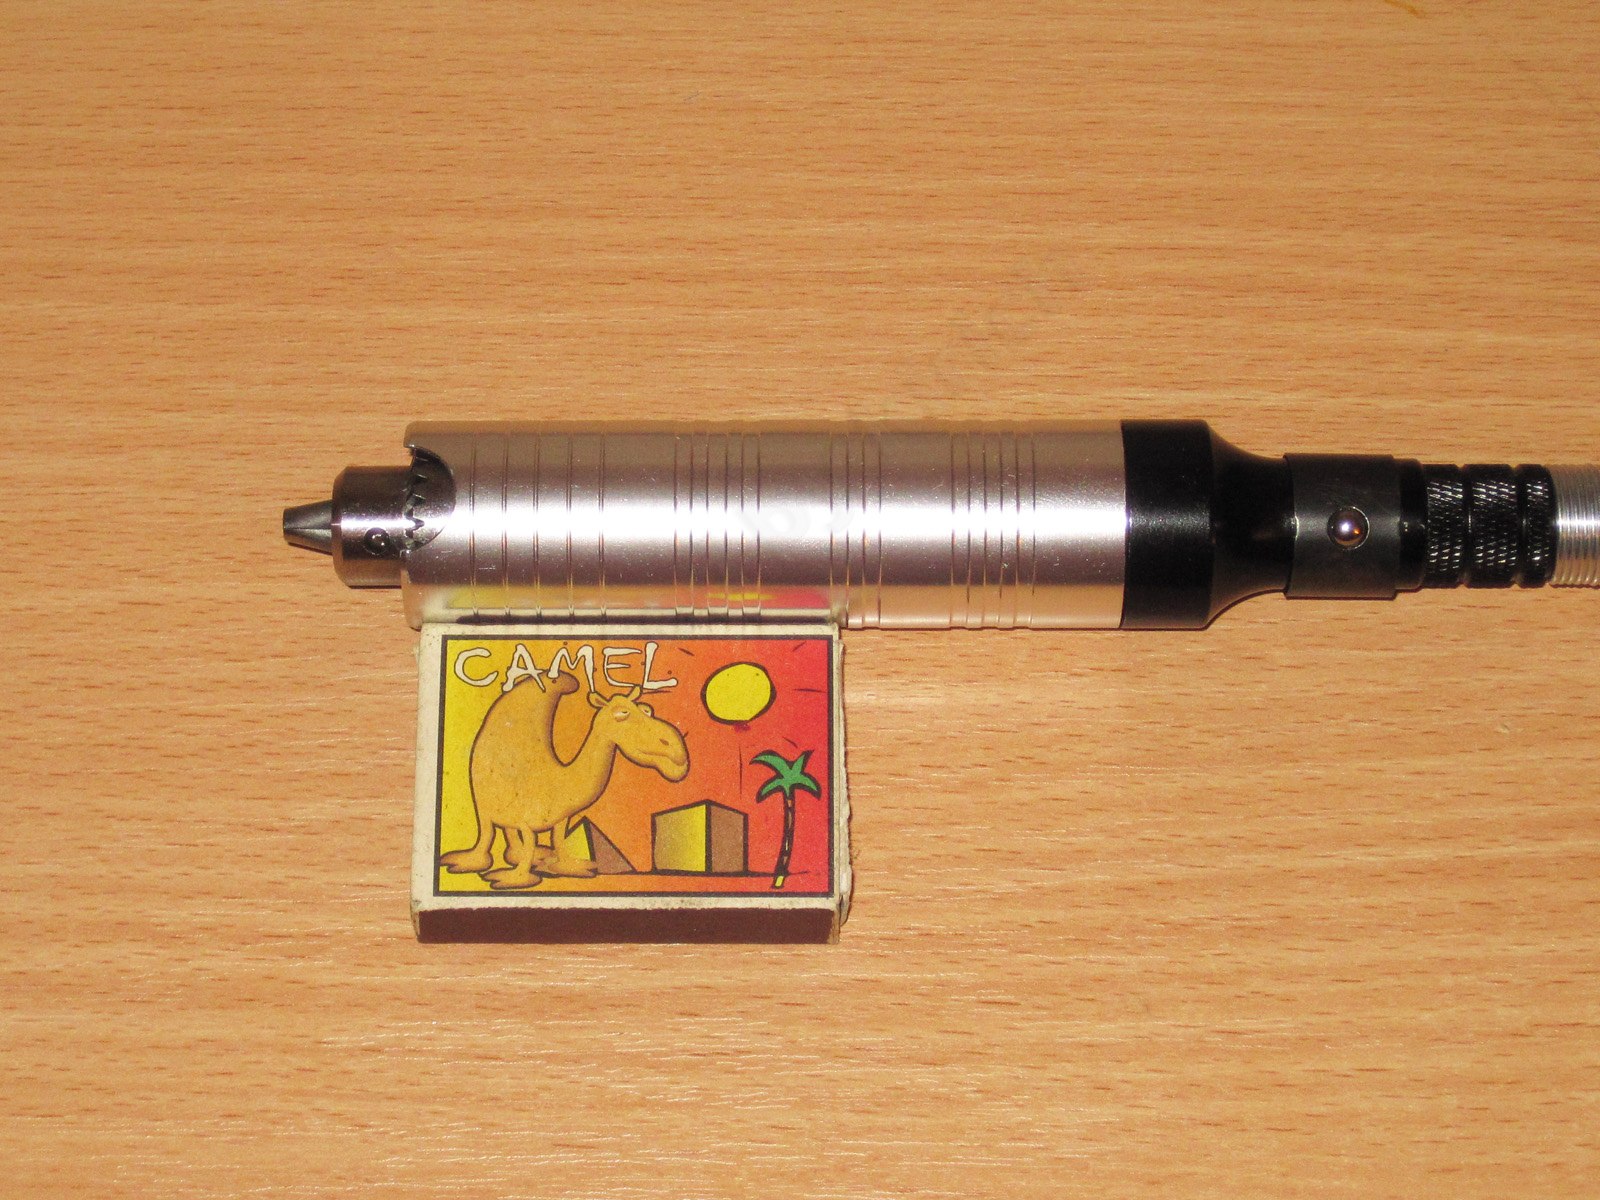
The ruler here is just for a rough idea of the dimensions. The stated length is 110 cm, but the actual length is closer to 100 cm.
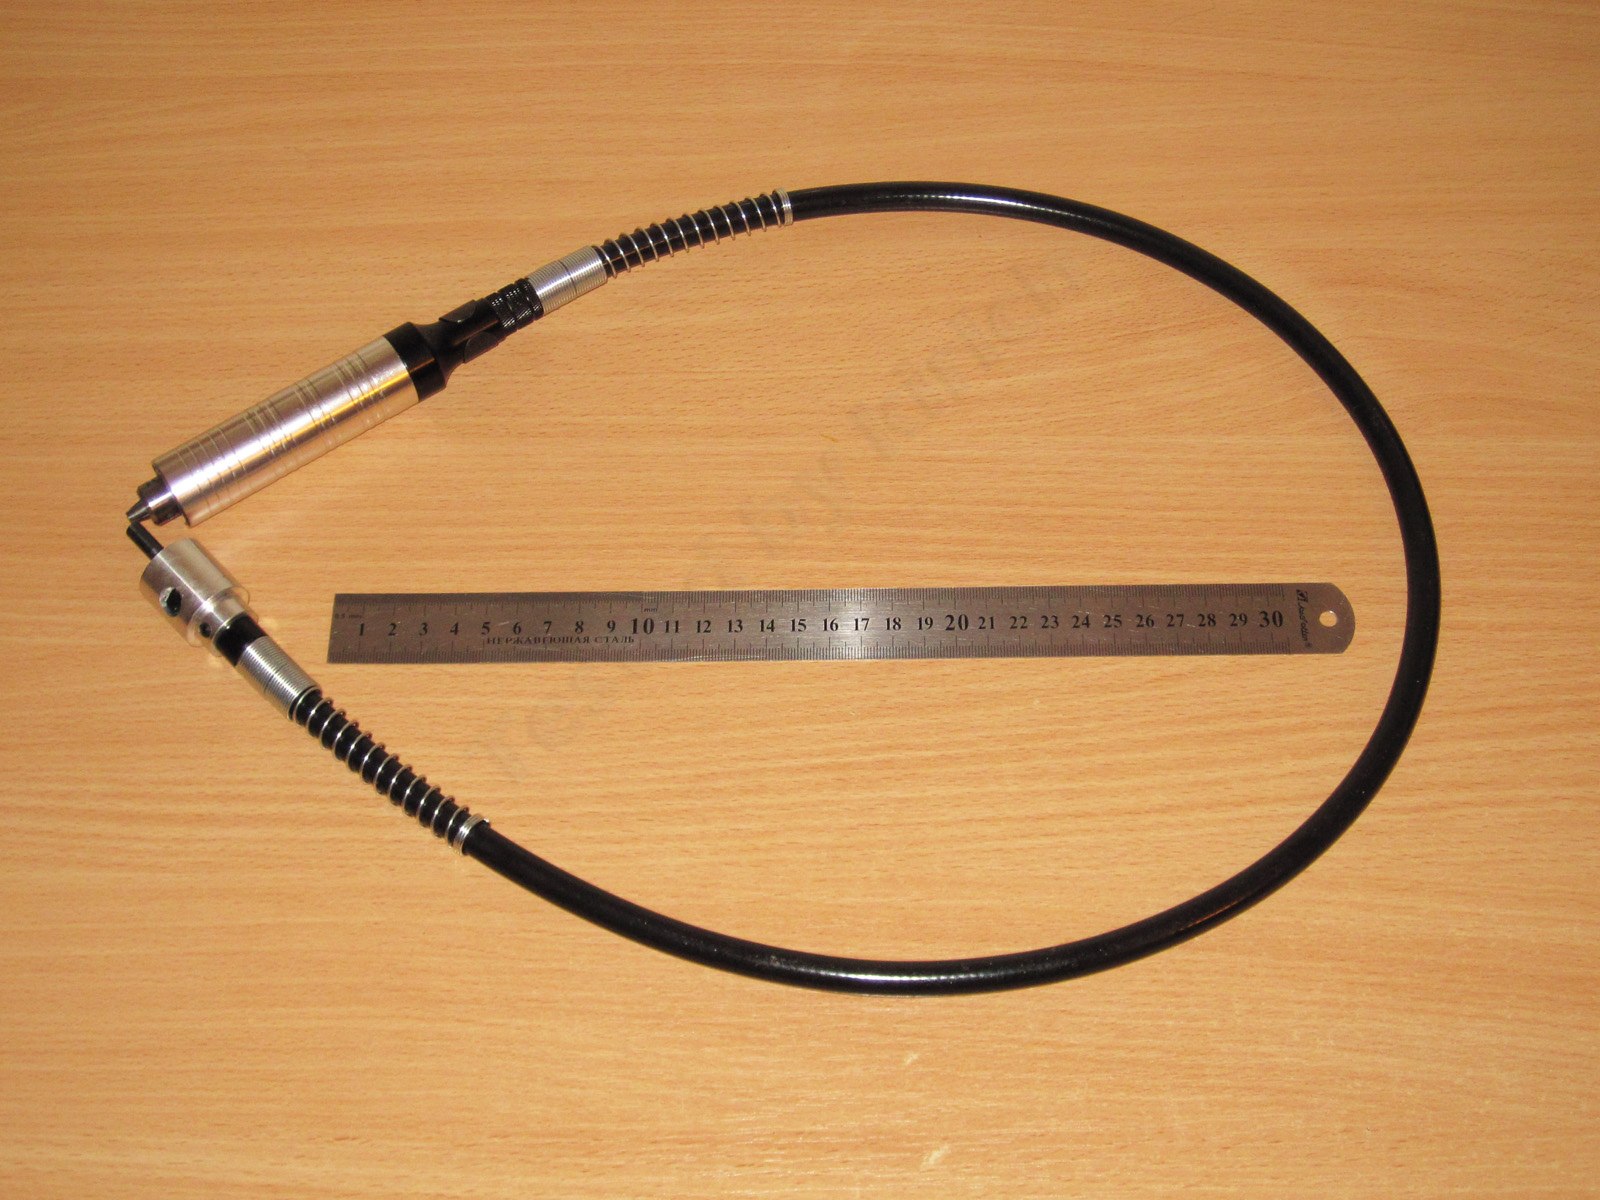
There are springs at both ends of the flexible shaft to protect the rubber section from kinking.

Surprisingly, it has a decent chuck. I don’t know the brand, since I couldn’t pry it out, but I liked how well it runs true.
The gap between the handle and the chuck is about 0.5 mm. There’s a little axial play, but I didn’t notice any radial play at all.
You can see the slot for the key on top. Tightening the chuck without holding it by hand isn’t very convenient, but the designers apparently tried to hide it as far inside the handle as possible. I’m not quite sure why, though.
The stated minimum diameter is 0.3 mm, and the maximum is 4 mm. In practice, it can hold drill bits up to 4.5 mm in diameter.

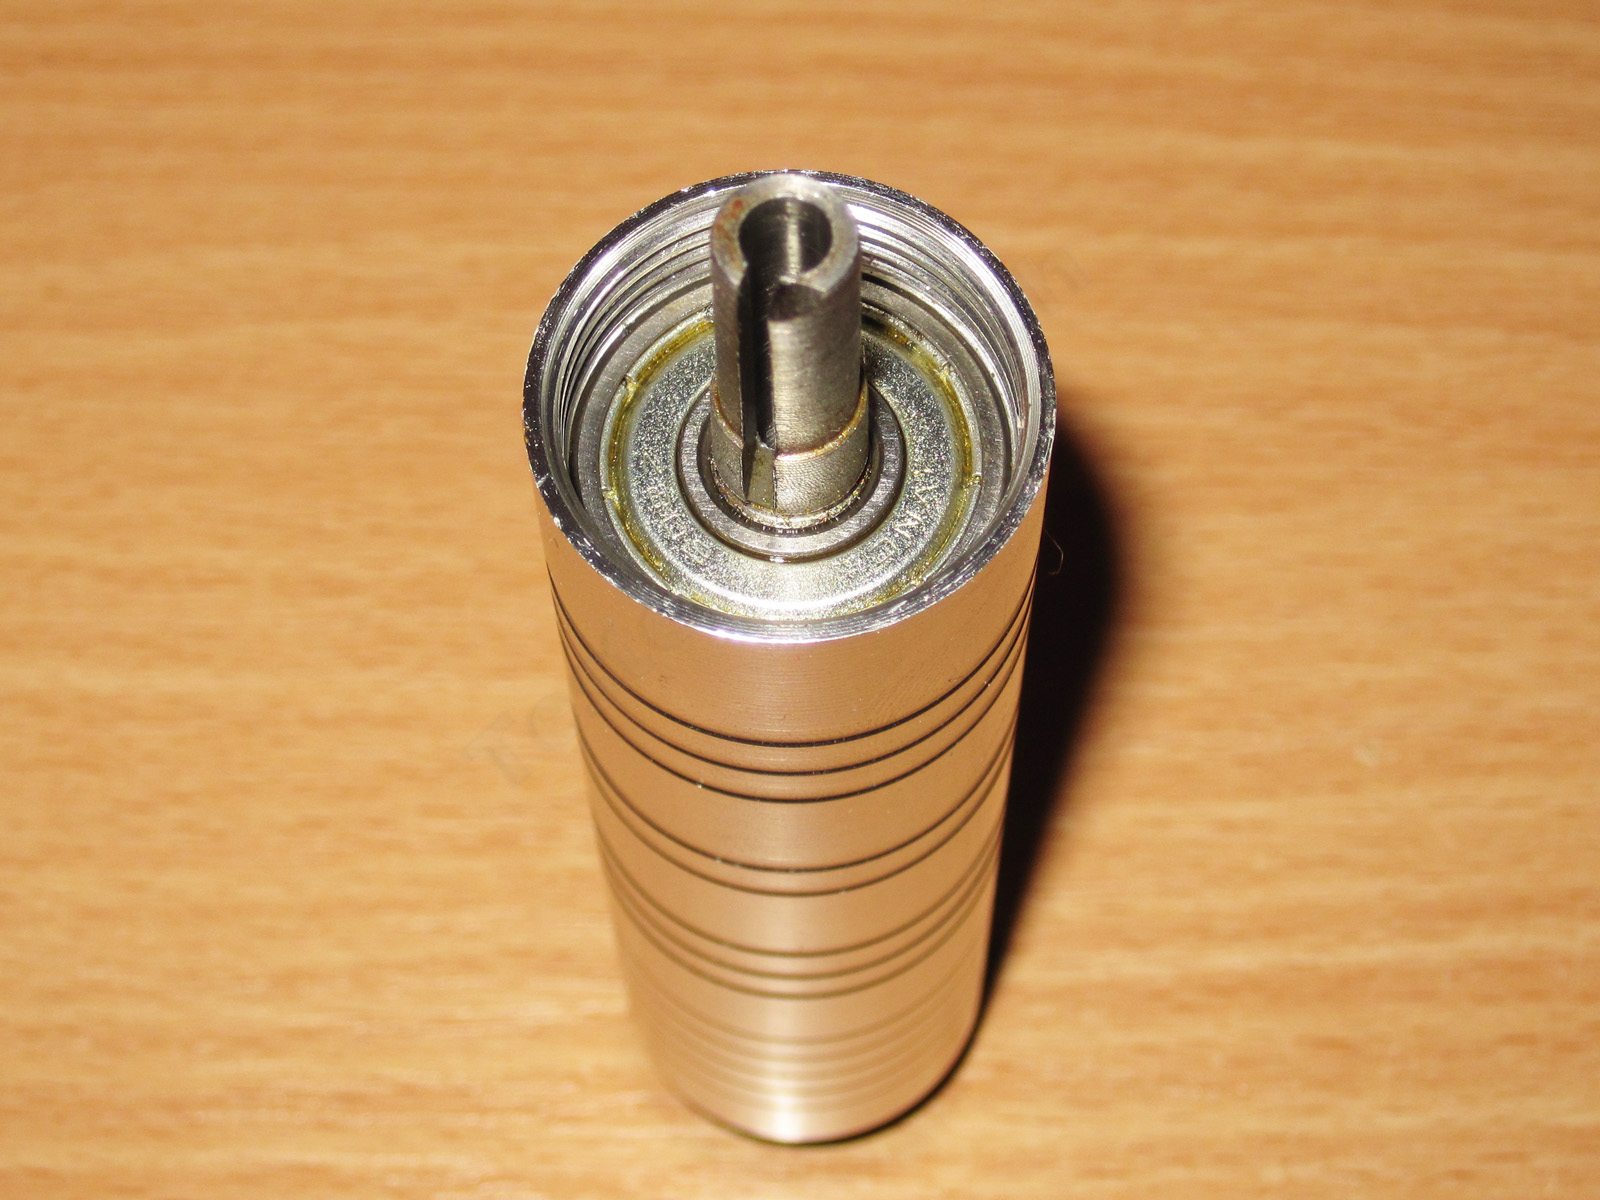
The front section comes off very easily; inside, I found a “wave” washer.

There are two bearings inside the handle, and they’re greased as well. The bearing model is Z809.
And here I'll explain why I bought the holder.
The whole assembly is secured only in the tool's chuck. If you put a heavy load on the shaft without holding the tool itself—in this case, the rotary tool—it will try to spin in the opposite direction.
It would be nice if the flexible shaft also attached to the front of the rotary tool, but since it doesn't, and the tool needs to be held, that's what the holder is for.
That's why it's best not to attach the holder to lightweight objects when using the flexible shaft. At high speeds, if the shaft jams, you could end up with a rather unpleasant sight: the rotary tool, flexible shaft, and whatever the whole assembly is attached to bouncing around the room.
The shaft is 6 mm in diameter, with a 20 mm reach.
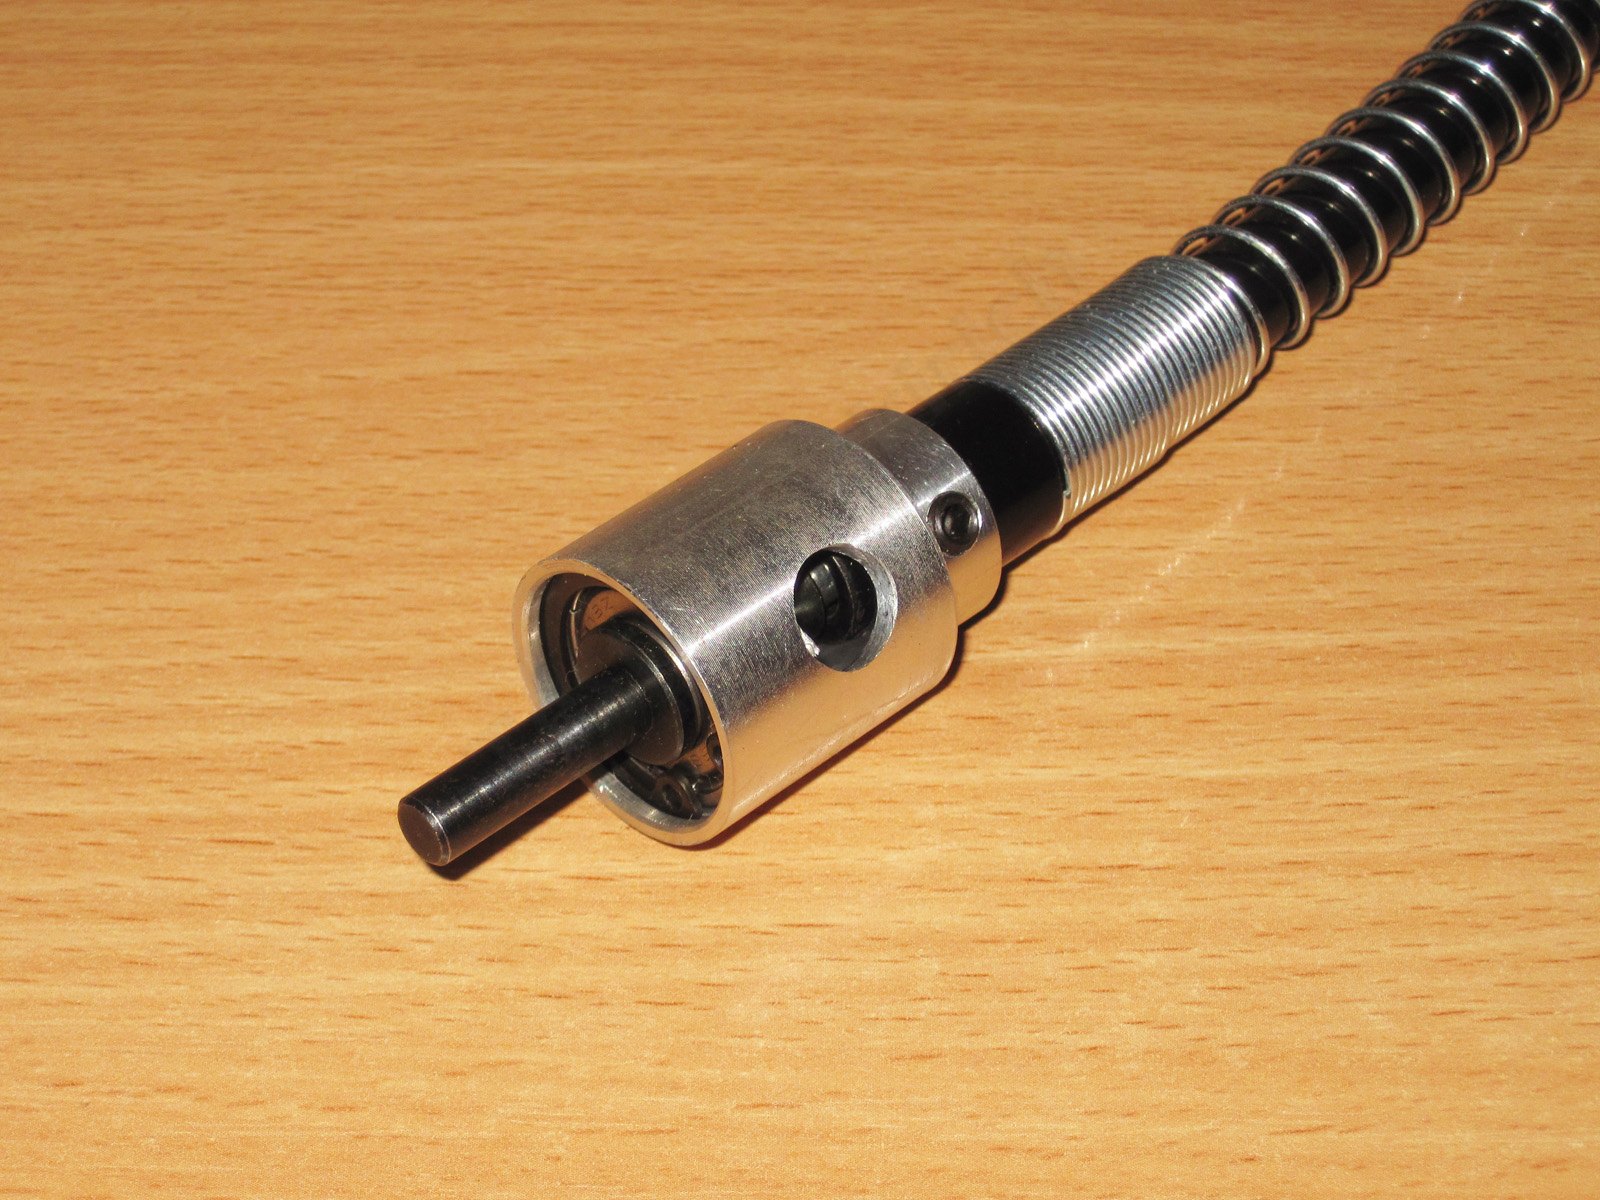
And here's why the manufacturer thoughtfully included a pair of hex keys. The whole assembly can be taken apart.

First, I unscrew the right-hand screw. This lets me remove the flexible shaft itself, which is a steel cable running inside a steel spring.
The mechanism needs to be disassembled for cleaning and lubrication. Though judging by how enclosed the assembly is, lubrication is probably the main reason.

I unscrew the second screw and pull the cable all the way out.
The shaft that clamps into the rotary tool's chuck can't be removed. It has the same type of bearing inside as the front end, except there are two bearings there and only one here.

I also noticed right away that there's a flat spring at the front, pressing against a steel ball. After a bit of fiddling, I managed to take that apart too. This assembly lets the front end rotate independently of the rubber hose that contains the flexible shaft itself.
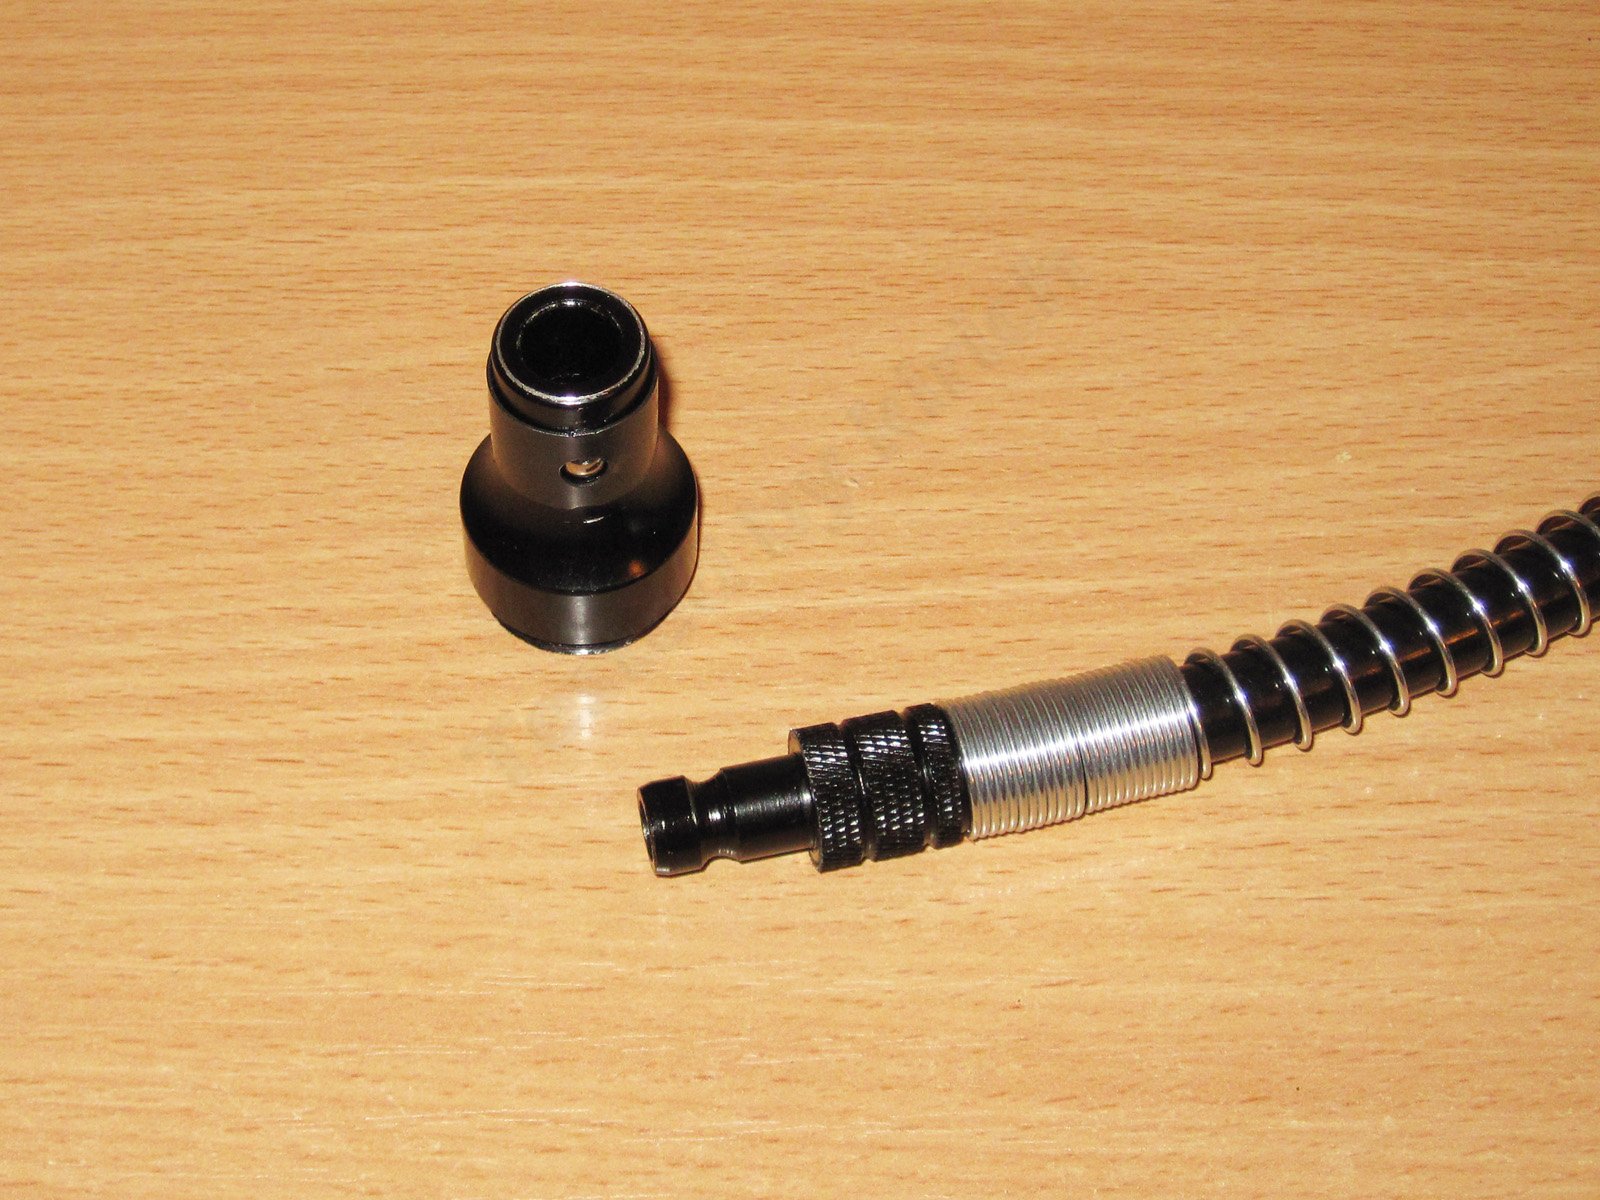
The flexible shaft completely disassembled.

And here's the tool I bought all the things shown above for. You can see it's been through a lot over the past year. The toughest job was cutting out tile grout: the dust was almost as bad as when using an angle grinder. Since the rotary tool has active cooling, it sucked all that dust through itself, so I'll have to take it apart and clean it.
I used the rotary tool quite a lot over the year: cutting aluminum, grinding, and drilling (that one was accidental). I had only one complaint during all that use: it gets hot under sustained load.
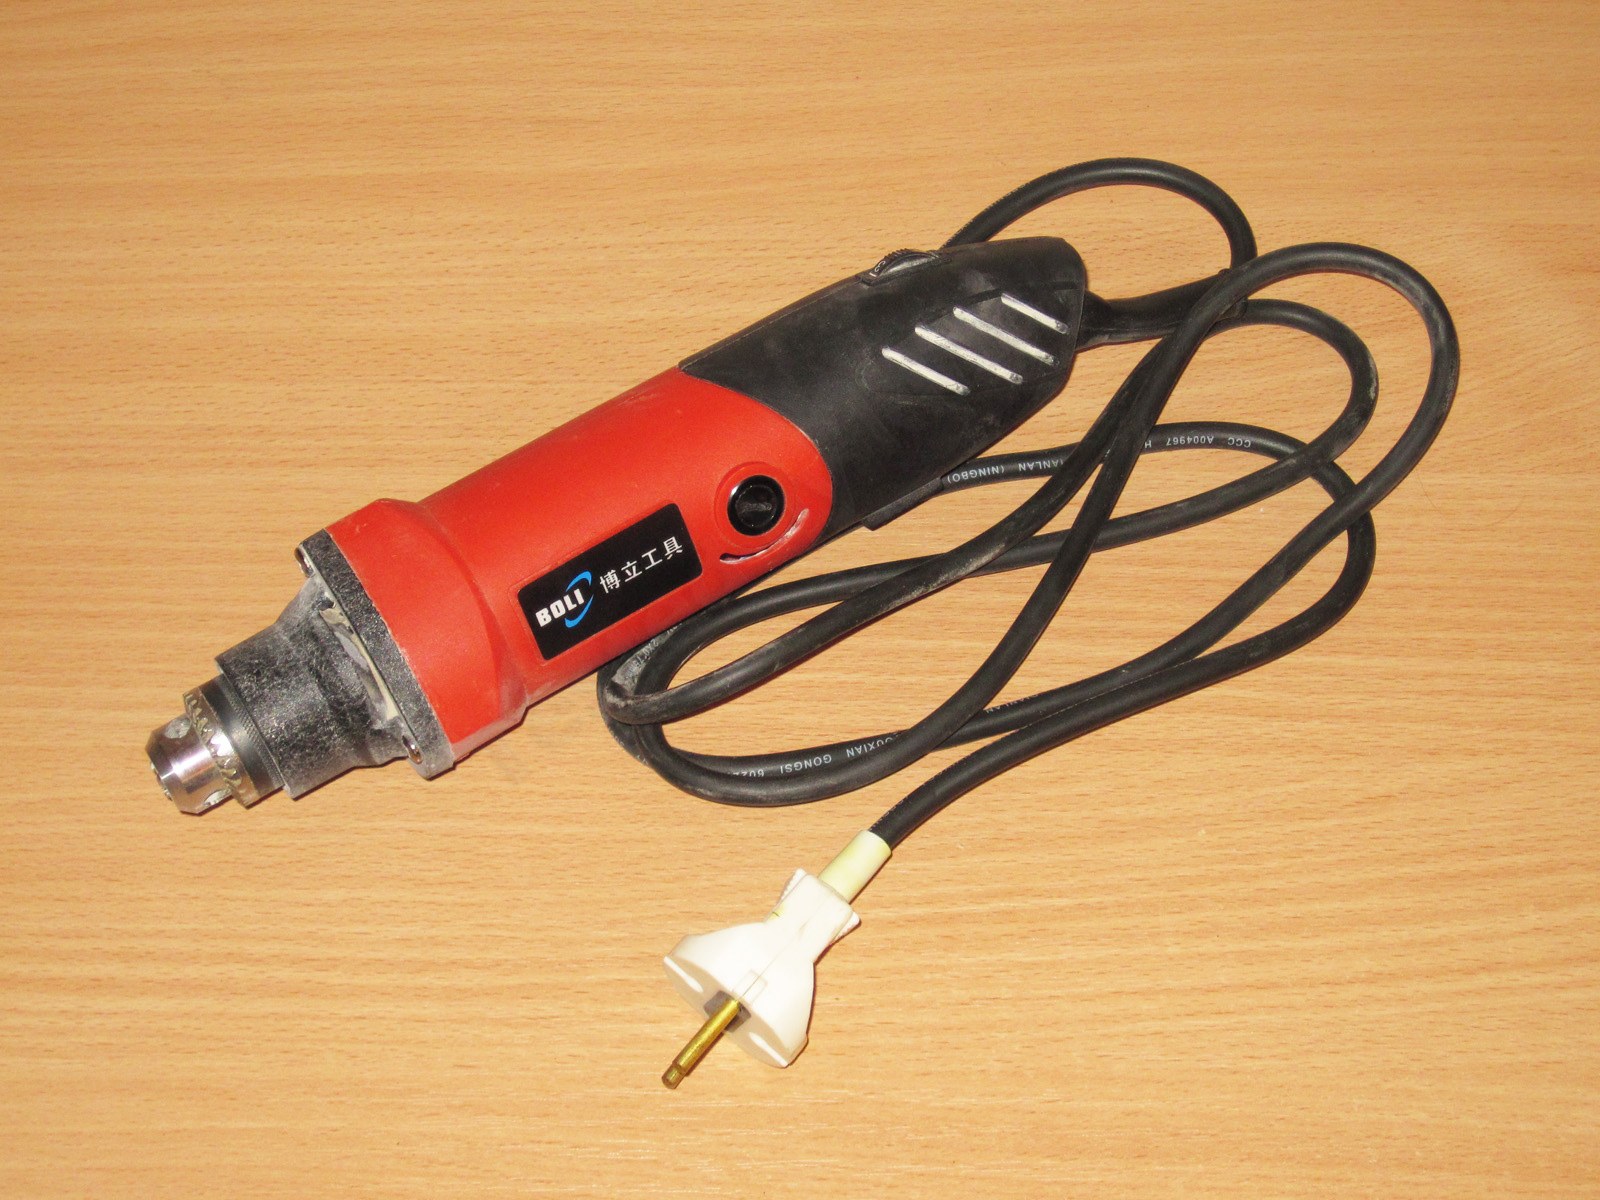
You can use the flexible shaft like this, as shown in the photo, but in this setup it really needs an attachment at the front of the rotary tool. That would be very convenient: you could connect the shaft and just set the rotary tool down somewhere nearby.
Since the front end isn't attached, someone has to hold the rotary tool while you work.

It's better to secure the rotary tool in the holder.
But first I decided to run a little experiment. I started by turning on the rotary tool with no load.

Then I connected the flexible shaft and turned on the rotary tool. The shaft was positioned as shown in the photo, though of course I was holding it in my hands.
By the way, the noise level went up noticeably. It increased after I secured the rotary tool to the table, and went up even more after I attached the flexible shaft. Let's just say it became less comfortable to work with, though noticeably more convenient.

I compared power consumption with and without the shaft, testing at no load and at the lowest speed.
The shaft adds a load equivalent to 10 W. Of course, we need to subtract the engraver's efficiency losses from that figure, so the shaft is getting about 7–8 W. It gets slightly warm during use. Obviously, the losses depend on how much the shaft is bent: the more it bends, the greater the losses. I tested it in the worst-case configuration.

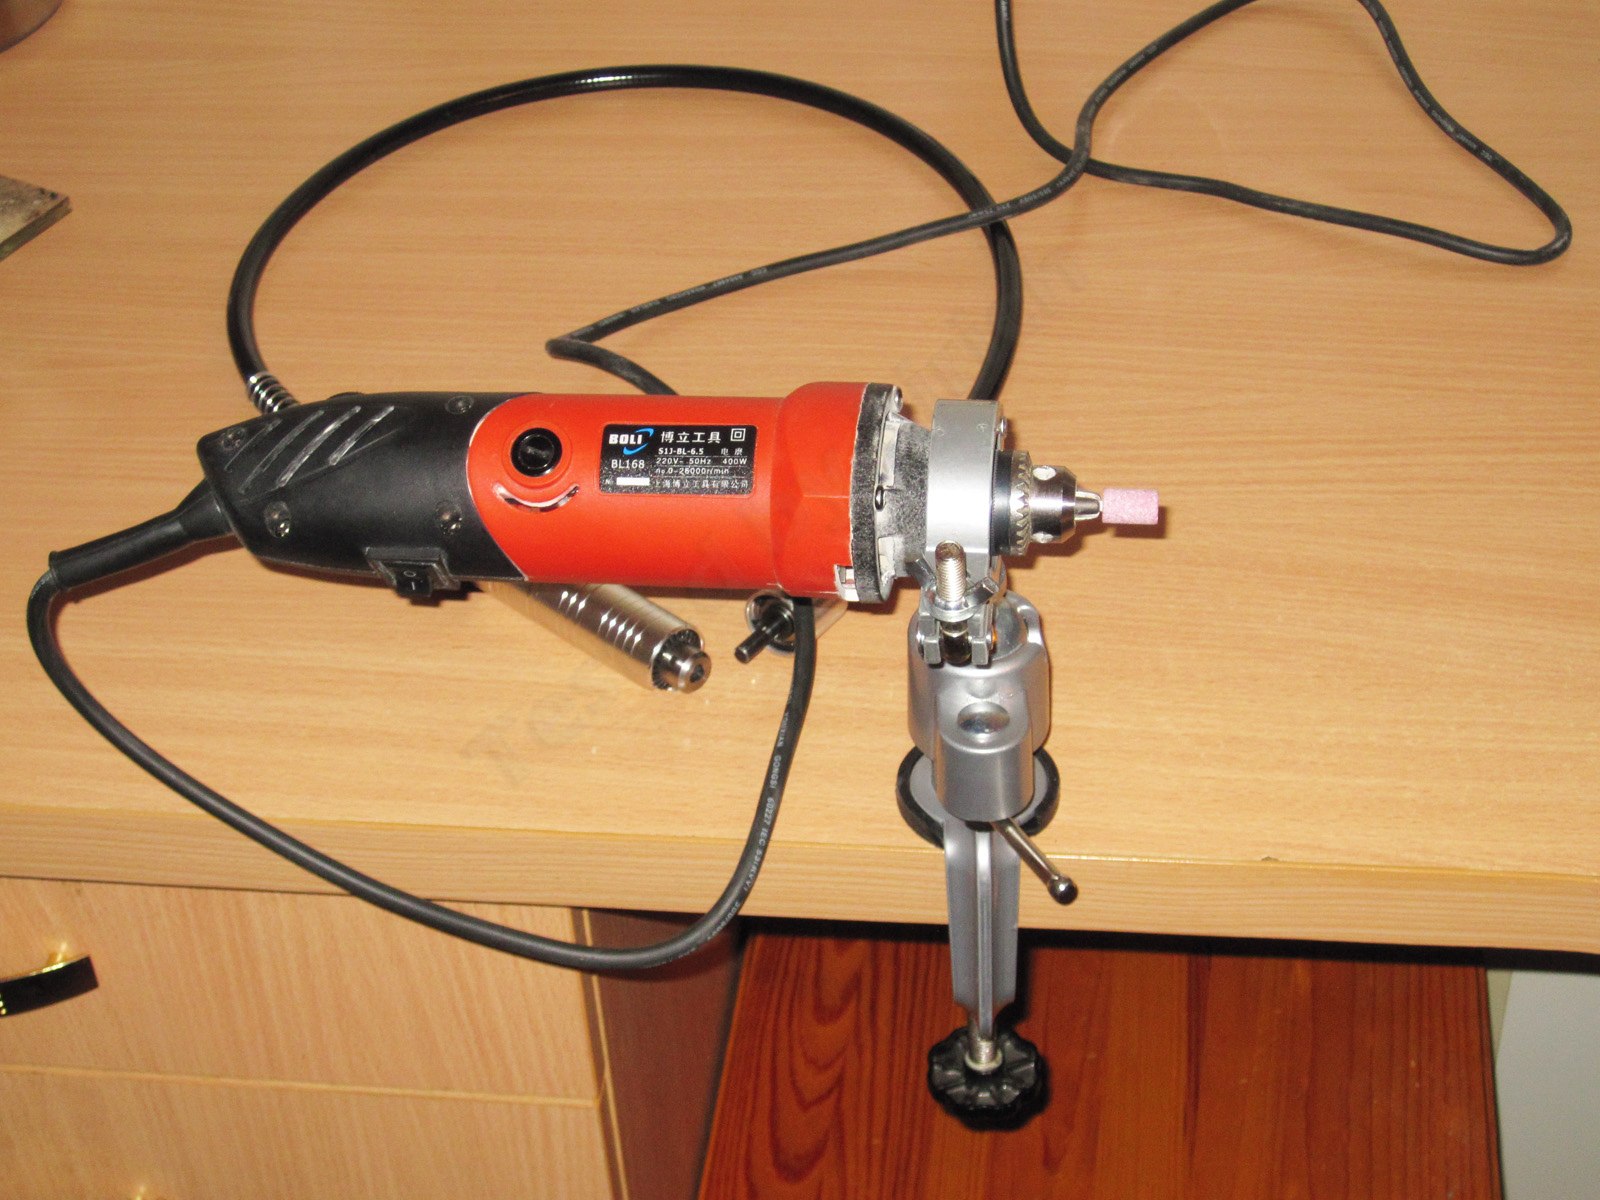
The holder lets you position the tool at different angles, which is quite convenient.
The grip is very secure. The only place with a little movement was where it attaches to the table itself, but I didn't tighten it too much because I didn't want to damage the table.
I should mention, though, that I've been using these kinds of “ball” joints for a long time, and I'm not a big fan. Over time, the clamping force weakens and the grip becomes less reliable. I expect the same thing to happen here.
Since the chucks are different, they also use different keys. It's not very convenient having two different keys of roughly the same size on the table :)

The joint also has a notch that lets you set the upper section at 90 degrees to the tabletop. I don't think I'll need it, but it's there if you do.
These photos are staged, so I wouldn't actually work with it positioned like this. For use, it's better to place the whole assembly noticeably farther to the right or left (if you're left-handed), for example at the edge of the table. But it's awkward to take photos from that position, and I'd have had to tidy up the table, so I just photographed it as it was :)

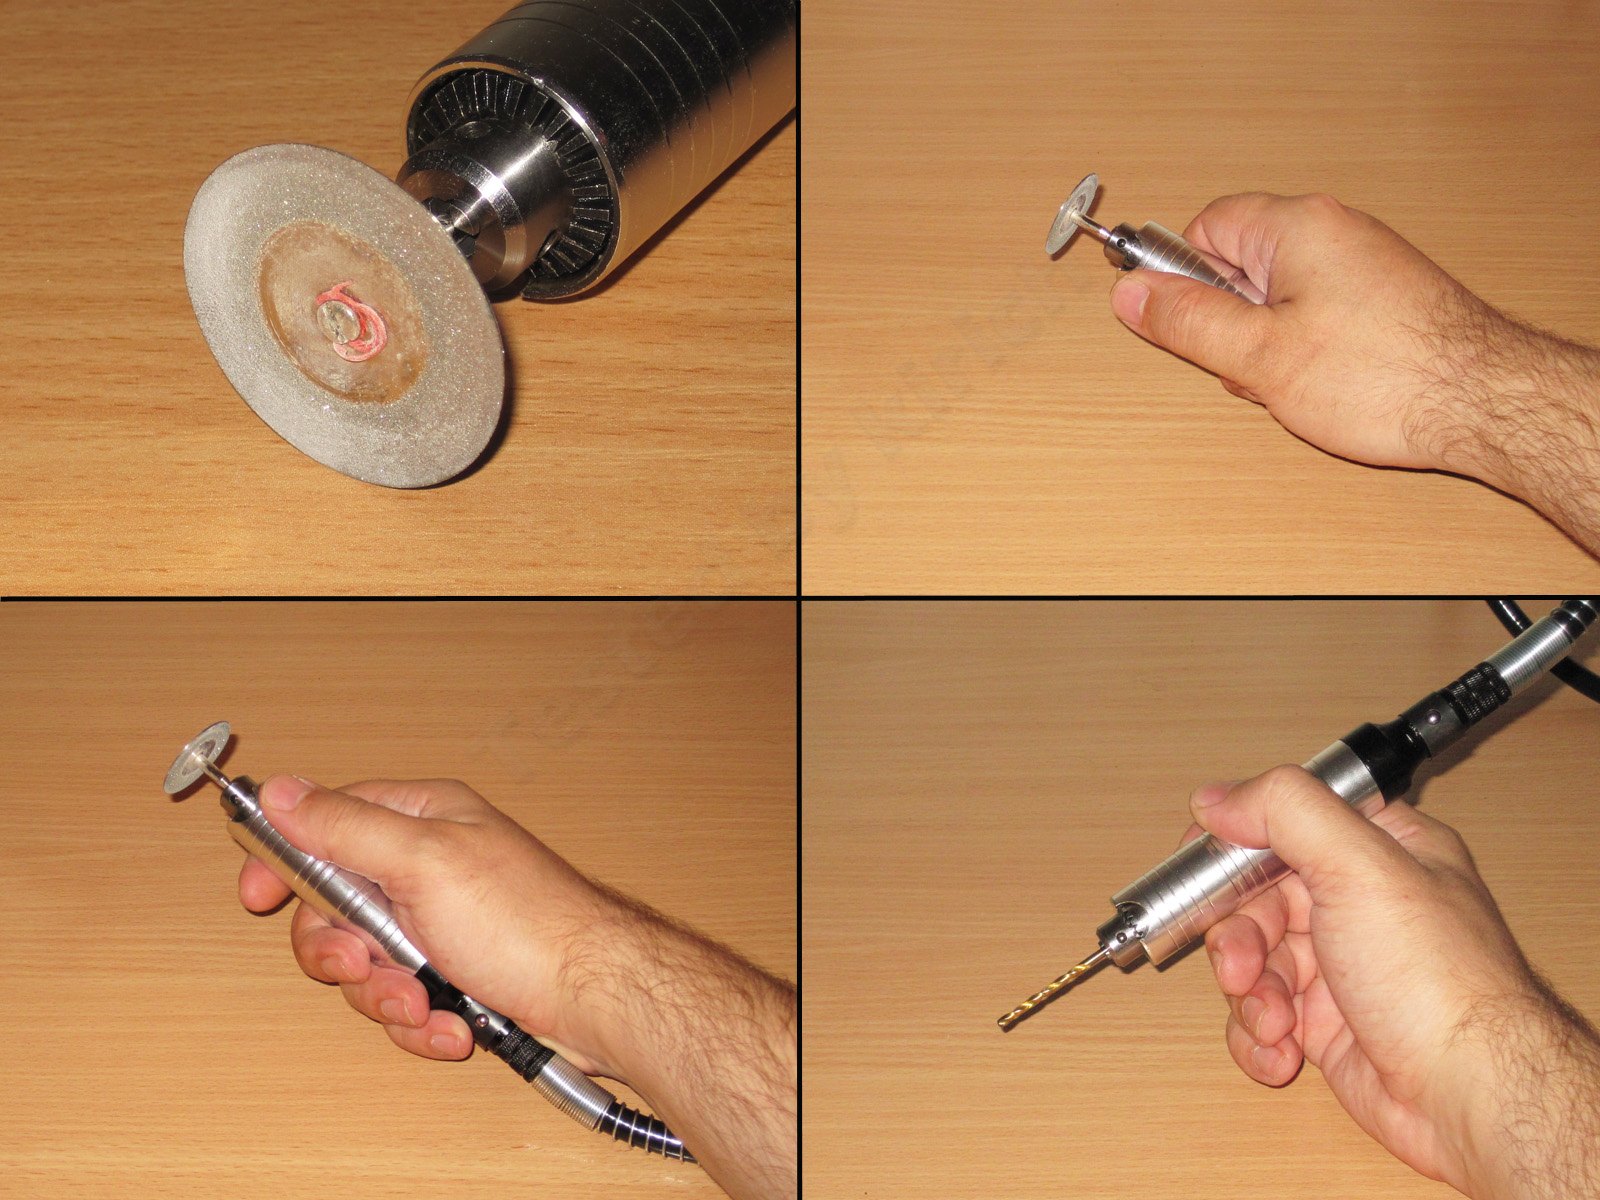
1. I used this disc to cut through about 4 meters of tile grout. It took quite a beating: the coating wore off around the edges, but it did the job.
2, 3. It's very convenient to use. In effect, this gives you a compact setup with plenty of power at the shaft. I wouldn't call the shaft completely flexible, though; the thick rubber makes it somewhat stiff.
4. You can drill with it, but a dedicated drill stand would be much more convenient. The engraver still runs at quite a high speed even at its lowest setting, so you can't drill by hand with large bits. They'll overheat, while small bits can break, even though the chuck can hold them.
You can also use the engraver as a mini bench grinder, though I wouldn't use large-diameter wheels because of the high speed.
And that's my mini review. I don't have a video camera, so I couldn't shoot a video. I tried to show everything with photos instead; I hope that worked. Now for a brief summary.
First, the flexible shaft: I have no complaints about it at all. It's genuinely very convenient to use. I have just one suggestion for the design: it would be great if the whole assembly could be attached to the engraver's body. That would make it perfect. There's no radial play or runout, and it's comfortable to hold.
One thing I don't understand: the store page lists a maximum speed of 1,000 rpm, but even at its lowest setting the engraver runs 10 times faster. Is it really not safe to use the flexible shaft at those speeds, or is that a mistake in the description? I used it with a disc and everything was fine, but I'm still not sure—maybe I'm doing something wrong?
The holder, on the other hand, is less clear-cut.
Pros
Convenient overall design
Secure tool grip
A wide range of possible tool positions.
Cons
The joint is flimsy, and I'm not sure it will last long.
The material choice isn't great; the joint would have been better made of steel.
The screw clamp attaches rigidly to the table, making it difficult to install and scratching the underside of the table.
My verdict: I'll definitely keep using the flexible shaft—I like it. It has a good chuck and a convenient design. The holder is just so-so, and it's best not to overtighten the joint. What bothers me more is that if the holder breaks, I won't be able to use the shaft properly :( Still, for now, the holder is convenient to use.
That's all for now. As always, I'm happy to answer questions, and I'd also welcome suggestions for improvements or alternative systems like this.
The product was provided by the store for review.
$18.85
This page was found when searching for:
каким смазкой смазывают гибкий вал трос гравера, стоят ли подшипники в гибких шлангах граверов?, 28, 1, гибкий шланг для гравера на 25 тысяч оборотов, гибкий вал для гравера до 25 000 оборотов, крепление к столу для гравера тотал, настенный держатель гравер что это, гибкий вал с патроном разобрать, подходит ли гибкий вал от гравера dremel к граверу bosh, тест кронштейнов для гравера, гравер удлинитель чем смазывать, разборка гибкого шланга от китайского гравера, присоединение гибкого вала к граверу, гибкий вал для дремеля разборка, dm-130a1 гибкий вал, особенности гибкого вала pg mini tools гравер 135 w, подсоединить к граверу гибкий привод, гибкий вал на гравер ivt для чего, подсоединить гравер к наждаку, разобрать наконечник с патроном гибкого вала с алиэкспресс, смазка гибкого вала, размер крепления гравера, как подключить к граверу кольнер гибкий вал, как разобрать удлинитель гравера хаммер
каким смазкой смазывают гибкий вал трос гравера, стоят ли подшипники в гибких шлангах граверов?, 28, 1, гибкий шланг для гравера на 25 тысяч оборотов, гибкий вал для гравера до 25 000 оборотов, крепление к столу для гравера тотал, настенный держатель гравер что это, гибкий вал с патроном разобрать, подходит ли гибкий вал от гравера dremel к граверу bosh, тест кронштейнов для гравера, гравер удлинитель чем смазывать, разборка гибкого шланга от китайского гравера, присоединение гибкого вала к граверу, гибкий вал для дремеля разборка, dm-130a1 гибкий вал, особенности гибкого вала pg mini tools гравер 135 w, подсоединить к граверу гибкий привод, гибкий вал на гравер ivt для чего, подсоединить гравер к наждаку, разобрать наконечник с патроном гибкого вала с алиэкспресс, смазка гибкого вала, размер крепления гравера, как подключить к граверу кольнер гибкий вал, как разобрать удлинитель гравера хаммер
The figures from this review are in the measurement database: Tools
Discounted products
You may be interested in


Discounted products
Support the project
All the content on the site and the advice are free, but we’d be grateful for your support of the project and the channel!
Discuss on the forumHave a question or some experience to share? Discuss the article with the author and readers: the forum is a convenient place to share schematics and photos.
Go to the forumOnly registered readers can comment. It takes a minute to sign up, and you can log in with the same account you use on the forum.
Log inRegister