
A brief review of Riden’s flagship RD6030-Max power supply
$313.90
A reminder: to keep up with new posts on the blog, I recommend following me on Instagram. I’ll post notifications about every new article there, and might also write about something interesting from time to time - link to my account
You can also subscribe to updates and new articles on the Telegram channel - https://t.me/KirichBlog Just a note: the channel has an open discussion feature for reviews and articles, as well as general chat. I recommend it.
As I said in the video and in the comments, this is essentially the same RD6030 I’ve already shown, but with a few improvements I wanted for myself.
But first, here’s the usual list of all the products from this company that I’ve had a chance to try.
DPH5005
DPS8005
DPS5020
RD6006
RD6012
RD6018
RD6006P
RD6012P
RD6024
RK6006
Enclosure and power supply for the RK6006
RD6030
Silicone case covers
RD 25A cable set
RS485 module with galvanic isolation for connecting RD60xx series converters
RD6018P
RD6012H
RK6012
As usual, I have no complaints about the packaging at all: a branded cardboard box with a foam insert, plus a large bag of accessories inside.
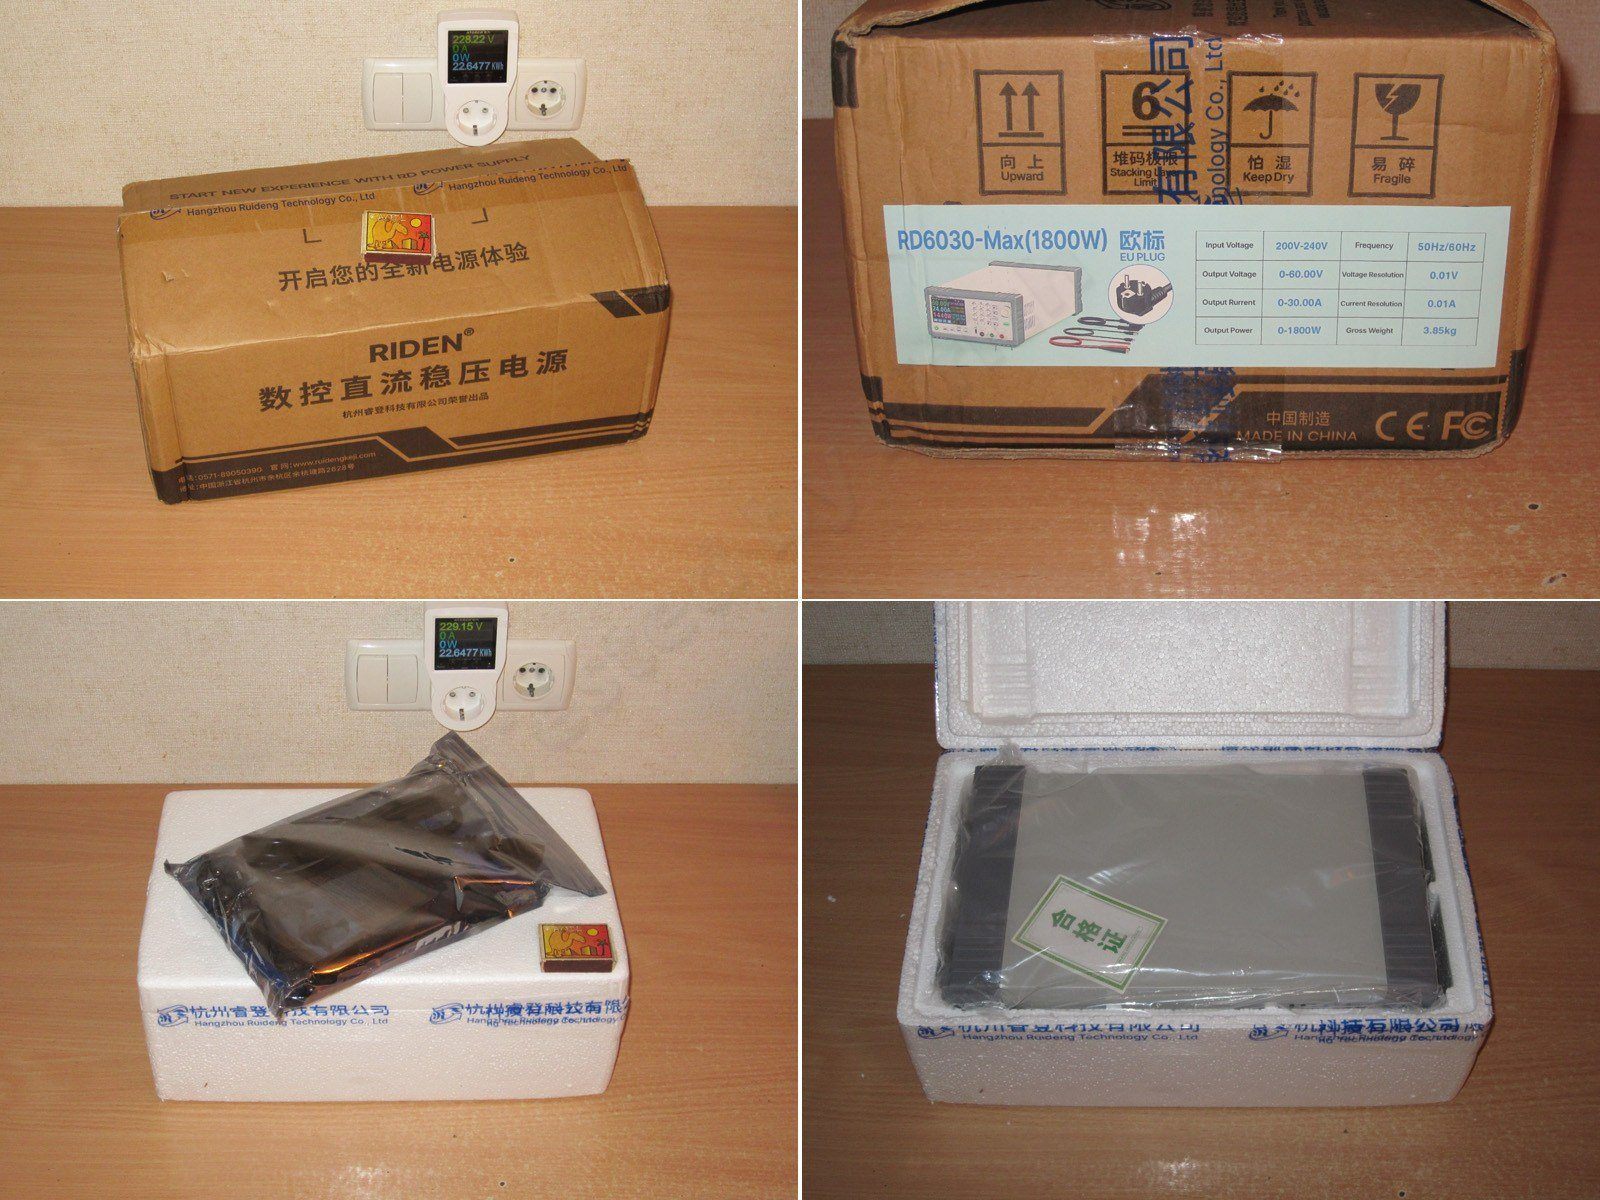
Here’s what was in the box: the bag, the power supply, and some piece of paper.
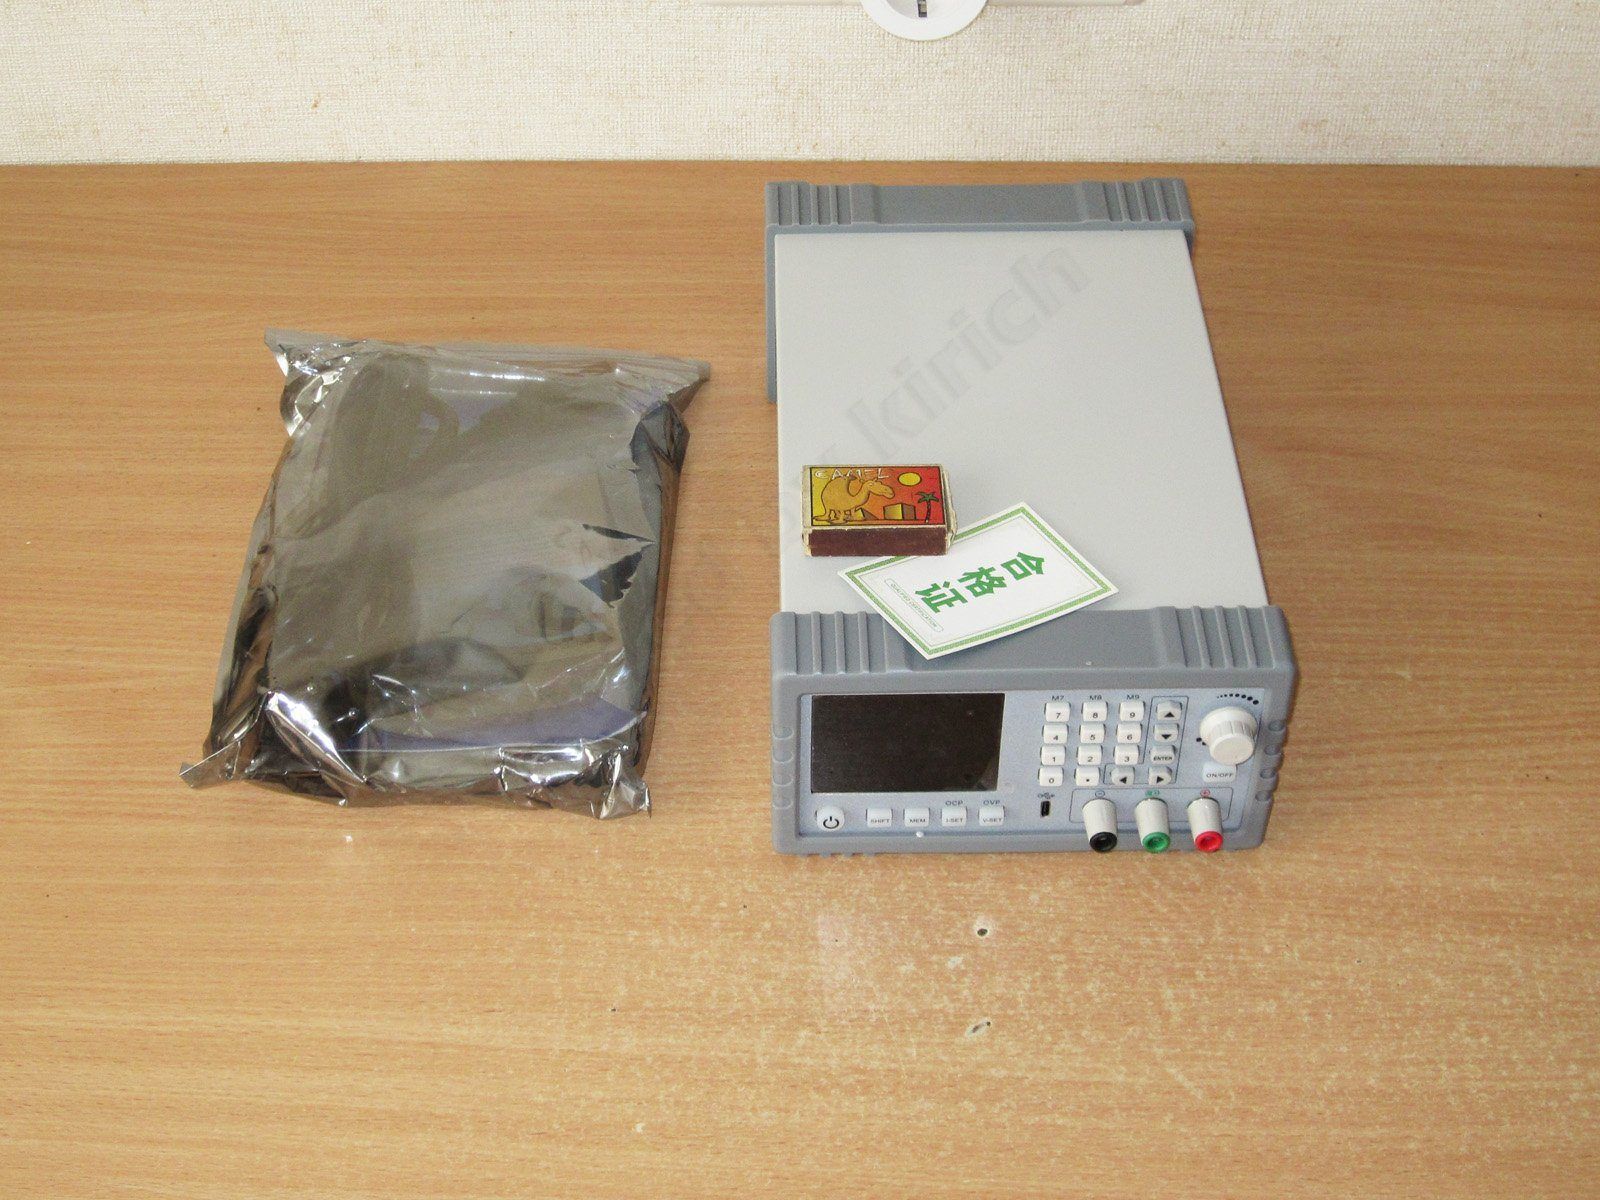
The bag contained:
1. Power cord
2. Manual
3. External temperature sensor
4. Washers
5. Fuse
7. USB cable
8. Power cables
9. A note reminding you about the power cables.
It was the little piece of paper included with the power cables that told me the split lock washers are meant to go between the terminal lug and the clamping nut. :) There are three washers, in case you lose one.
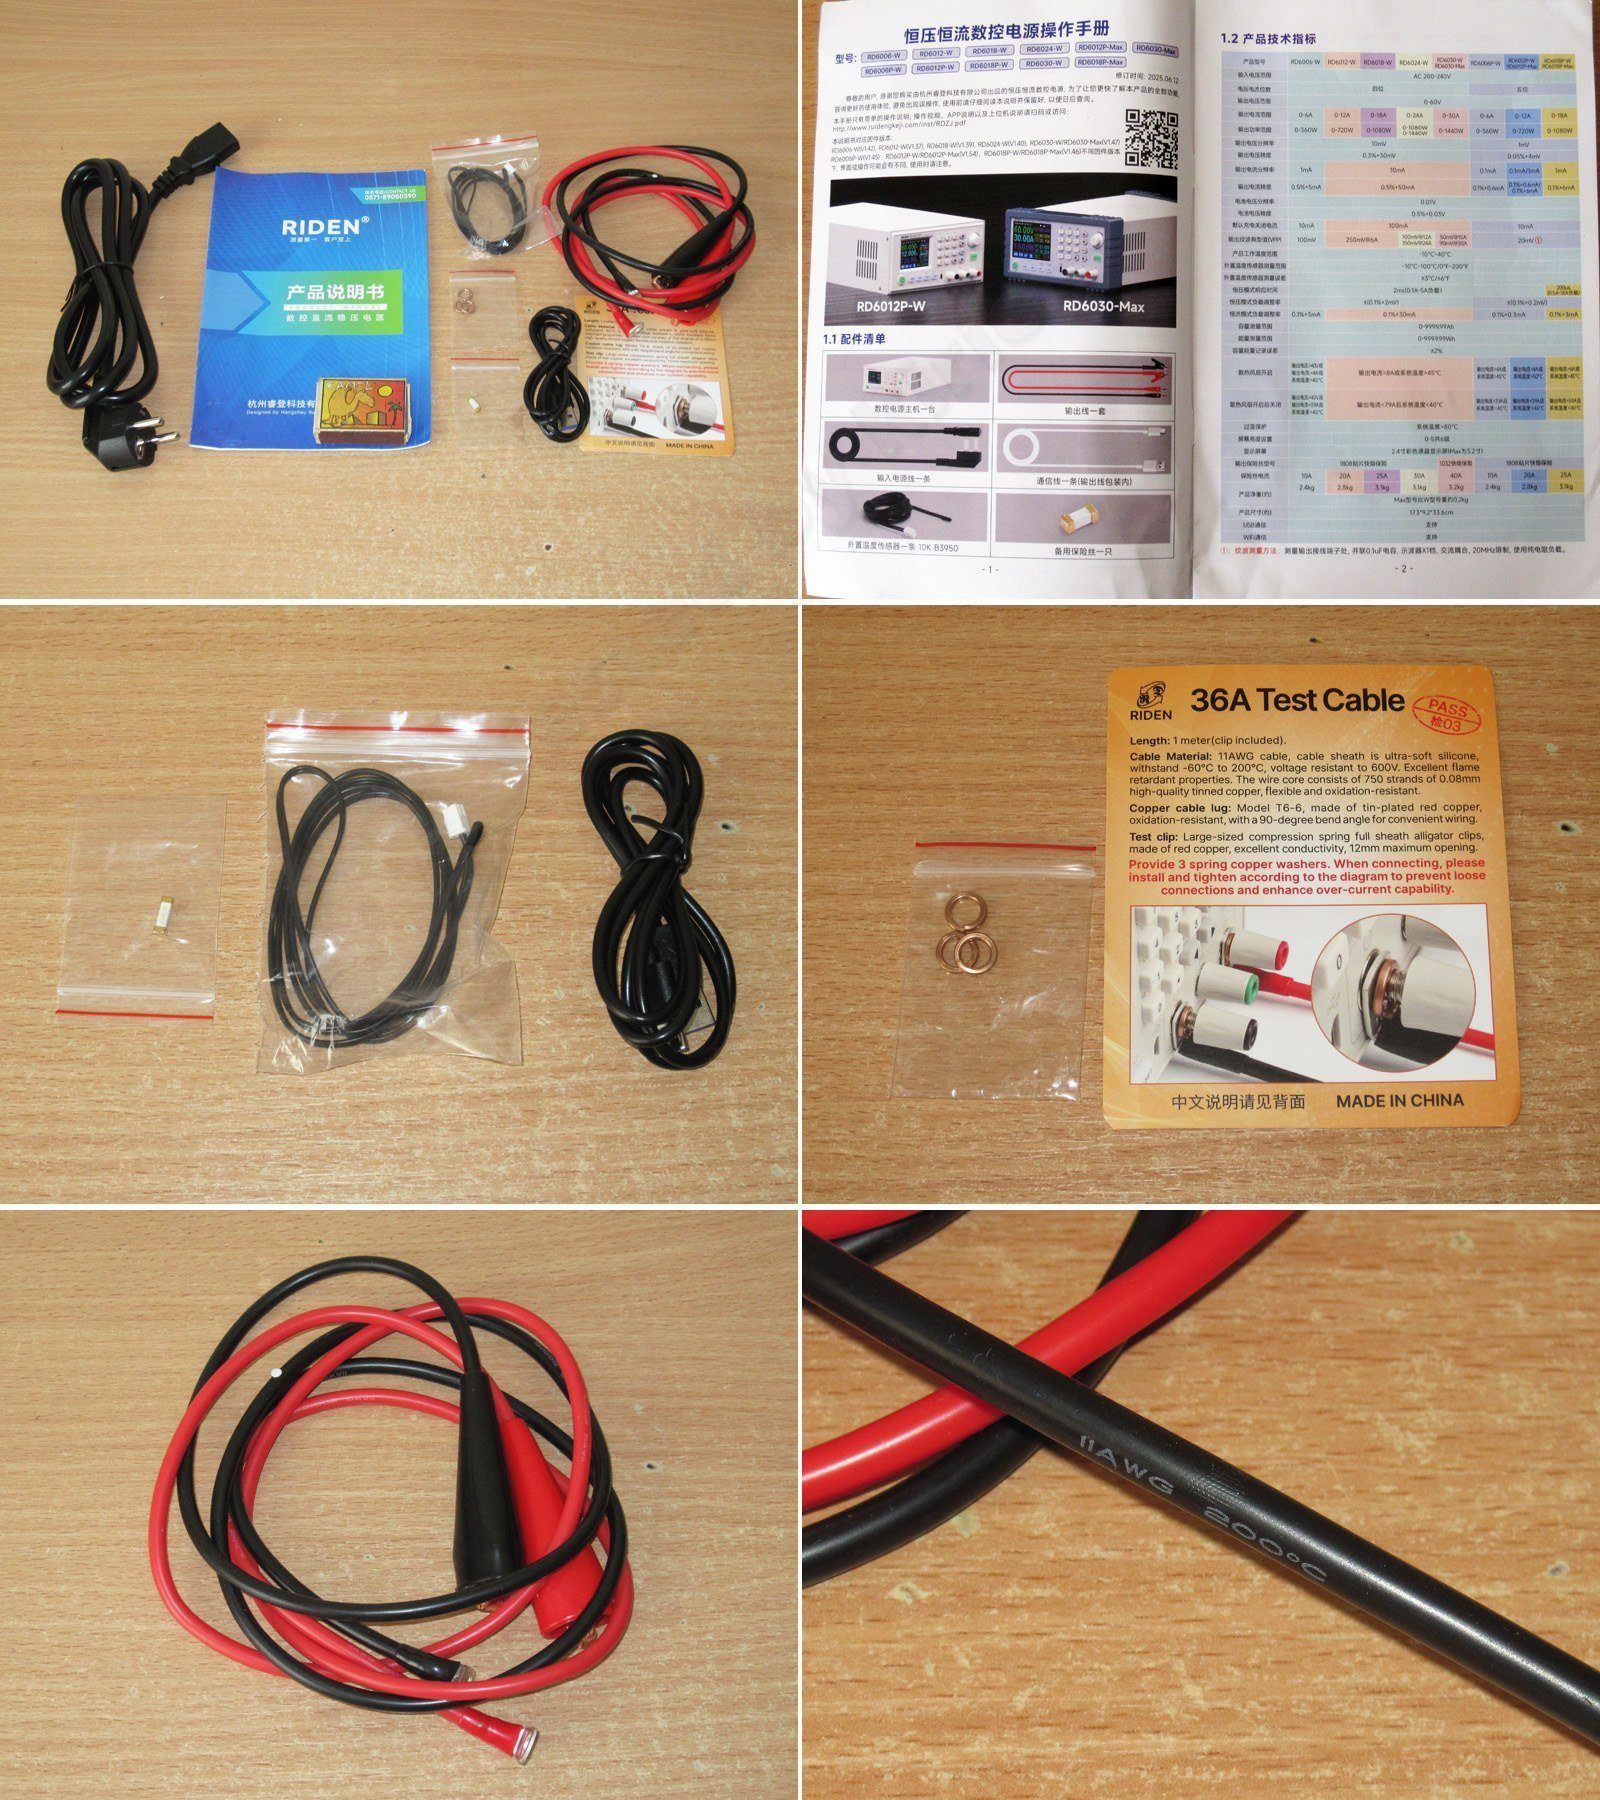
In the video I said the power cord felt like good quality, and I was right: its resistance is about 0.13 Ω, compared with 0.23 Ω for a pretty decent branded cable.
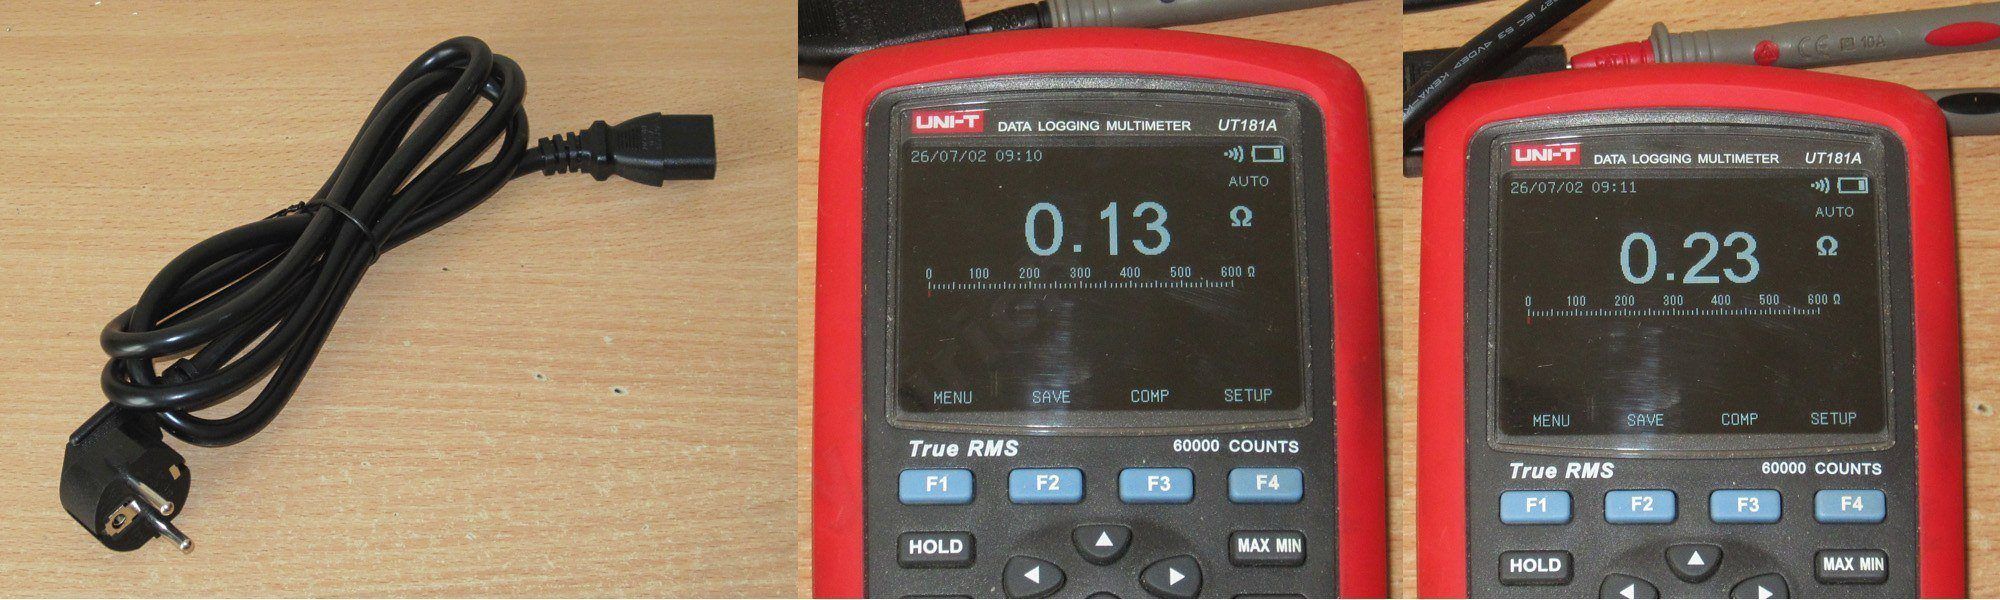
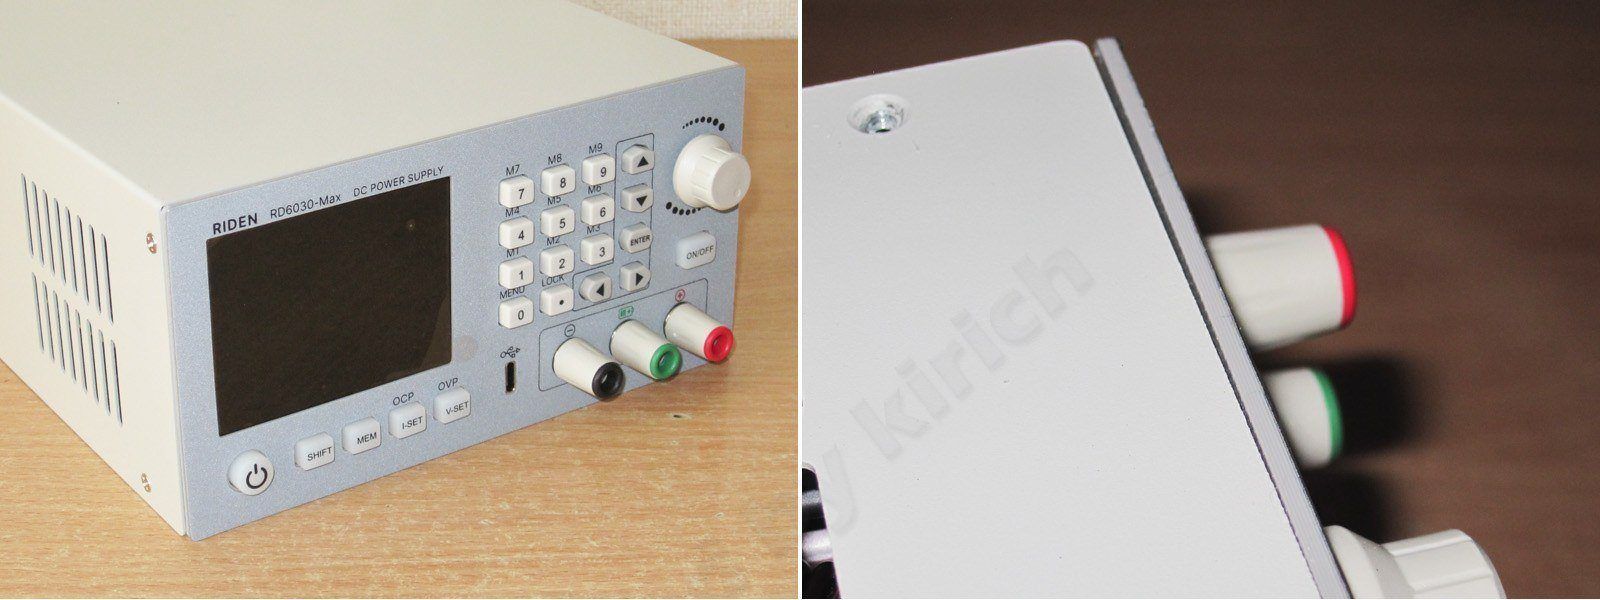
The power supply looks very much like my workhorse RD6030, even down to the silicone covers. I bought those separately for mine, but they come standard here.
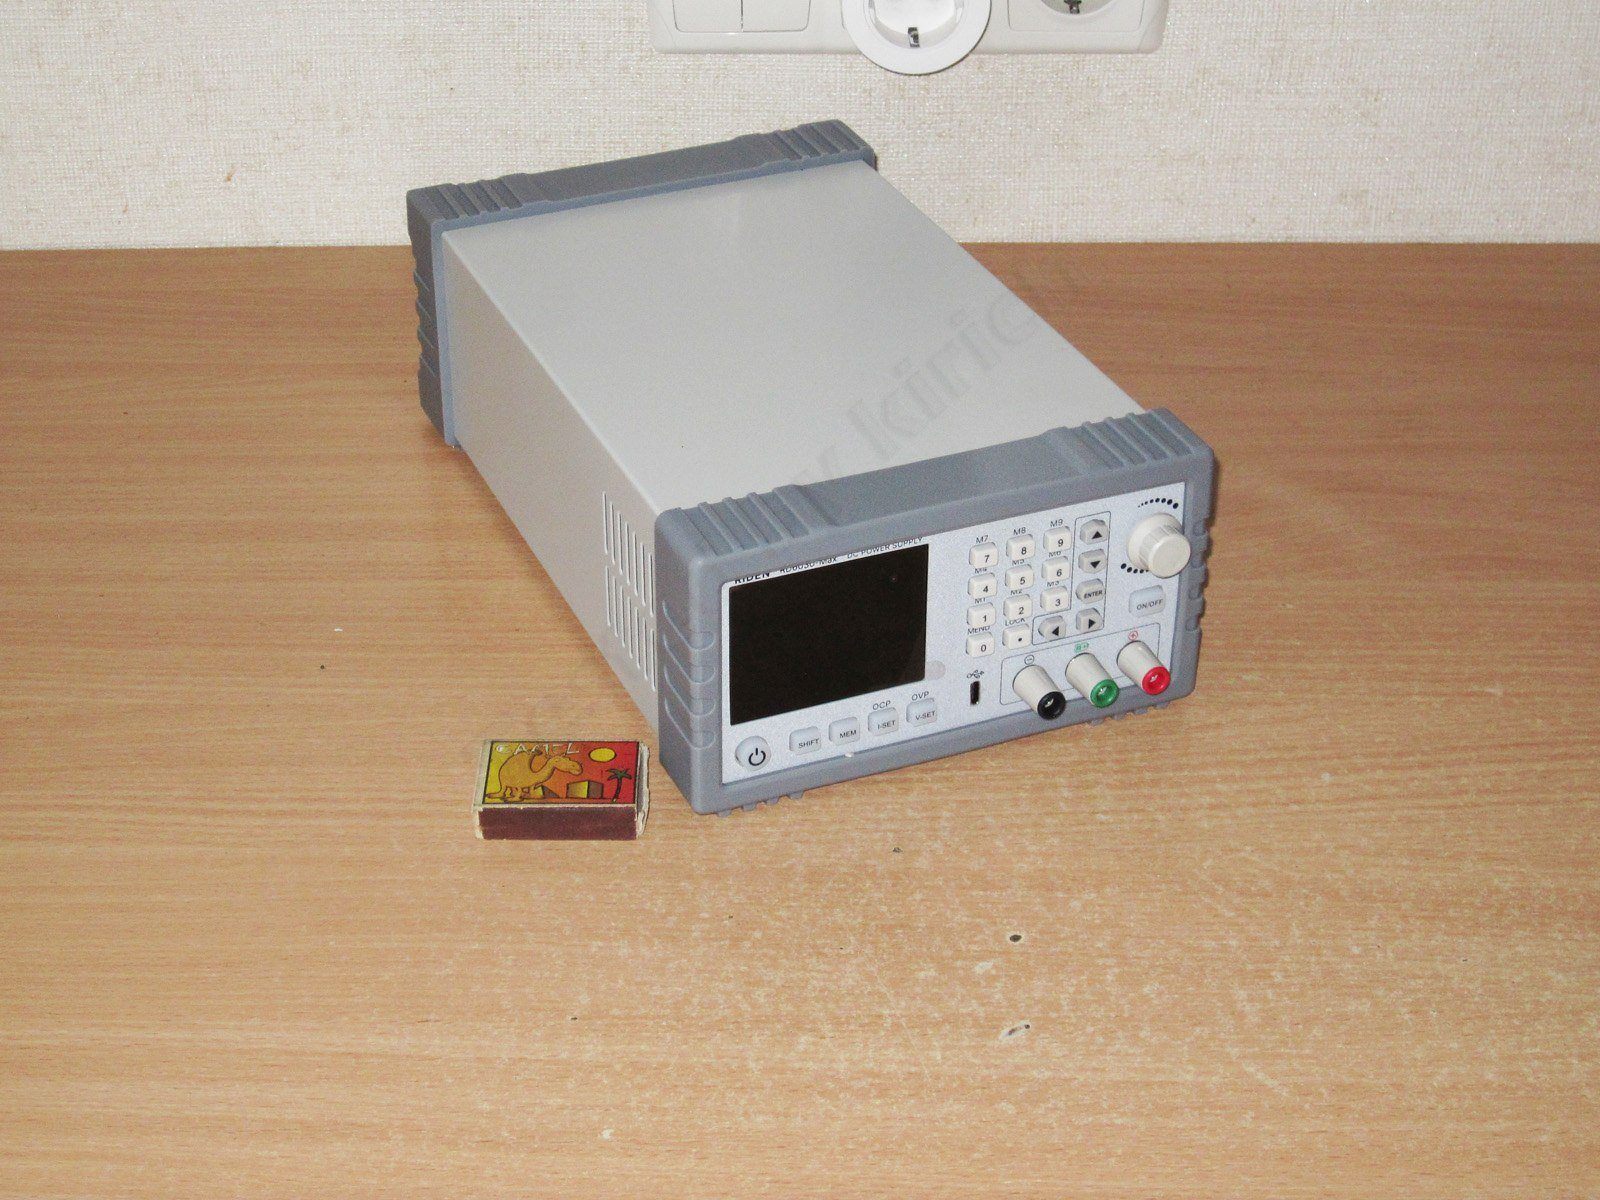
The biggest difference from the regular version for me is the large display. It also comes with a USB-C port, but otherwise the front looks exactly the same.
There are a few differences on the back too. The most useful one is the external temperature sensor socket, which is brought out to the rear panel. On all the other models, you have to connect the sensor directly to the converter board.
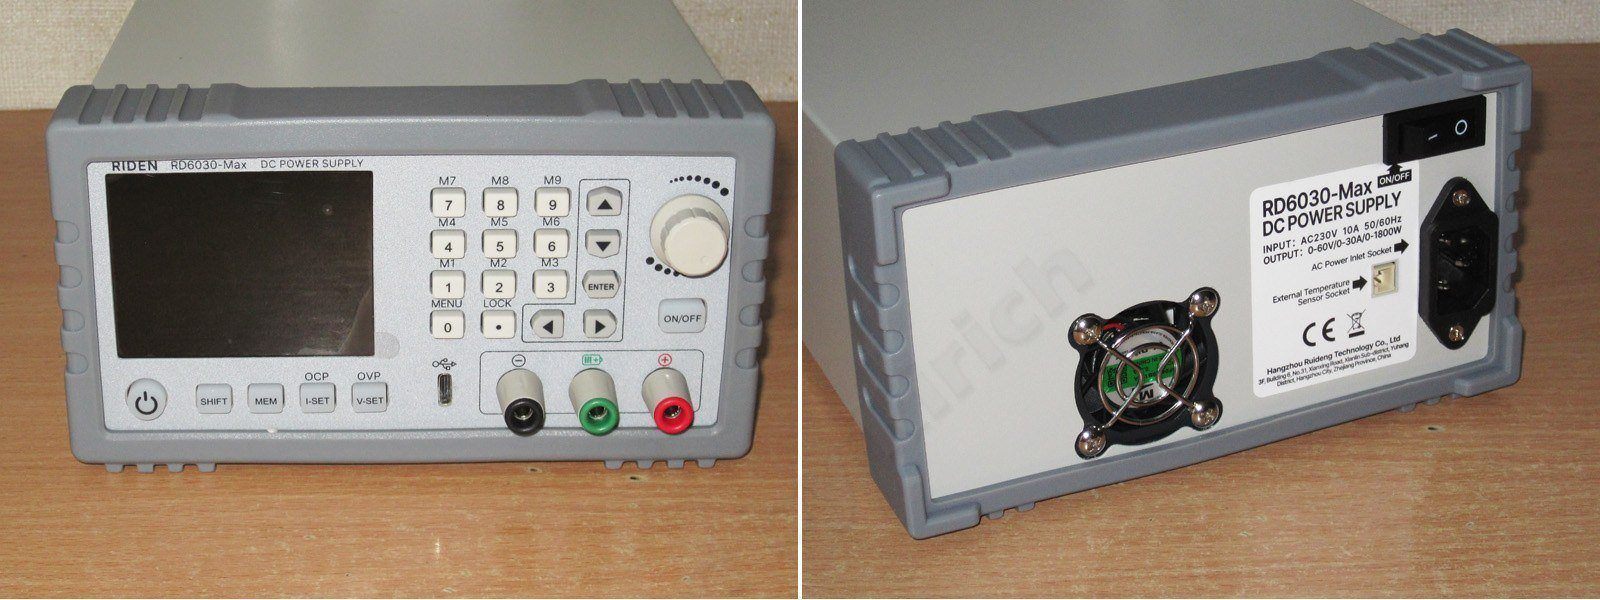
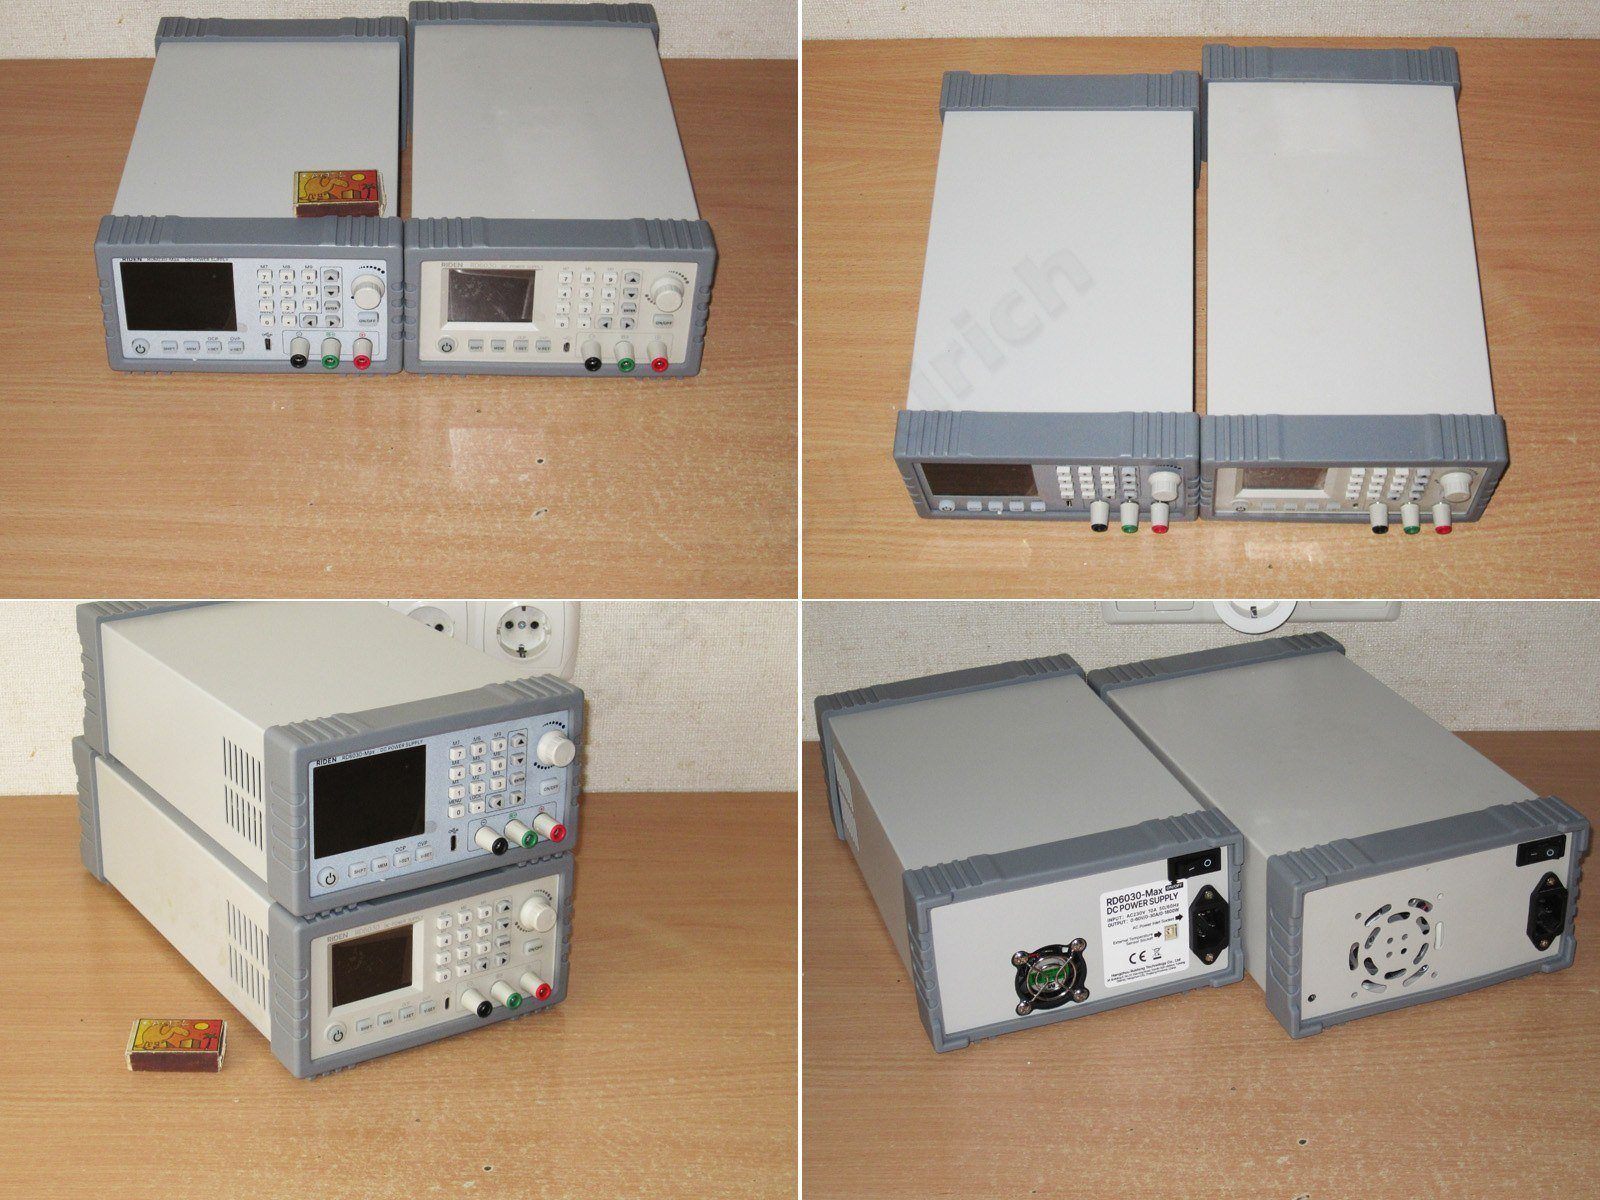
The unit looks a lot like the older model. Even as a regular 6030 user, I’d say they’re almost identical—and that “almost” is where the difference lies.
I was genuinely surprised that the Max version is shorter than its predecessor. For some reason, I was 100% sure Riden had only three enclosures: one small one that’s no longer made, and two large ones. It turns out there are now four—or even five, if you count the enclosure for the RK series.
The silicone covers fit together really neatly, making the units easy to stack while also keeping them from sliding around. Honestly, I’ve been using them for a long time, and I can say for sure: if you have a large enclosure, this is a real must-have.
There are differences on the back too. The new model has a small fan and a dedicated opening for it; the old version just has a stamped-out vent, which isn’t great, by the way. Ideally, you’d cut it out and install a grille.
It just occurred to me that because of this fan opening, this enclosure is only made for the Max series. It’s sold as a converter + power supply + enclosure bundle, and the power supply in the regular versions is clearly different.
All right, let’s remove the trim and see what’s inside.
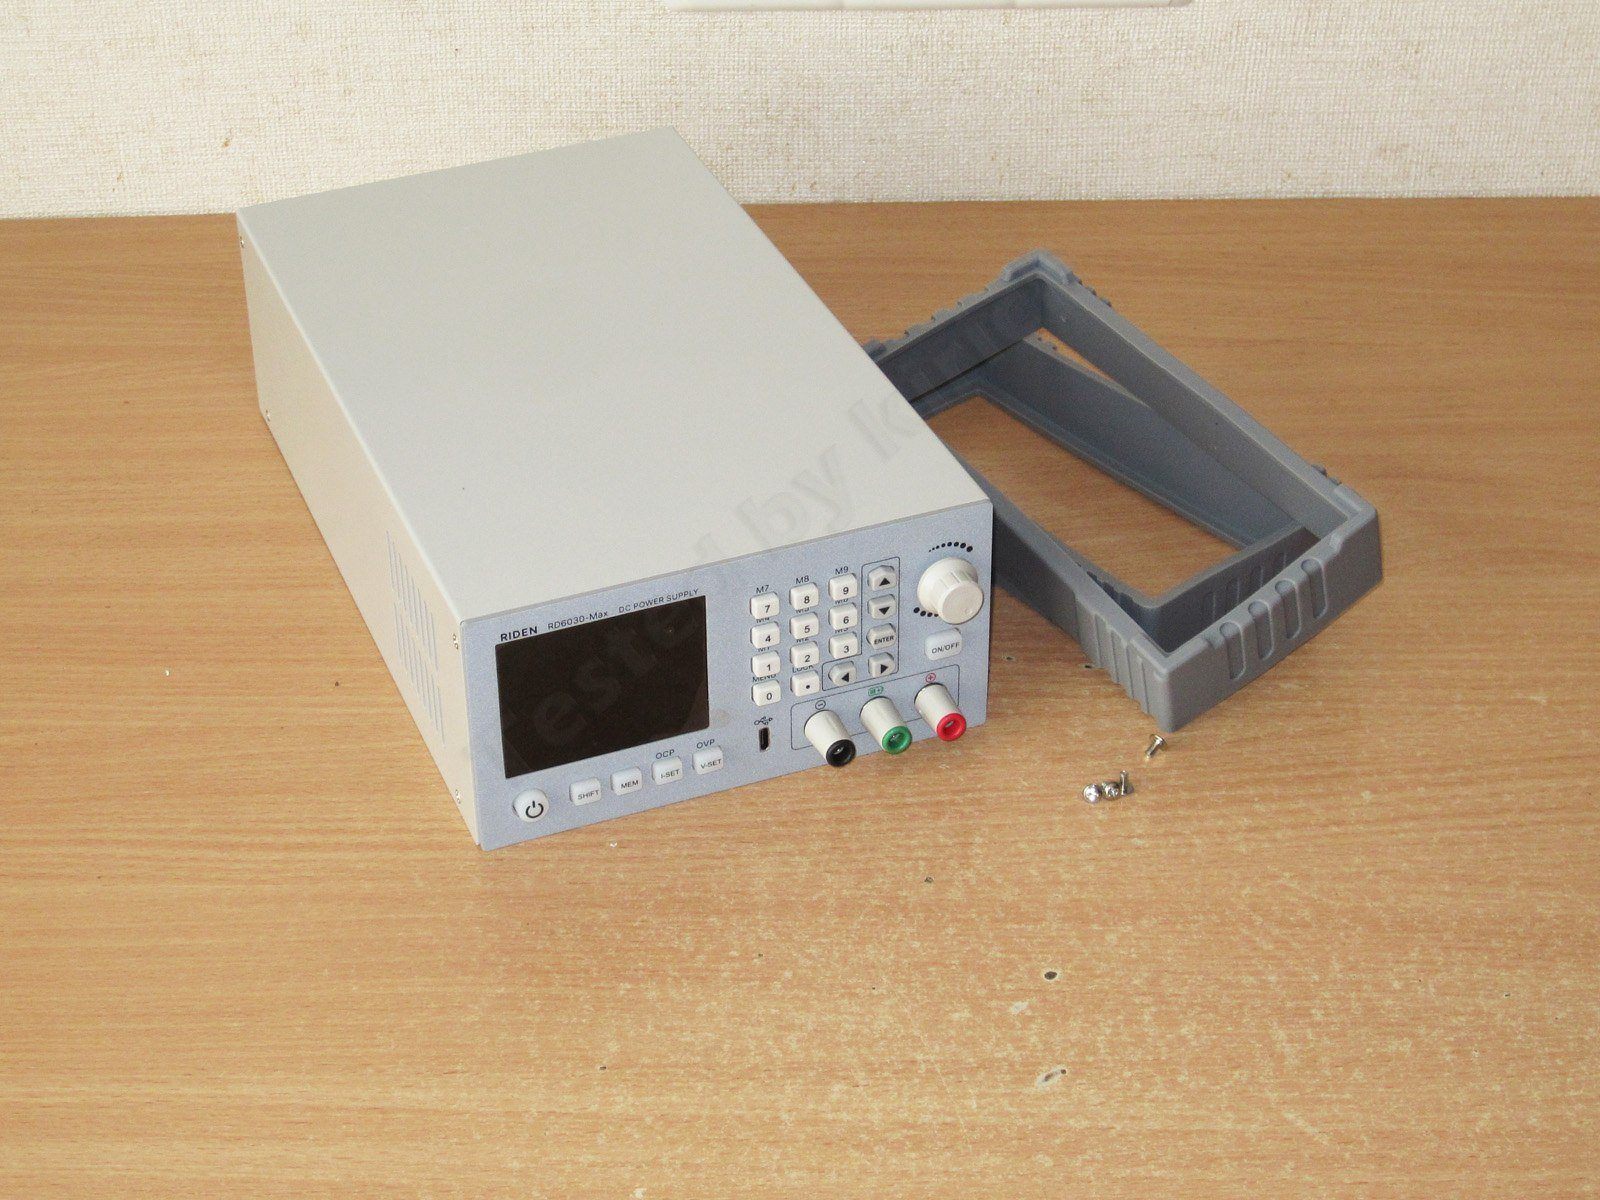
And here’s another surprise: the front panel is different. It’s clearly not the familiar panel used on the RD60xx series converters.
The second odd thing is that the front panel doesn’t sit flush against the enclosure everywhere, but it doesn’t wobble either, unlike what you get with almost all RD-series power supplies in an enclosure like this.
Let’s remove the cover. No surprises here; it’s just like the regular version.
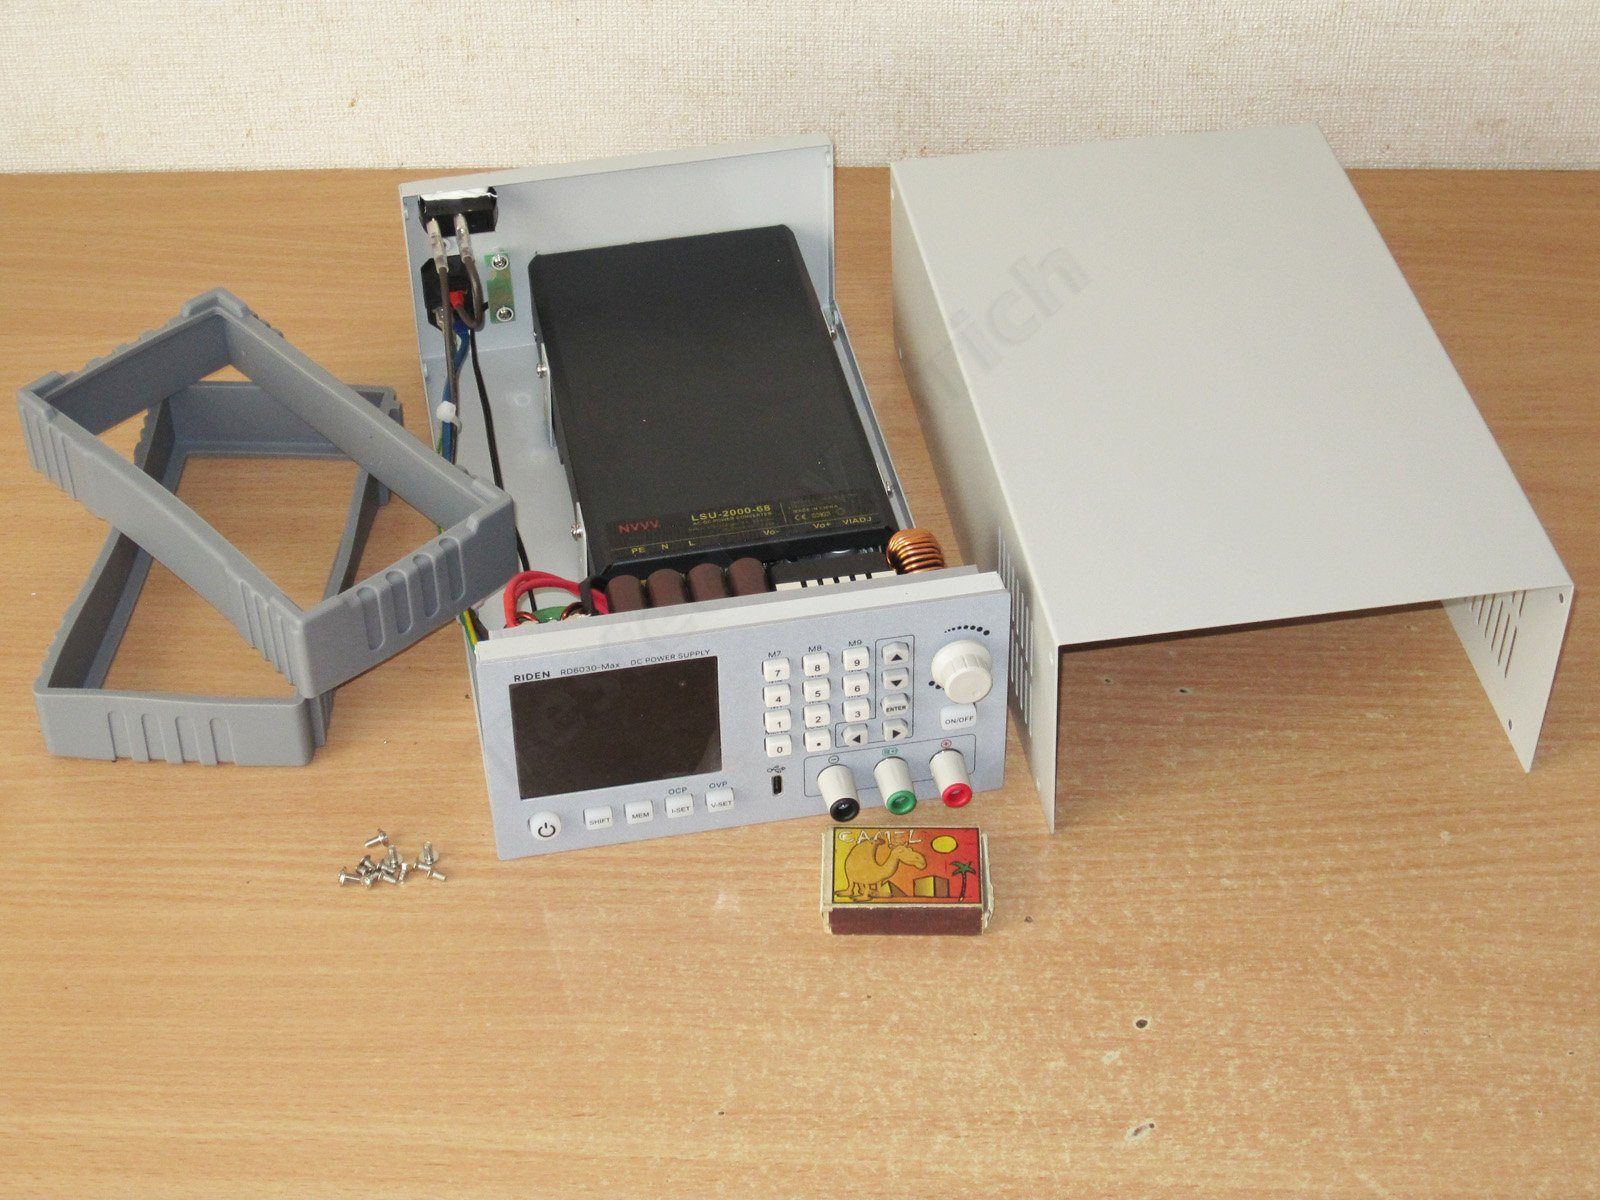
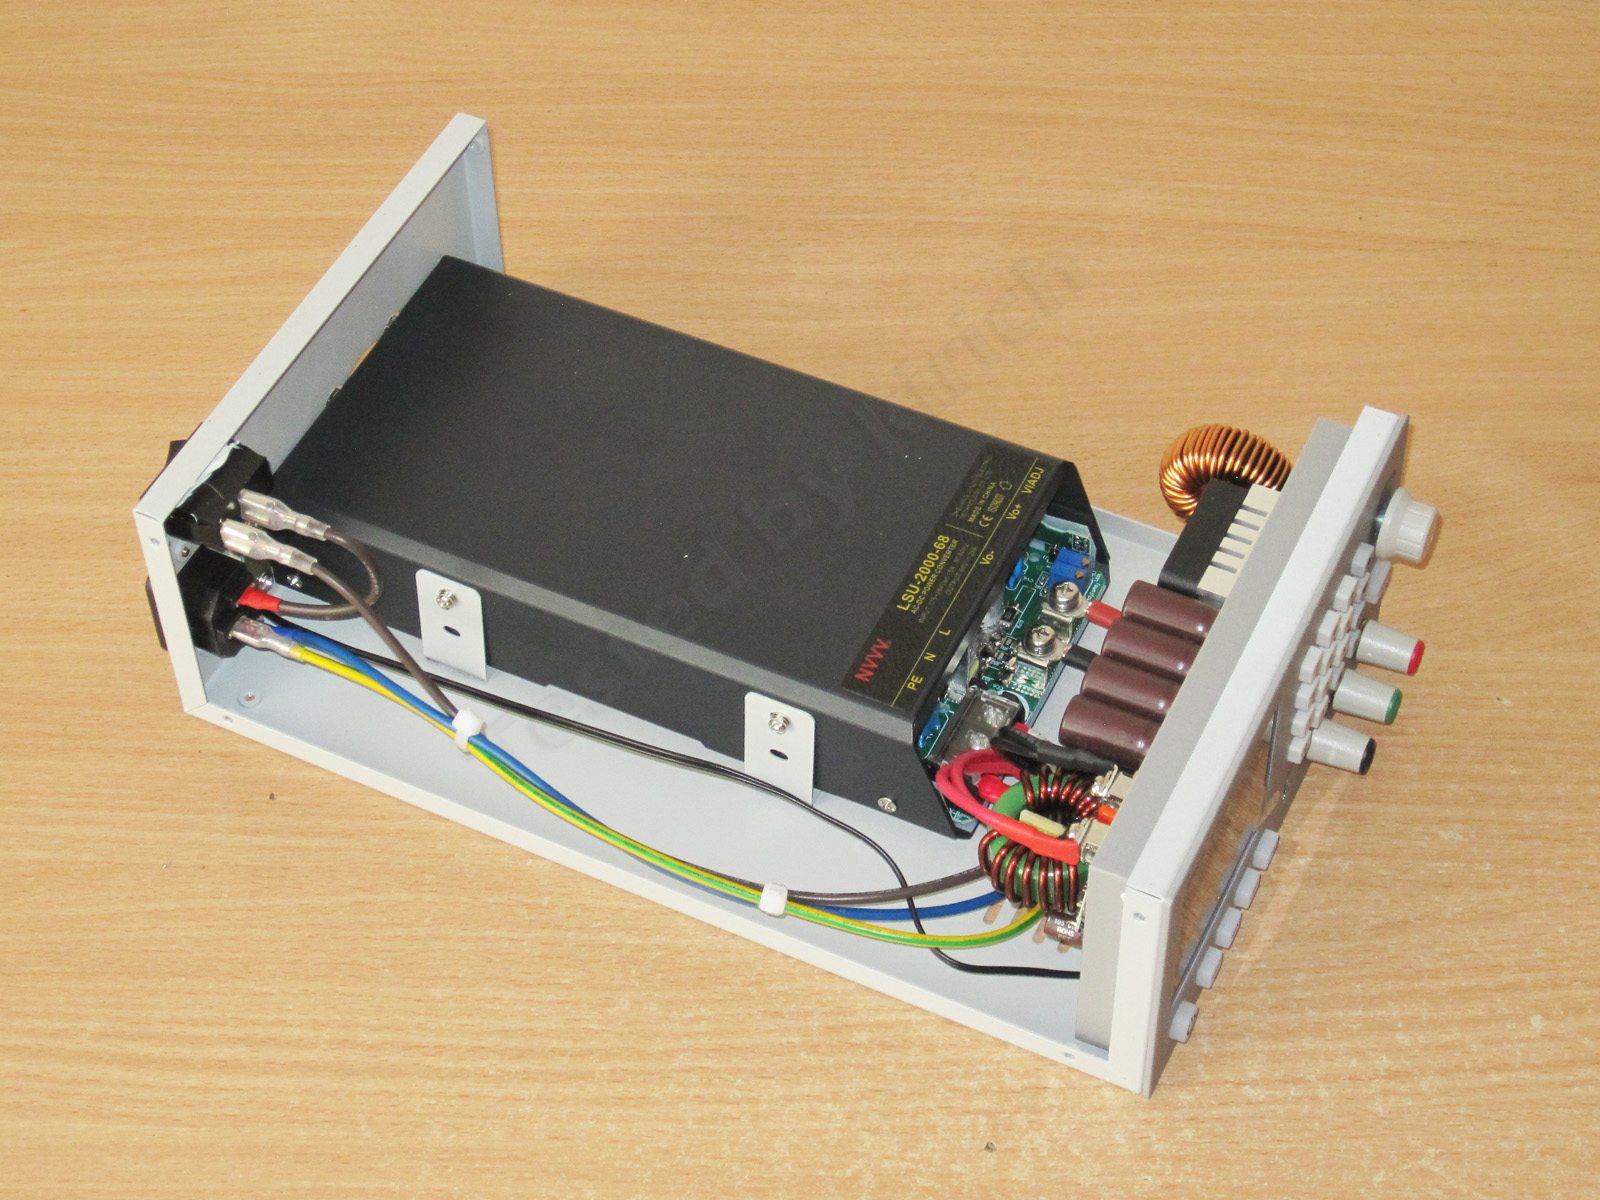
And another surprise: not only is the enclosure a little smaller than usual, but the power supply inside is about half the size of the familiar 1500 W models sold for the old enclosures.
Seriously, when I opened it up, I was almost certain I’d find a regular, large power supply inside, like the 1500 W one I reviewed some time ago.
I open it up and find a half-empty enclosure and a power supply that’s not only smaller, but more powerful too....
The converter board itself is no different from the standard RD6030 board. Apparently, the only changes are to the front-panel board, but I don’t want to poke around in there, and I’m not even sure I could.
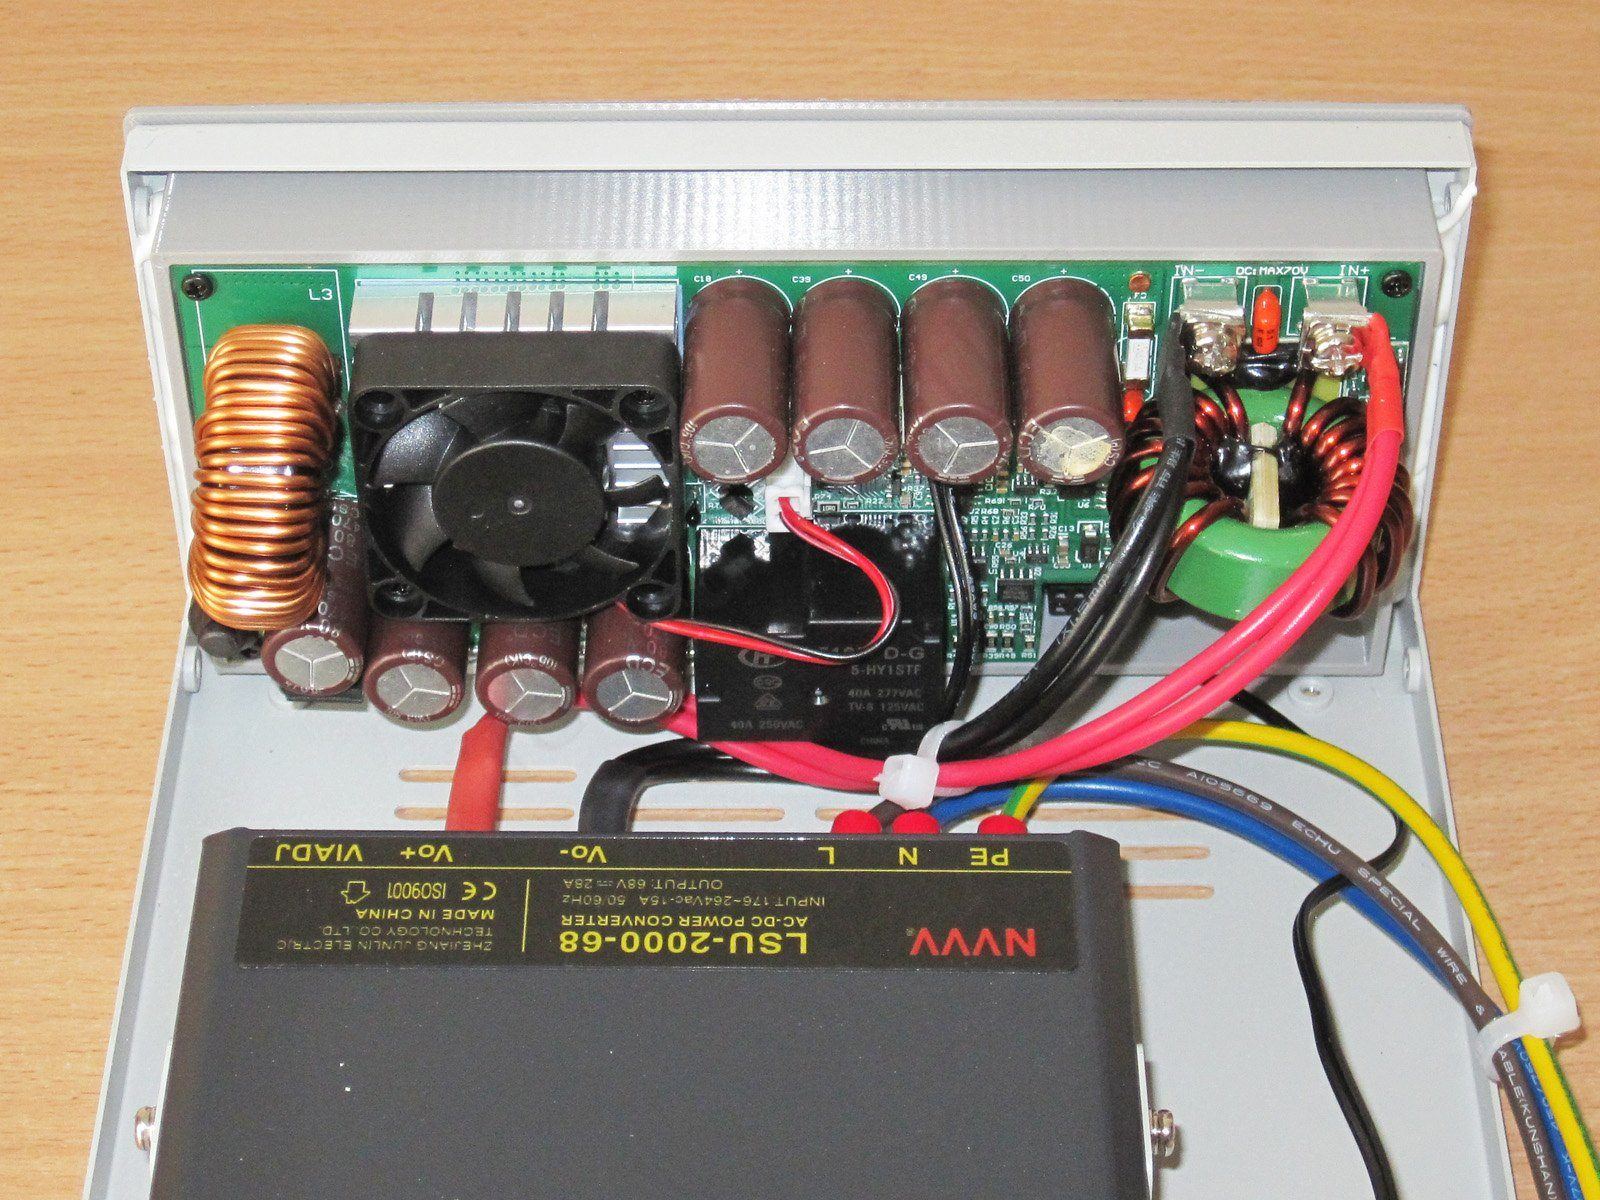
To my surprise and disappointment, this supposedly top-of-the-line version doesn’t come with a WiFi module. They could have included their RS485 module too, for that matter. I don’t really need one, but if you’re selling a top-tier device, you could at least install WiFi—and ideally include a battery as well.
The fan is fairly powerful: 12 V, 0.5 A, 40 × 20 mm, so yes, it’s noisy.
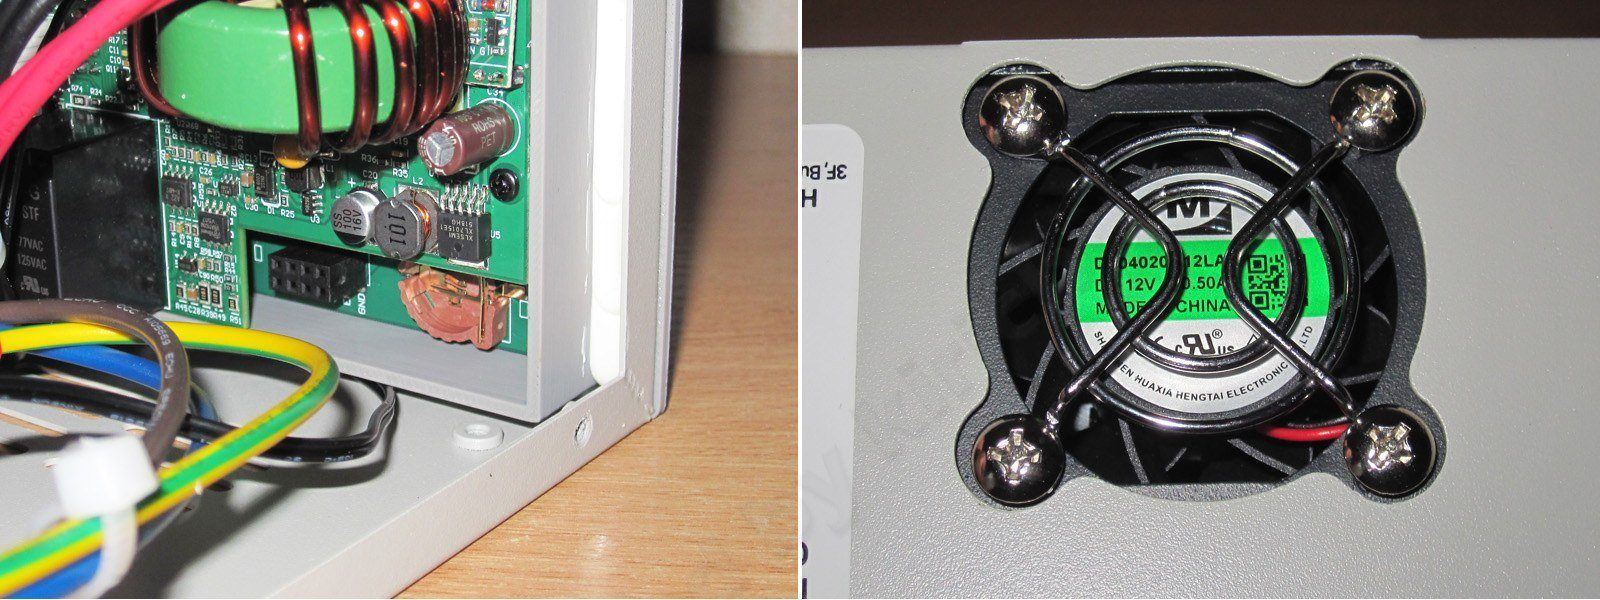
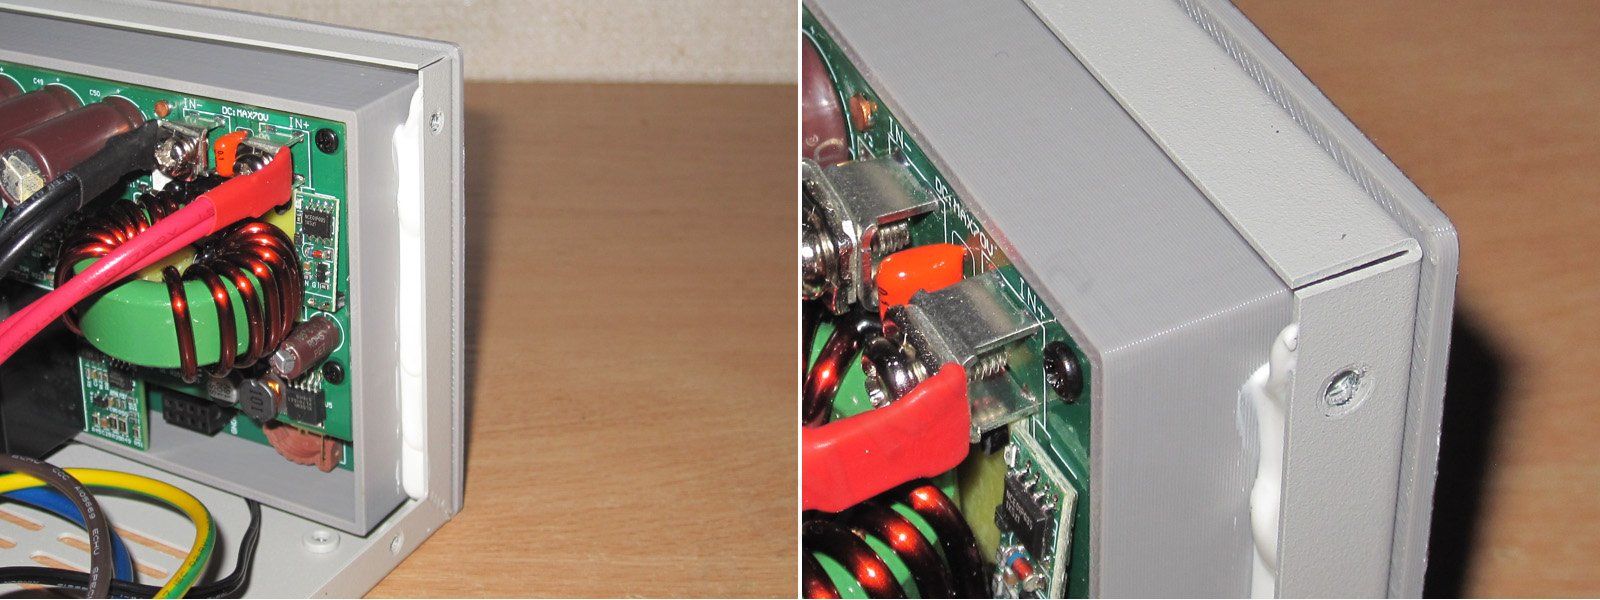
And here are the front panel’s quirks. Right from the start, the sales rep told me that the Max version of the converter isn’t sold separately. I wondered why at the time; it turns out the reason is simple: it’s a “non-standard” model.
First, there aren’t even any clips here—the panel is simply glued into the enclosure with sealant. Second, the panel is 3D-printed, as you can tell from its characteristic texture.
So there’s no point ordering a new panel for the larger display: it would cost more and there’d be less demand. It’s easier to print one and essentially release a custom version.
All right, that’s it for the enclosure. Let’s move on to the power supply. As I’ve already mentioned, it’s genuinely compact, although to be fair, I have a 12 V, 1400 W power supply at home that’s probably about half the size again. Thanks to one of my readers for that :)
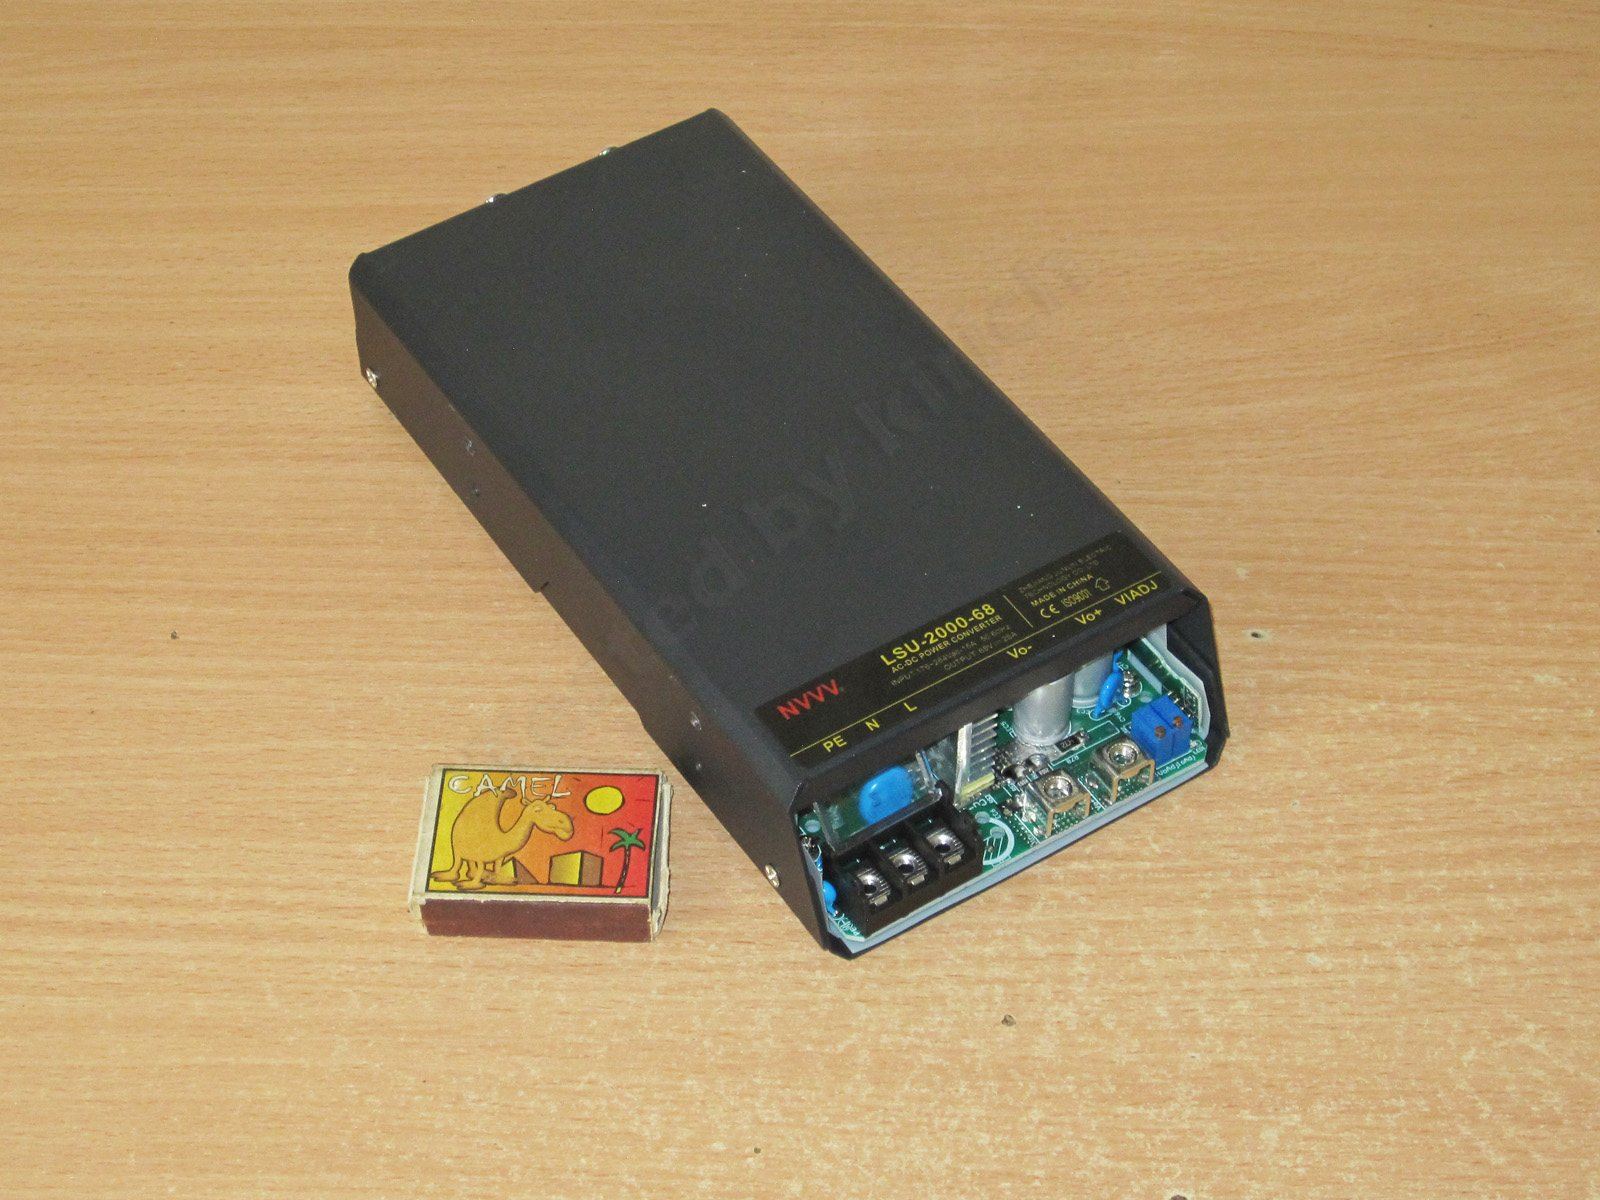
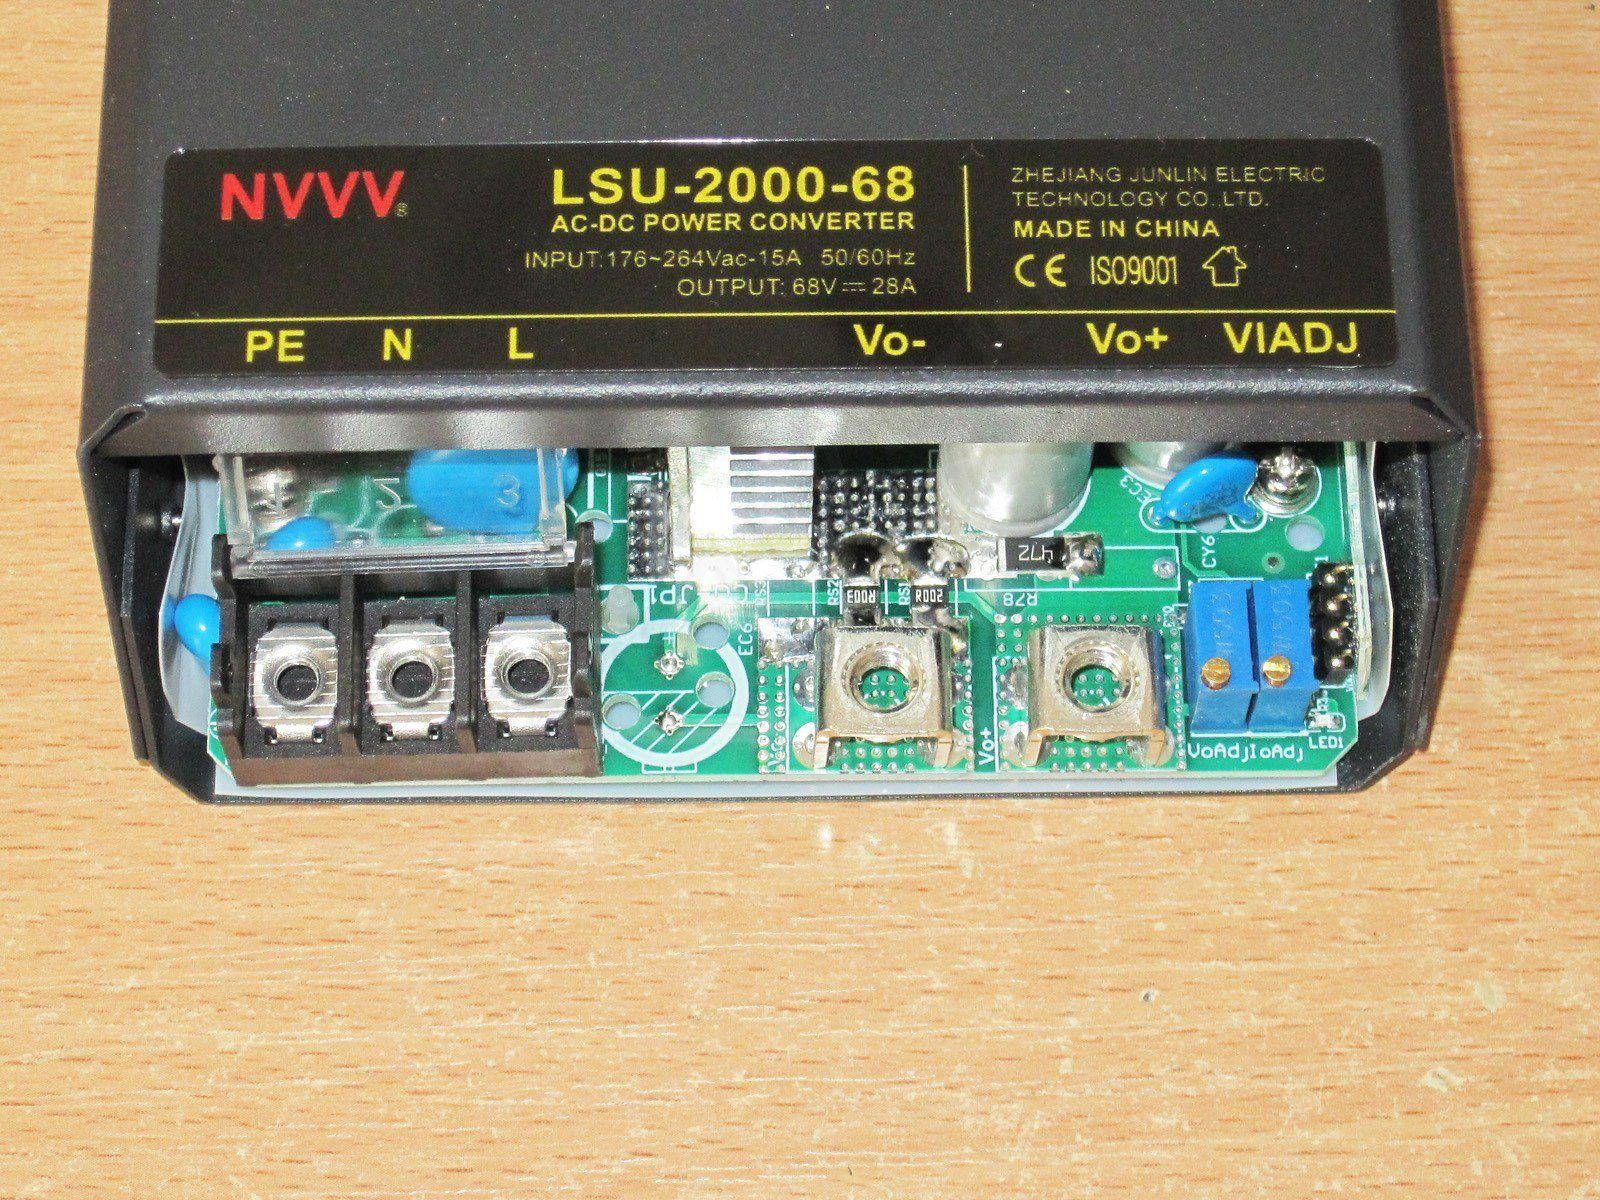
The manufacturer is NVVV, which is actually a fairly well-known company. I’ve even been asked a couple of times about their power supplies, so now I finally get to take a look at one in person.
The rated specs are 68 V, 28 A. That works out to about 1900 W rather than the 2000 W stated in the model number, but what really matters to us is the result, not the numbers.
I’ll point out right away that it has two trimmer potentiometers, so the power supply can operate in both CV and CC modes.
In general, 60 V at 30 A is 1800 W. The 6030 has fairly high efficiency: at around 60% output power, losses were about 48 W. So in practice, a 1900 W power supply should be just enough to deliver 1800 W, or even 1830 W.
I open up the power supply enclosure, and the first thing I see is the fan power wires, pinched in two places (two pinch points on each wire). These wires were laid across the transformer, then got pinched by the cover and their insulation was crushed.
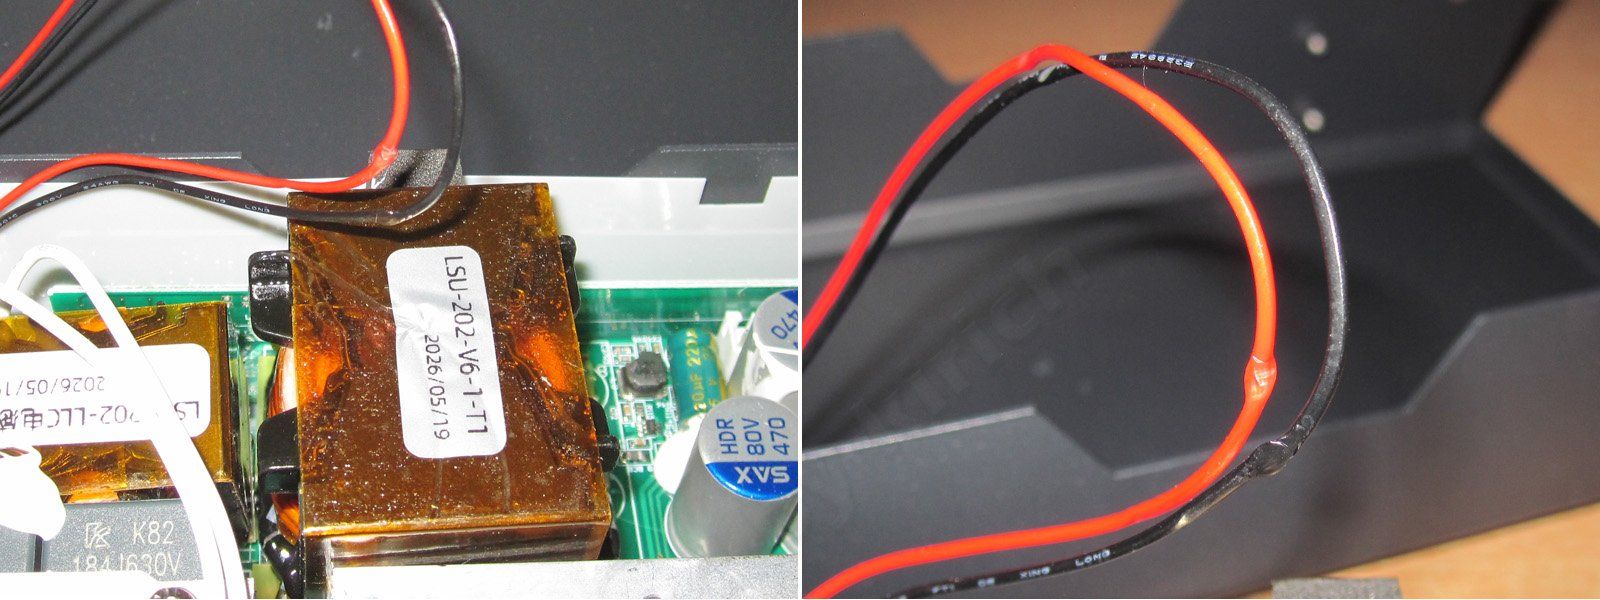
We disconnect the fan and remove the cover; we won't need it for now.
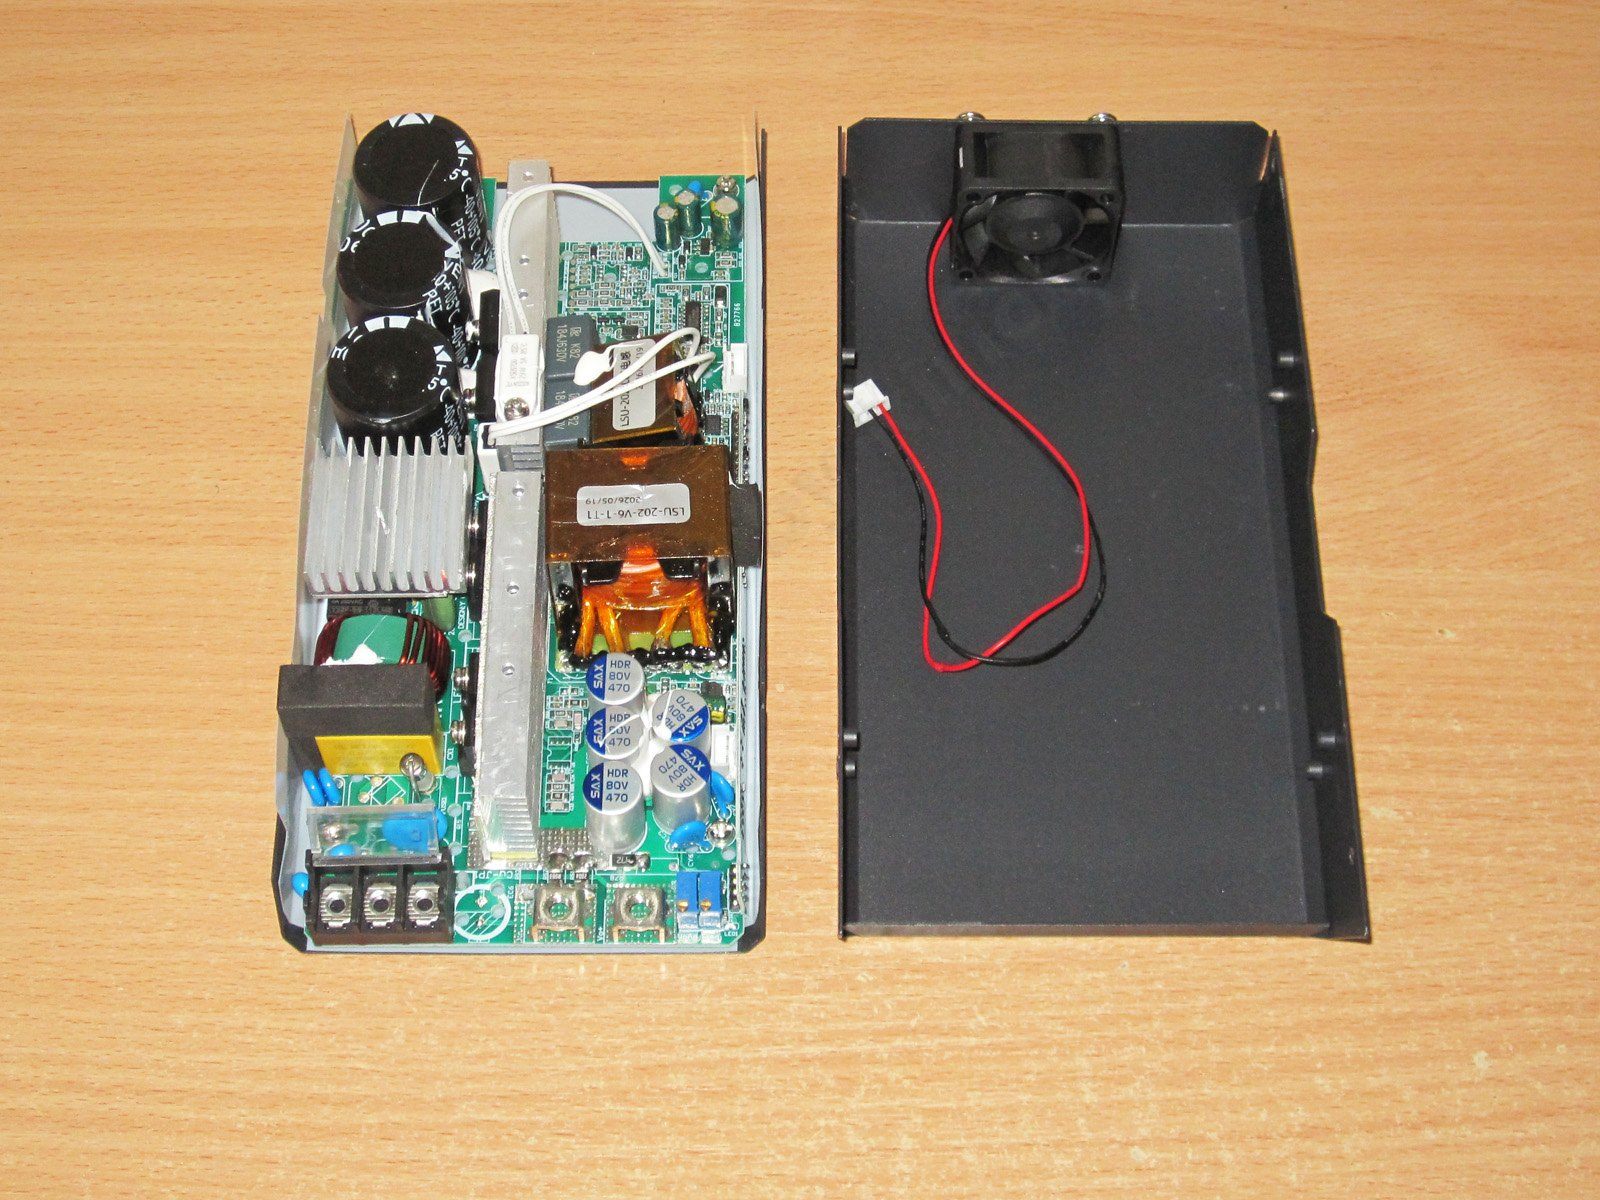
The layout is fairly compact—not like the branded telecom or server power supplies, but still quite cramped.
That said, I’ll point out right away that the cooling system is well designed, with the heatsinks getting effective airflow.
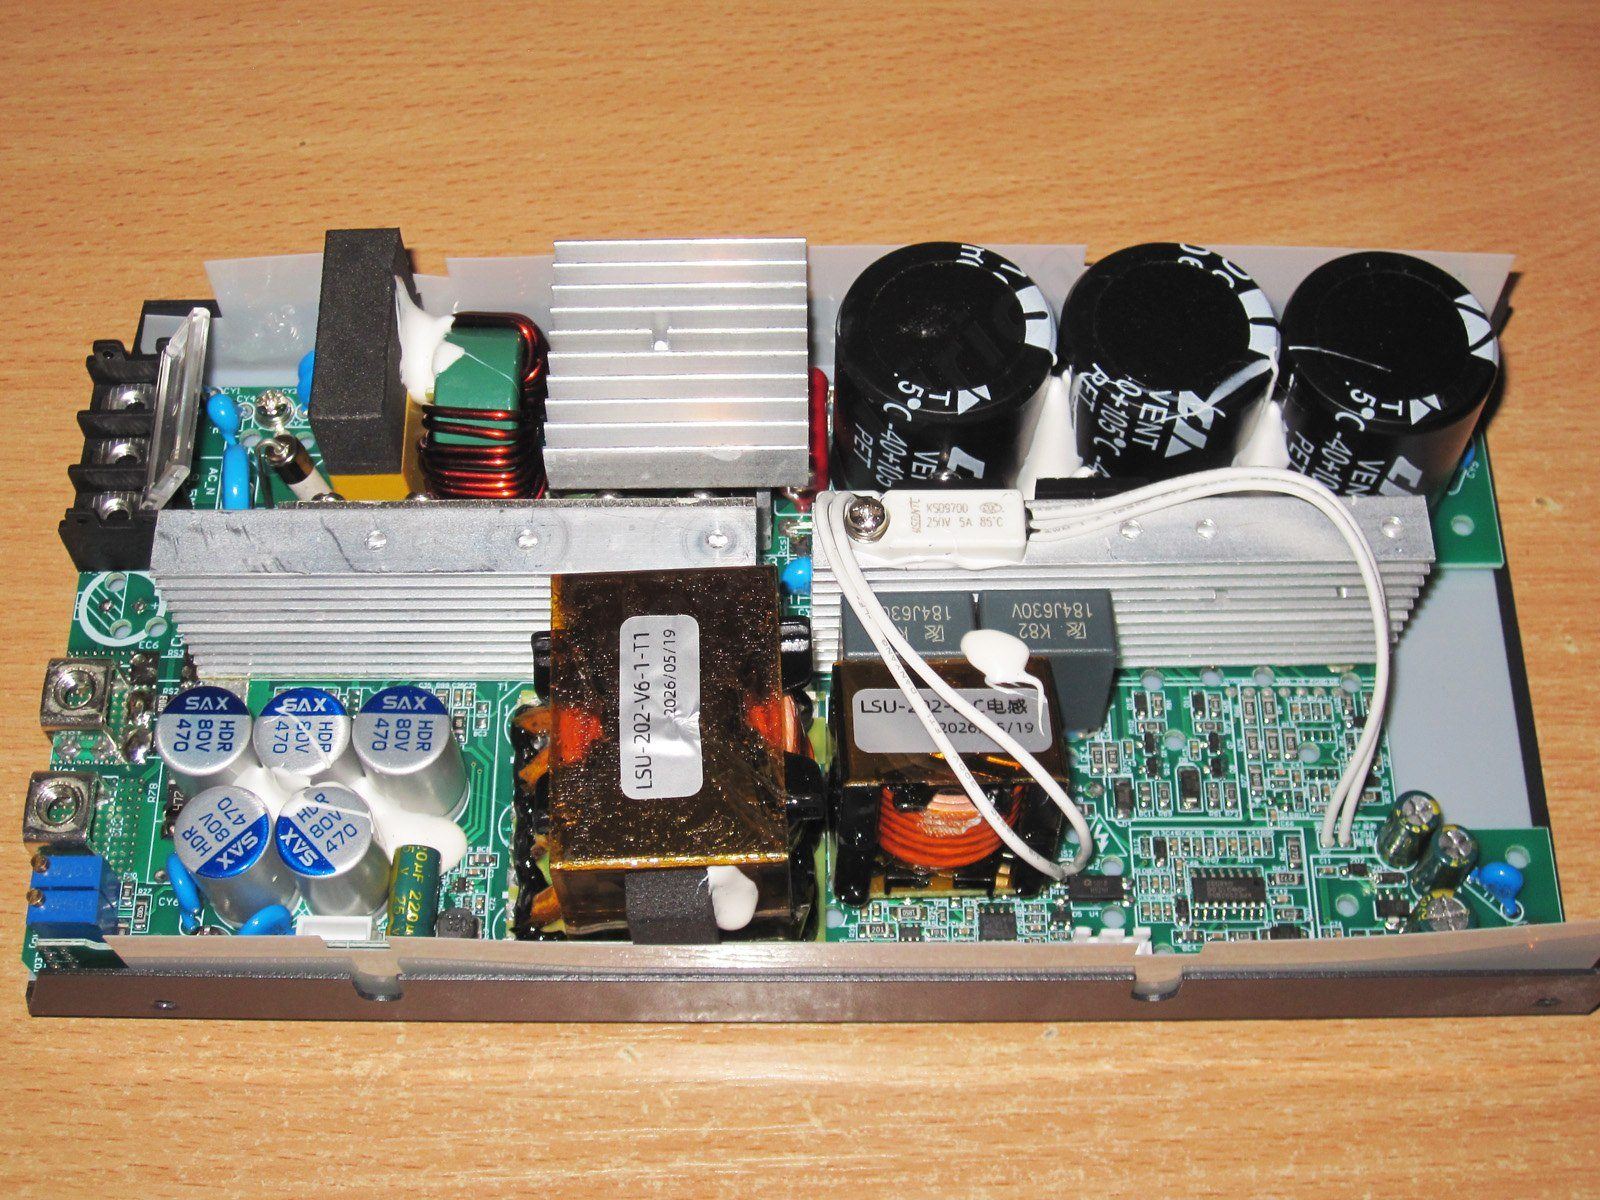
The input has a proper filter, a fuse, and a varistor. I didn't spot a thermistor at first glance, but I'm sure there's one in there.
Also, if you look closely, there's a relay under the bridge rectifier's heatsink, which most likely shorts out the power supply's startup thermistor.
There are three 390 µF input capacitors, for a total of almost 1200 µF. That's not much for 2 kW, but bear in mind that this power supply is designed to operate over a relatively narrow voltage range, starting at 176 V.
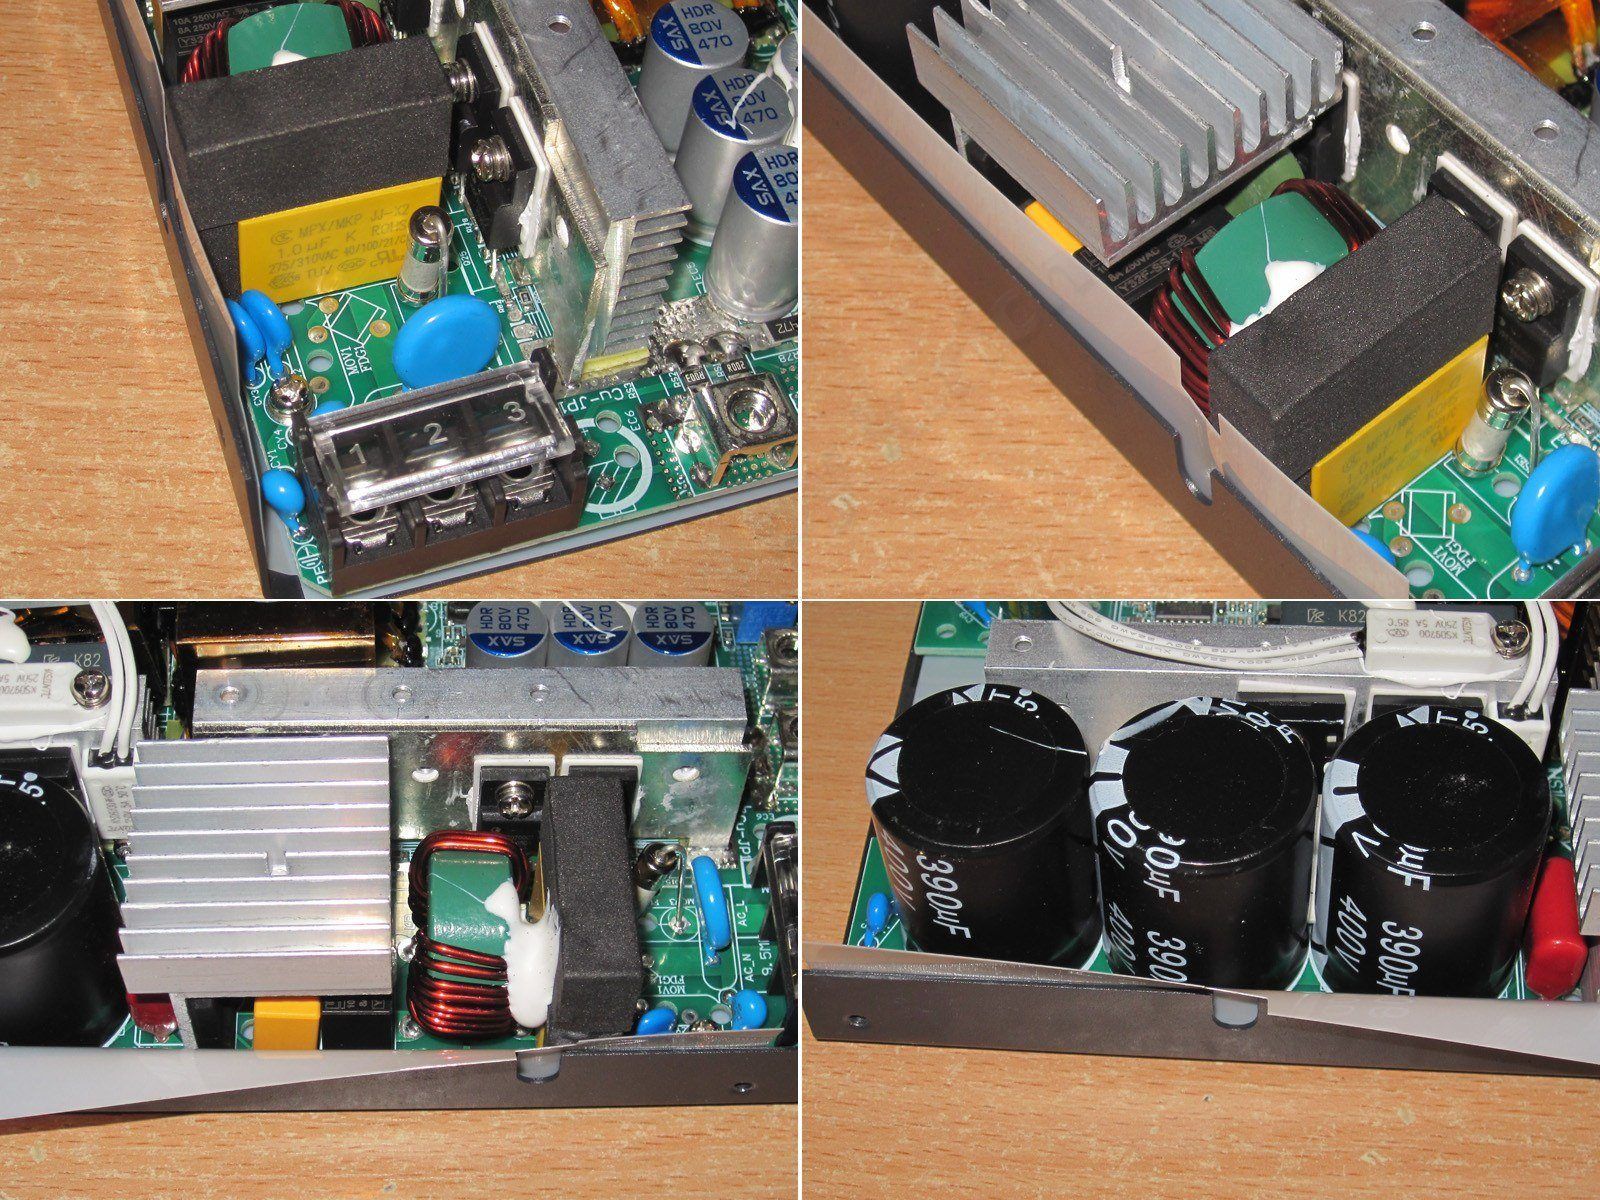
The inverter heatsink has two thermostats: one set to 85 degrees for overheat protection, and one set to 50 for fan control.
Yes, the fan just switches on and off, and I’m thinking of adding a speed-control board.
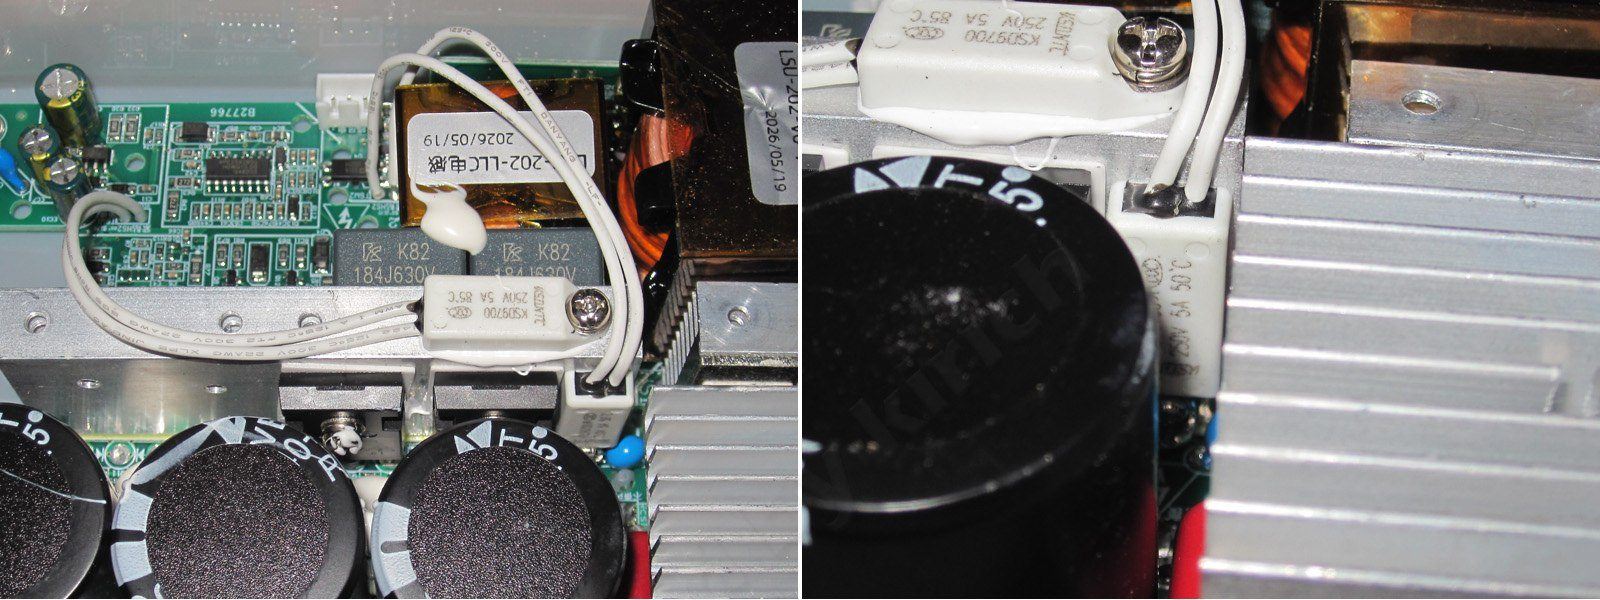
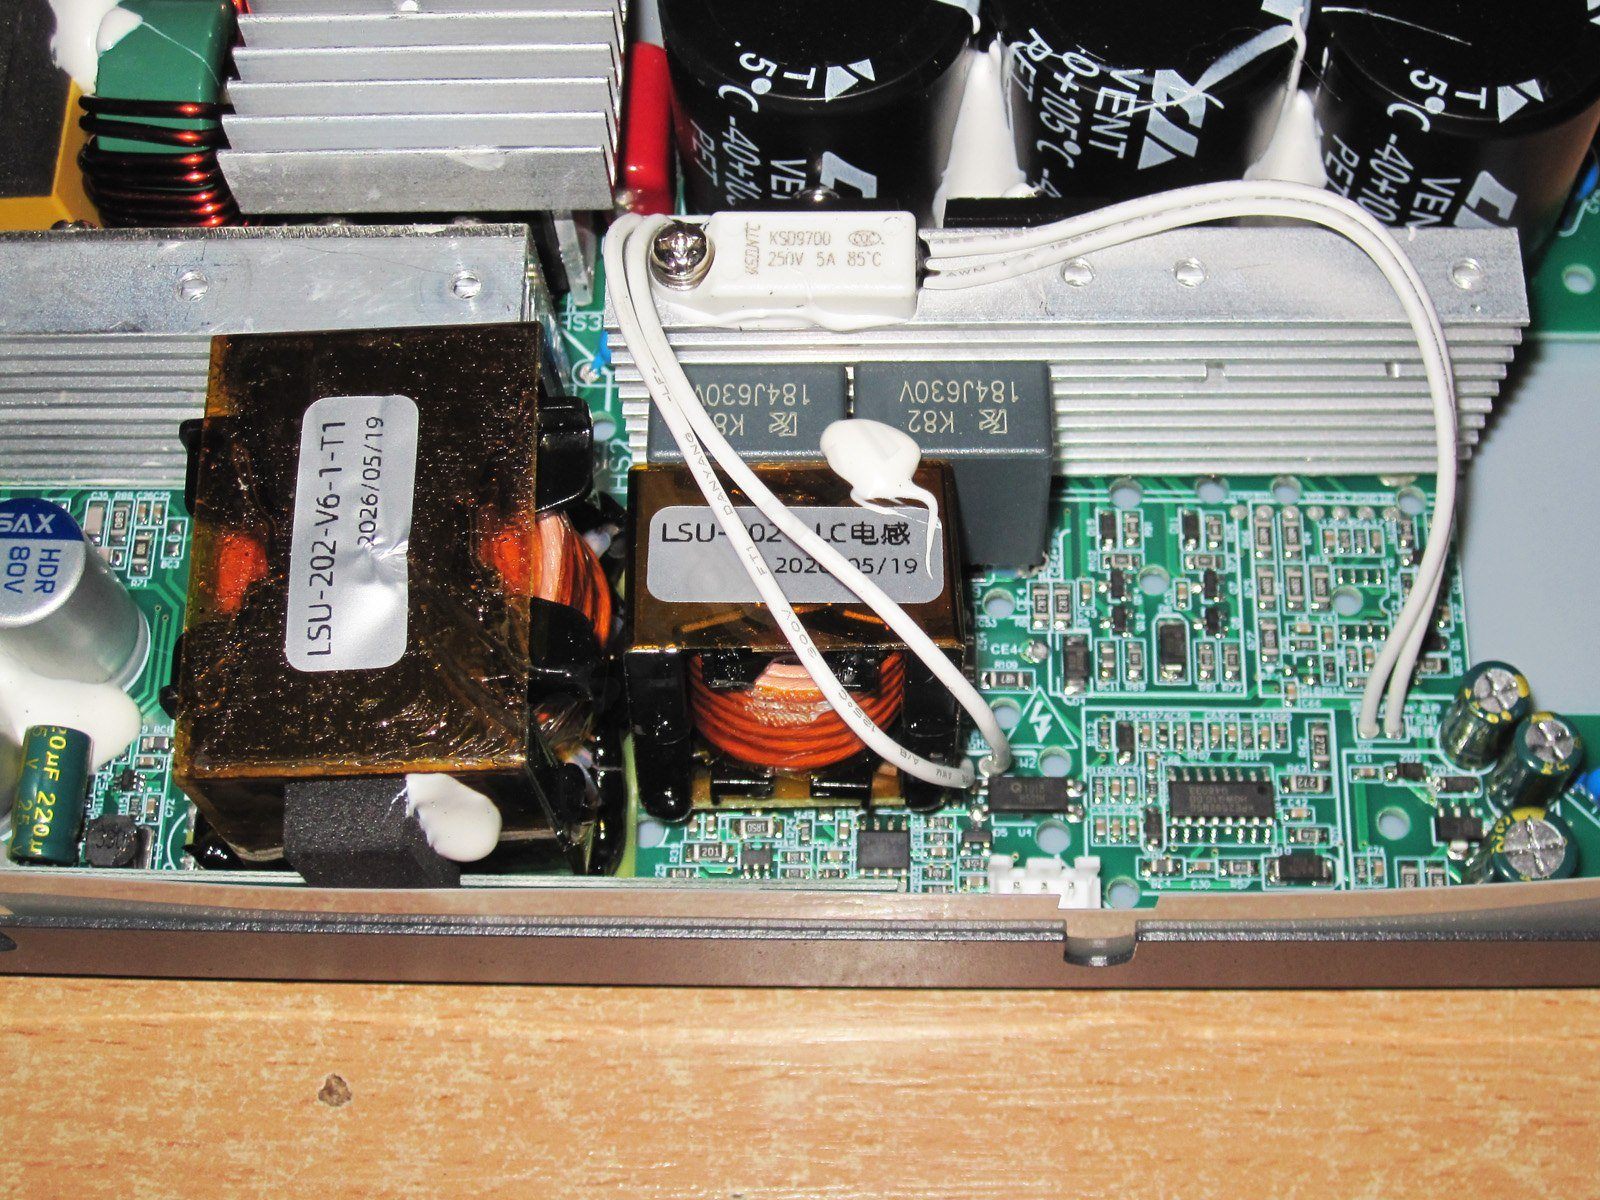
As you can probably guess by now, this power supply uses an LLC topology. The transformer, inductor, and capacitors installed next to each other make that pretty clear. The windings are made with Litz wire, which is to be expected at this kind of power and size.
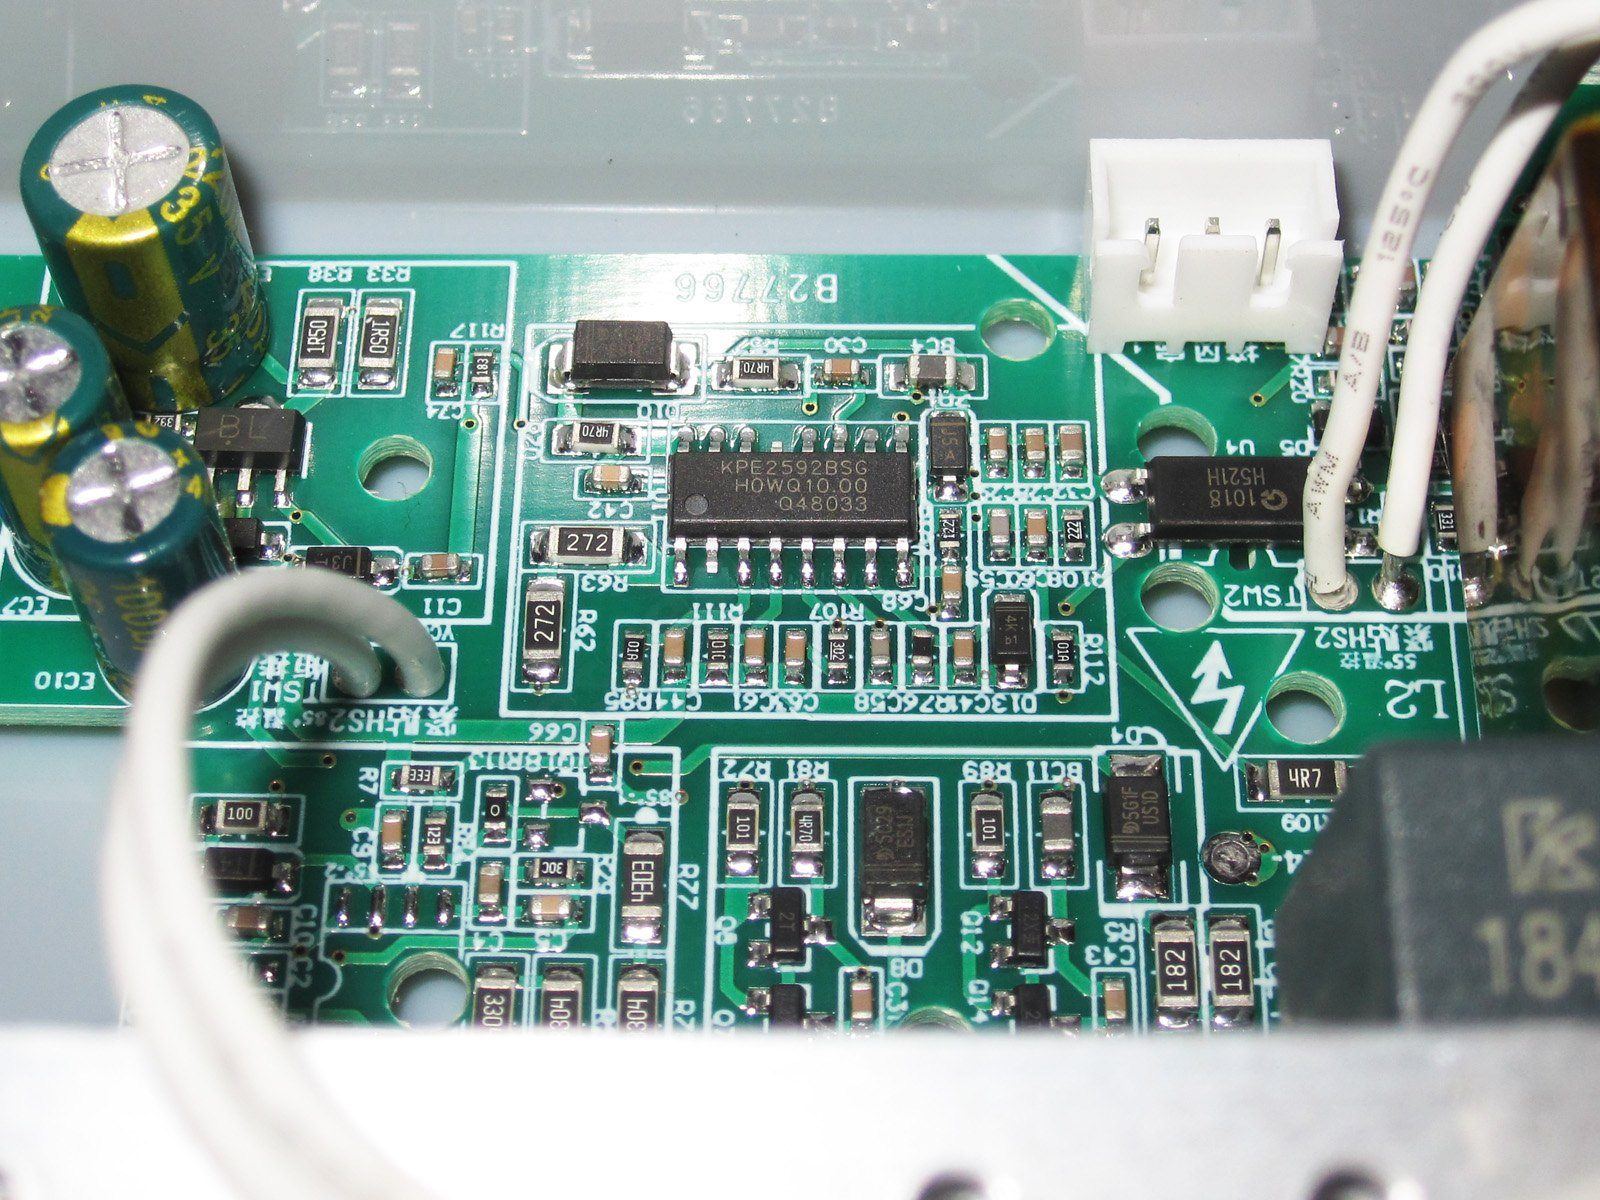
The PWM controller section. I didn't even look up the datasheets; if you're interested, you can check them out, but I doubt there's anything new there.
On the output side, there are at least a couple of 20 A, 200 V diode arrays, as well as five 470 µF capacitors—about 2500 µF in total for 28 A. Granted, the capacitors are polymer types, and the topology also makes tricks like this possible.
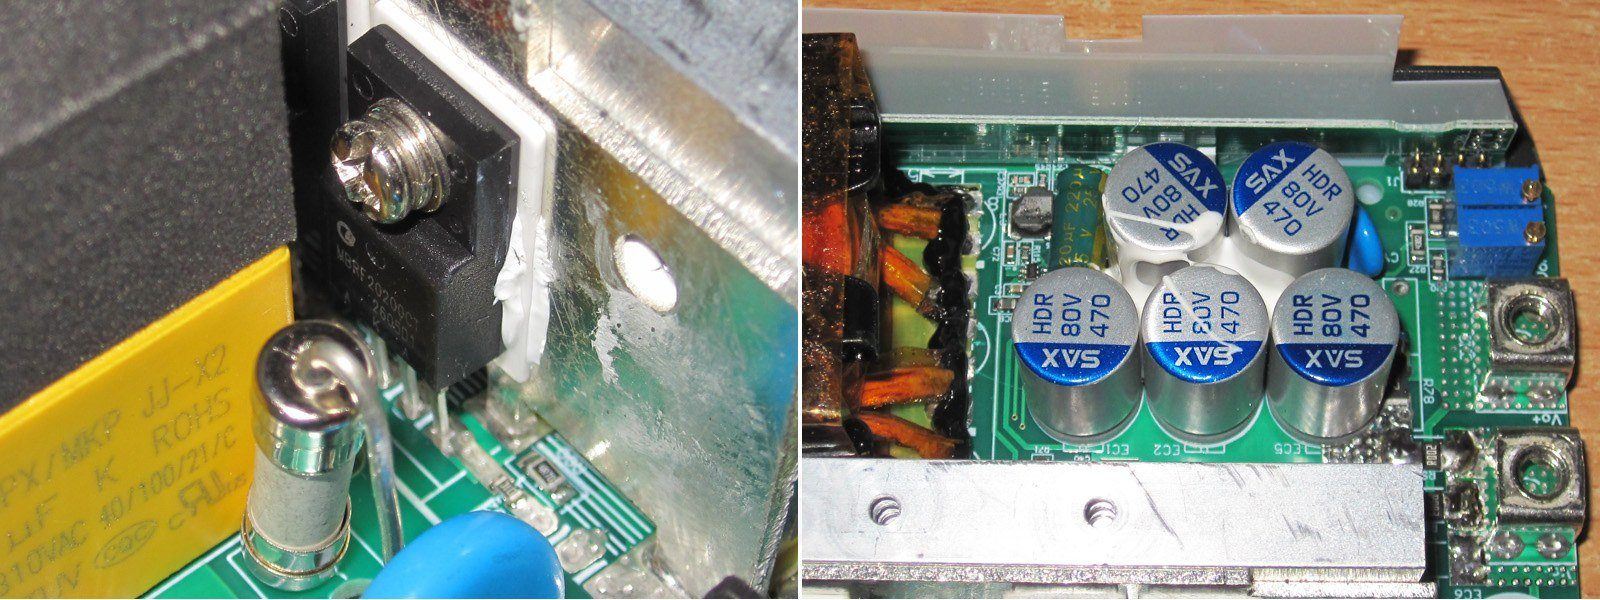
There are a couple of shunts near the terminals, though I still can't figure out why it has a CC mode.
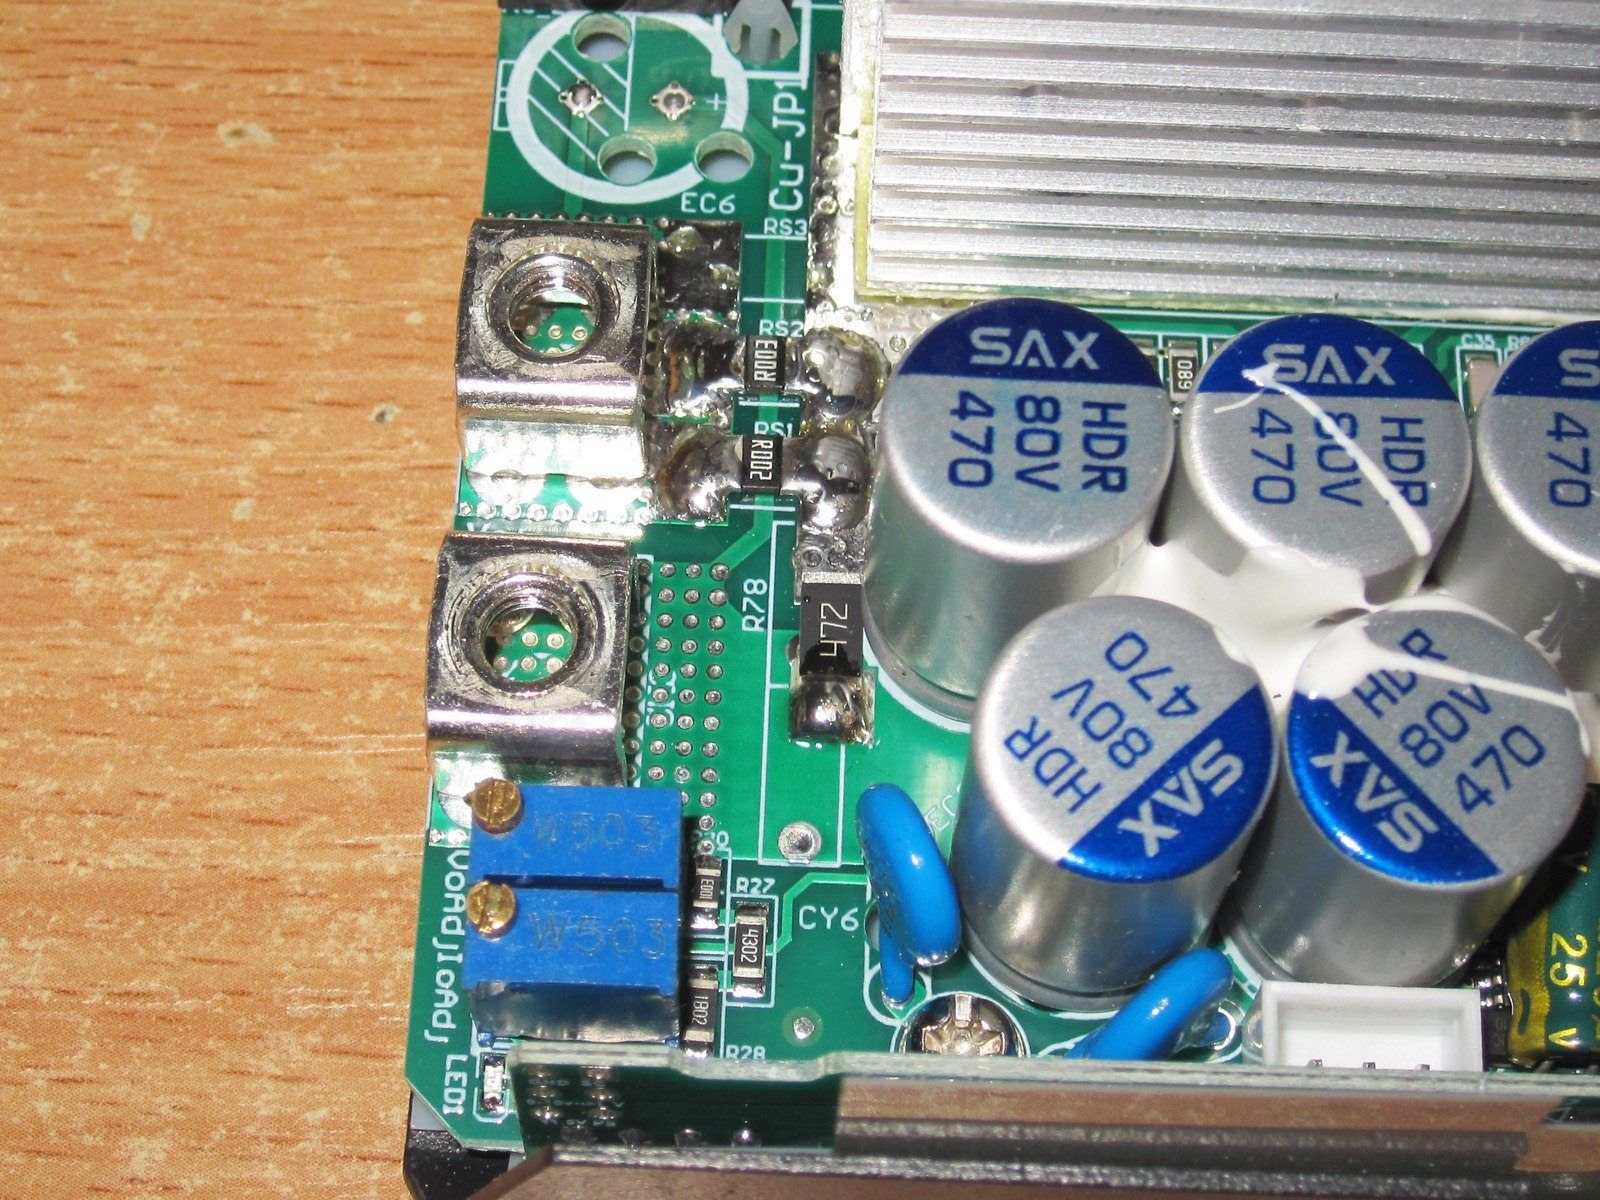
The designers clearly have a knack for improvising. They obviously ran out of space, so they raised the inductor above the component board :)
Yes, there's a piece of fiberglass board soldered underneath, and the inductor was raised along with it; some components are underneath. Though maybe they originally planned to use a smaller inductor, but it didn't work out (or it did, just not the way they wanted), and the new one wouldn't fit.
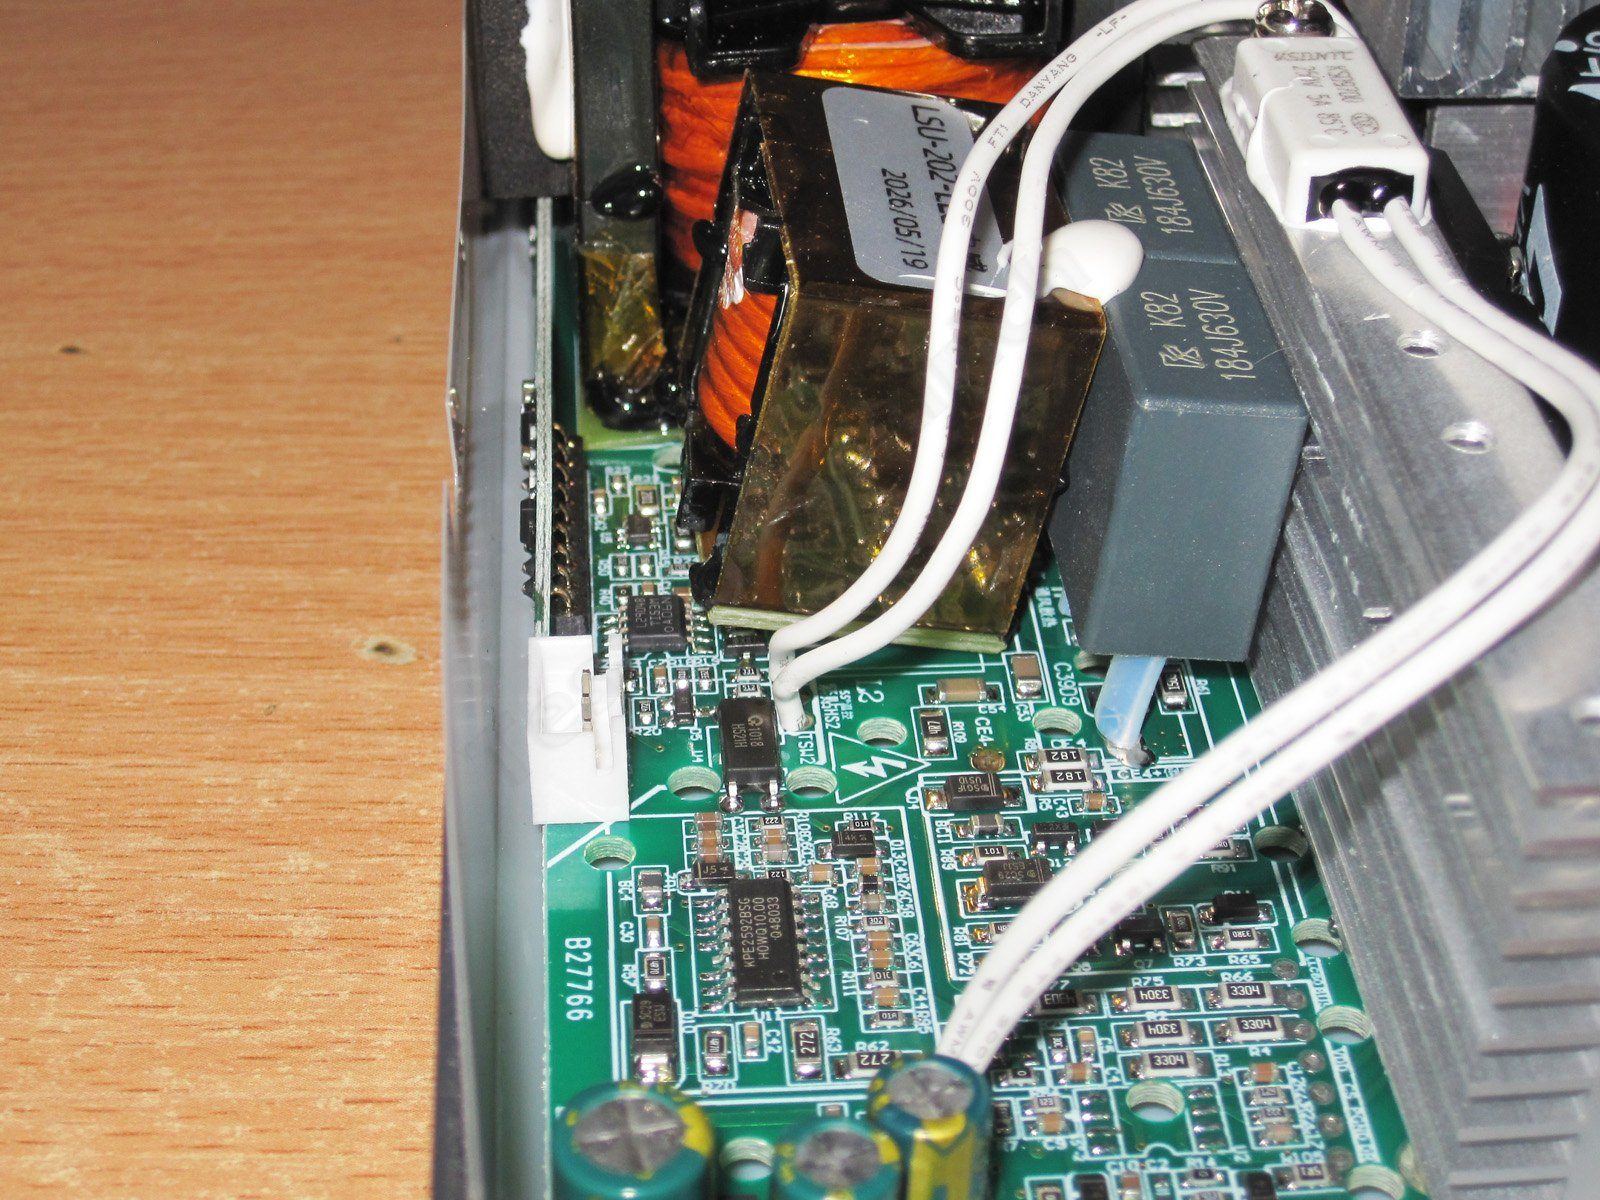
All right, let's insulate the wires and put everything back together. Unfortunately, it's technically difficult to get rid of the gap, but thankfully the trim pieces hide it.
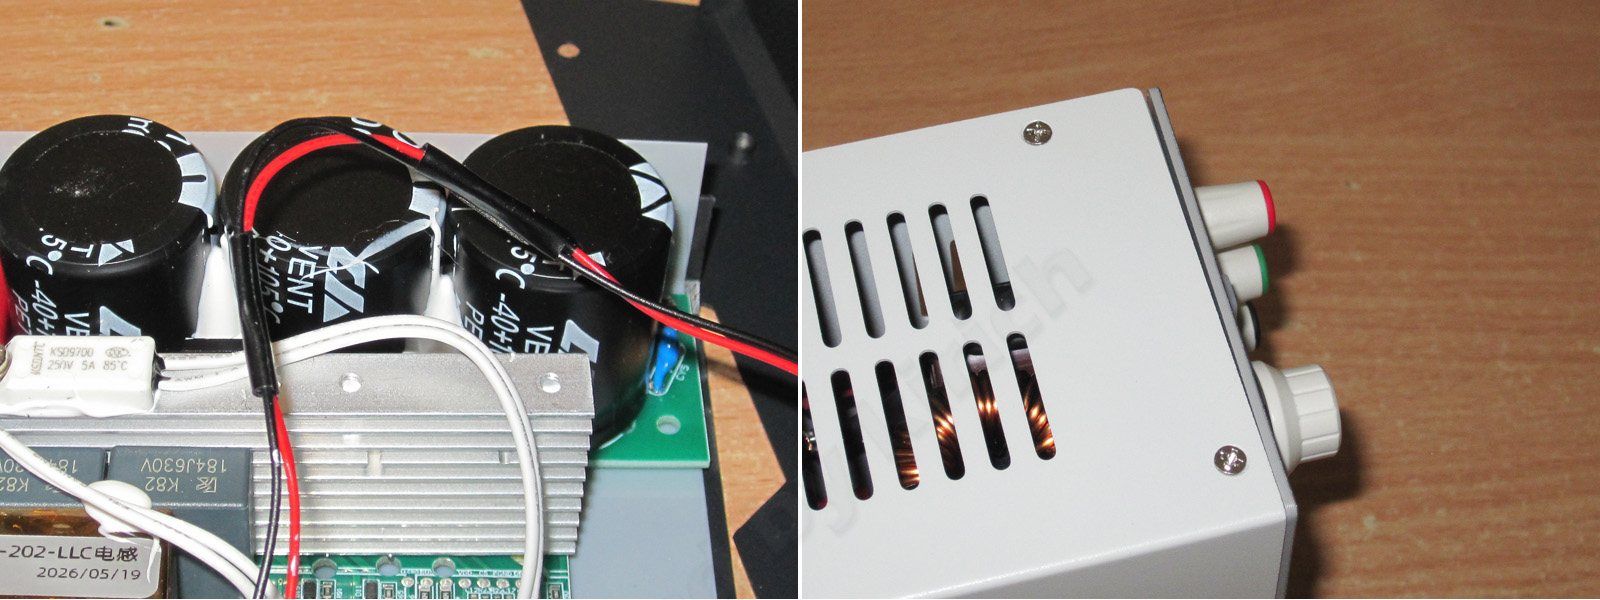
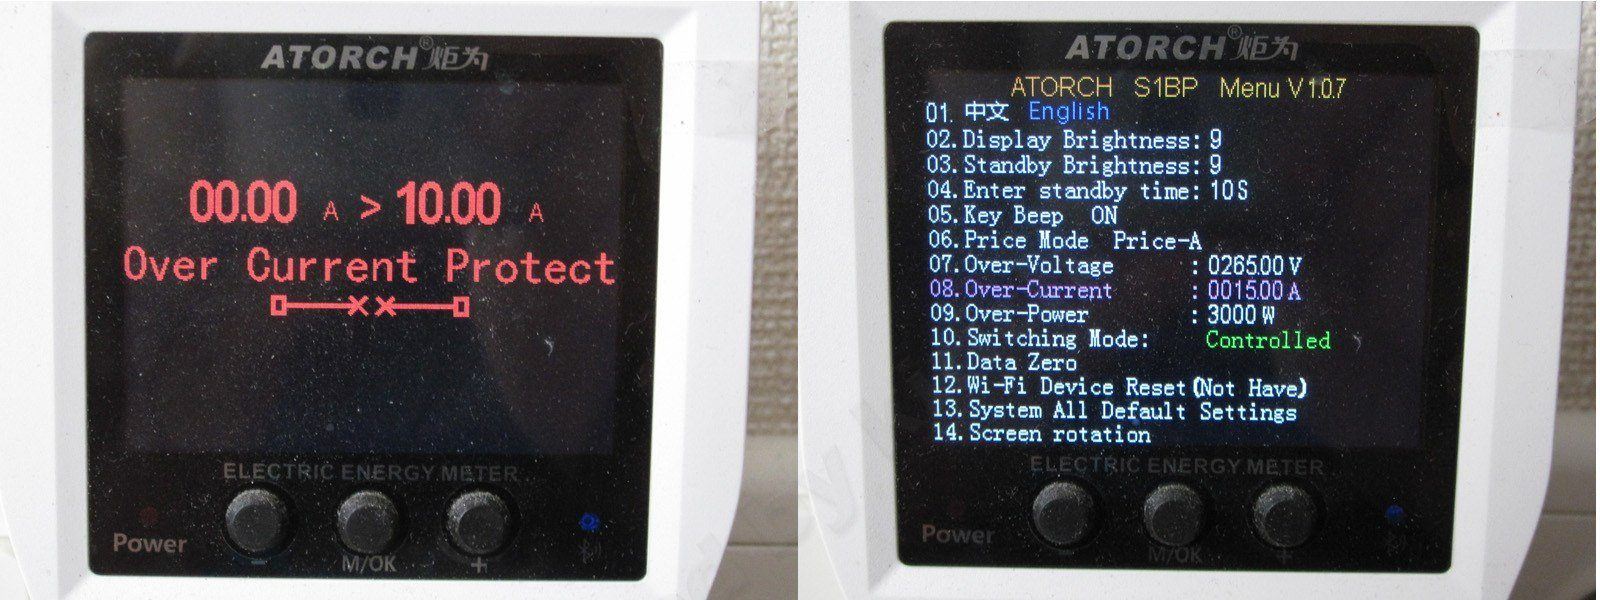
The power supply gave me a bit of a scare right at the start of testing. I connected it to the load and gradually increased the current. Everything was fine, then suddenly the power supply just shut off.
My first thought was, “Well, that's it. We're screwed.” I looked up, and the wattmeter I had connected the power supply through was showing an overload.
No idea why it was set to 10 A, but that's clearly not enough for our tests. I went into the menu and set it to 15 A.
There's not much point in describing the tests in detail. I simply grabbed one of my electronic loads, which had just been sent to me for servicing and testing, connected the power supply to it, and loaded it as much as I could.
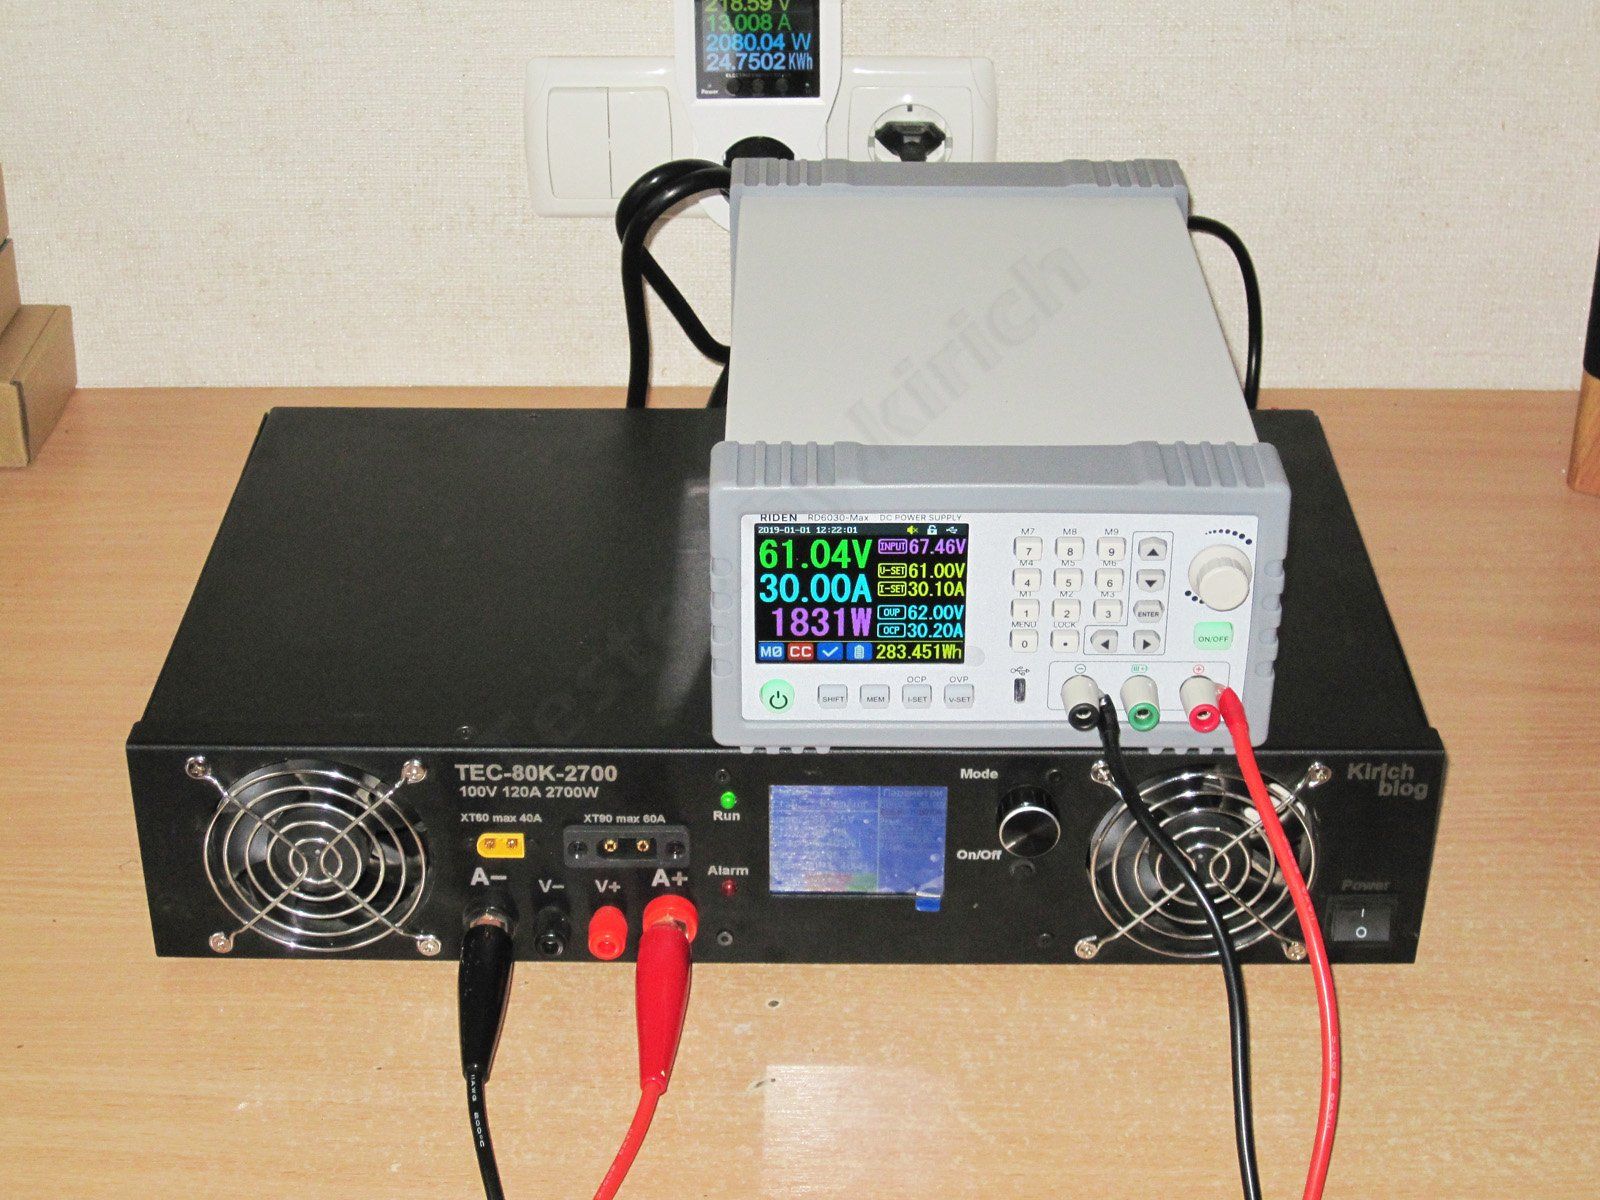
The RD6030 is limited to 61 V and 30.1 A, so I set it to the maximum 61 V and dialed in 30 A on the load. The next step was 30.5 A, so I stopped at 30. I don't think an extra 100 mA or 6 W would have made any real difference.
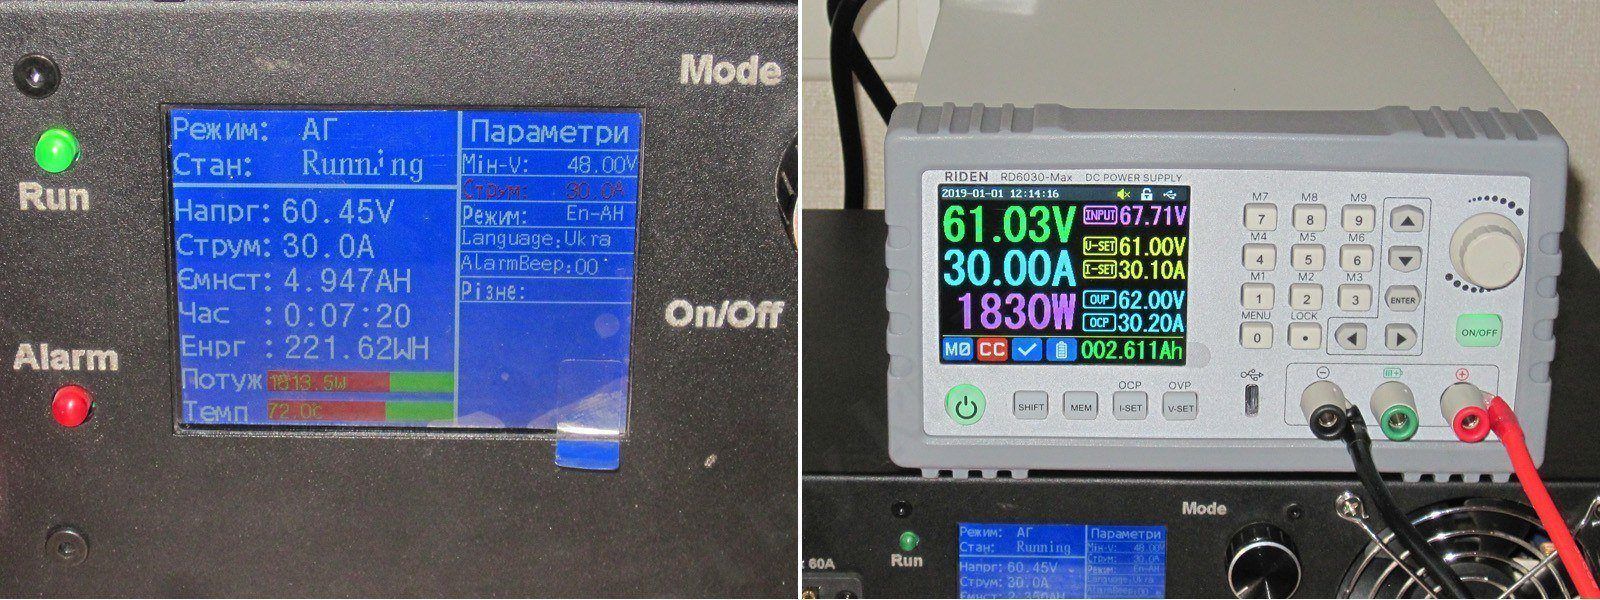
I ran it like that for a while, didn't notice anything suspicious, and switched it off. I should note that although the power supply is noticeably noisy, even compared with the electronic load, the noise isn’t too annoying and there are no irritating rattles.
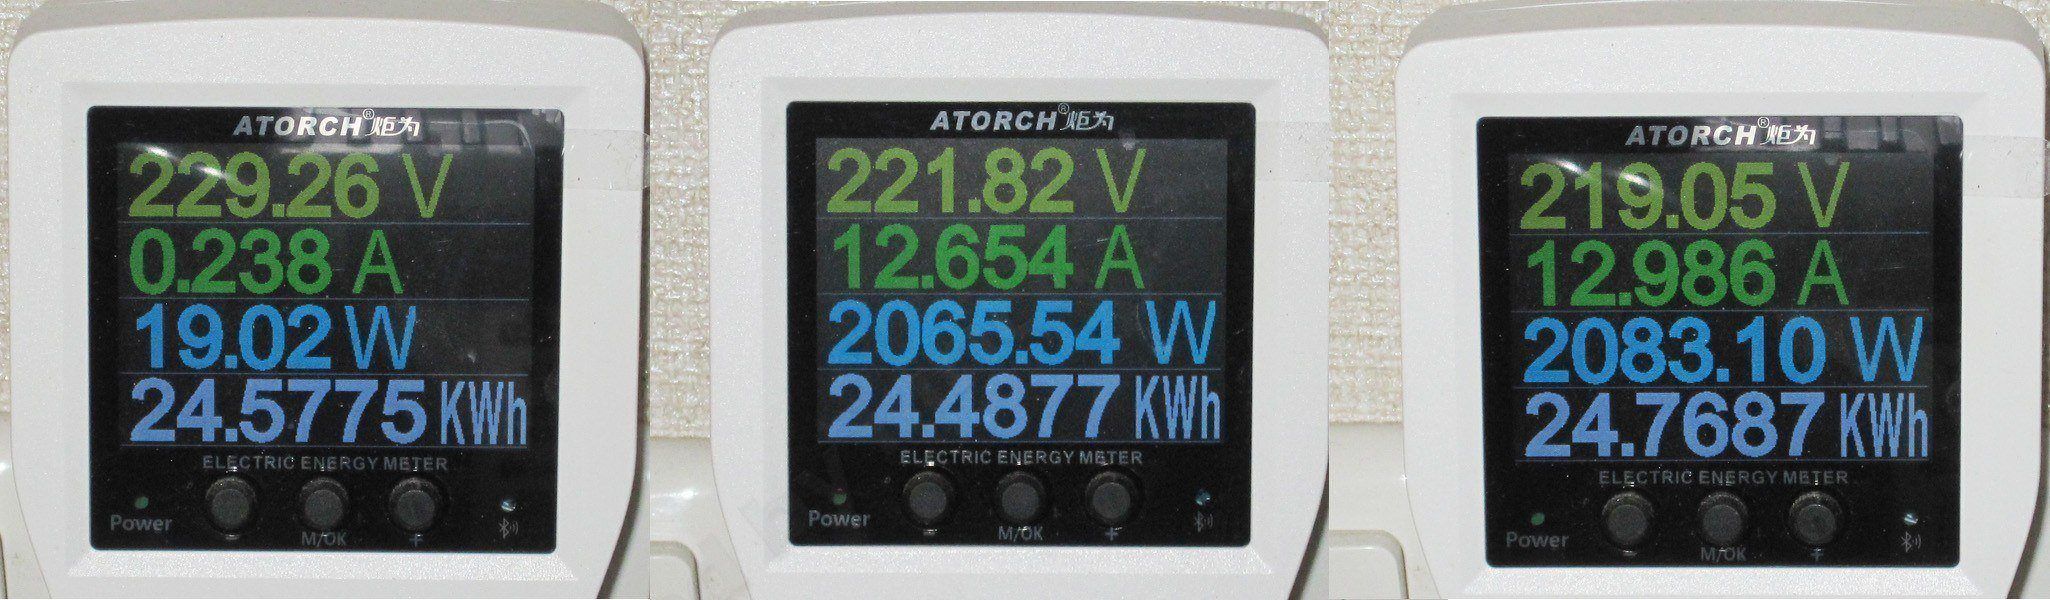
With no load, the power supply draws about 20 W. I think that’s with the fan running, but I could be mistaken.
Under load, the power reading drifts a little. At 1831 W output, the input was about 2065 W at first, then rose to 2085 W after a while.
Even so, the system’s overall efficiency is about 88%, which is actually pretty good.
And here’s a video of the unboxing and first power-up.
So, here’s my verdict.
Basically, it’s a power supply like any other. But what’s really cool, and what I love, is the big display and the power output of over 1800 W. Awesome—I’m thrilled. No, I still want something more powerful, preferably with even more current, but I really like it as it is.
Sure, if you want to save money, you can build one yourself based on a regular 6030; it’ll do exactly the same thing. That’s if you just want the functionality. If you want the bells and whistles too, the 6030 Max is definitely the way to go.
In short, there are a few minor drawbacks: an occasional click, a noisy fan, no WiFi. But I still like it, even with those quirks.
That’s all for now. I’m off to test three more new Riden units :)
$313.90
This page was found when searching for:
блок питания на базе rd60ххp, riden блок питания обзор, rd 6030 max
блок питания на базе rd60ххp, riden блок питания обзор, rd 6030 max
This model is included in the summary table: Comparison of adjustable converters for a bench power supply
The figures from this review are in the measurement database: Converters
Calculate manuallyAll calculators
Discounted products
You may be interested in



Discounted products
Support the project
All the content on the site and the advice are free, but we’d be grateful for your support of the project and the channel!
Comments2
Discuss on the forumHave a question or some experience to share? Discuss the article with the author and readers: the forum is a convenient place to share schematics and photos.
Go to the forumOnly registered readers can comment. It takes a minute to sign up, and you can log in with the same account you use on the forum.
Log inRegister
Comments are published in their original language.