
ILIFE A4 robot vacuum, a little helper around the house
$169.99
A representative of the manufacturer contacted me with an offer to write a review. There's a link to the official AliExpress store at the beginning of the review.
The vacuum arrived in a large box with branded printing. But it turned out there was another box inside; the outer one was just for shipping. The packaging is sturdy, and I have no complaints.

As you can see in the photo above, they sent me the A4 model. The original plan was to review the new A4S, which replaced this model. But due to a mix-up, I ended up with the familiar A4. It also turned out that the A4 has been discontinued, so this is probably the last review of this model.
The new model is very similar in terms of features, but it supposedly has protection against debris getting tangled around the brush (as I understand it) and can work in small rooms. It also has a longer battery life; I assume that's simply because it has a slightly higher-capacity battery.

Since this was my first device of this kind, I didn't particularly care whether it was the new or old version. I was interested in the device itself.
There's quite a bit of empty space inside the box, although most of the items are in their own trays and don't rattle around the box.

The package includes the following, in addition to the vacuum:
1. Two spare brushes
2. Power supply
3. Charging station
4. Spare filter
5. Remote control
6. Batteries
7. Brush
8. Manual
9. Quick-start guide
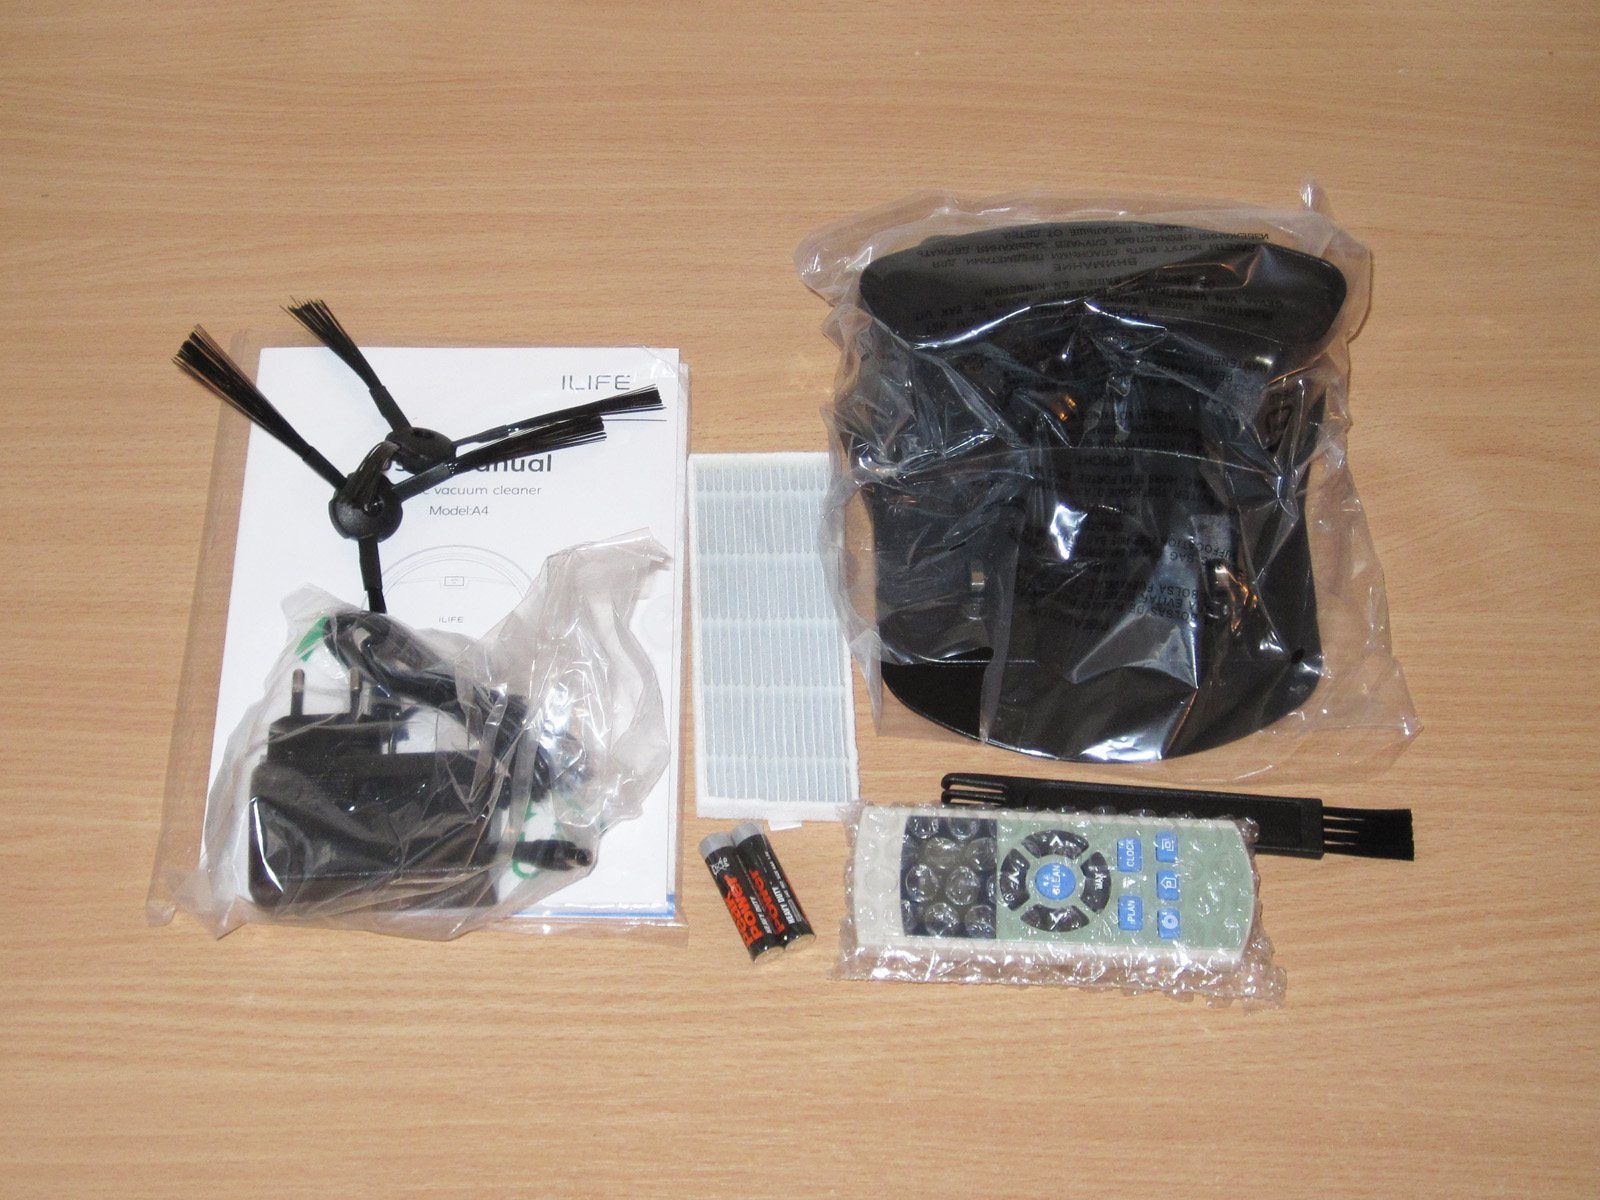
The first thing you notice isn't the vacuum, but the thick manual. It's practically a book. Unfortunately, I couldn't find Russian in it, even though I know the company has a warehouse in Russia (but not in Ukraine yet).


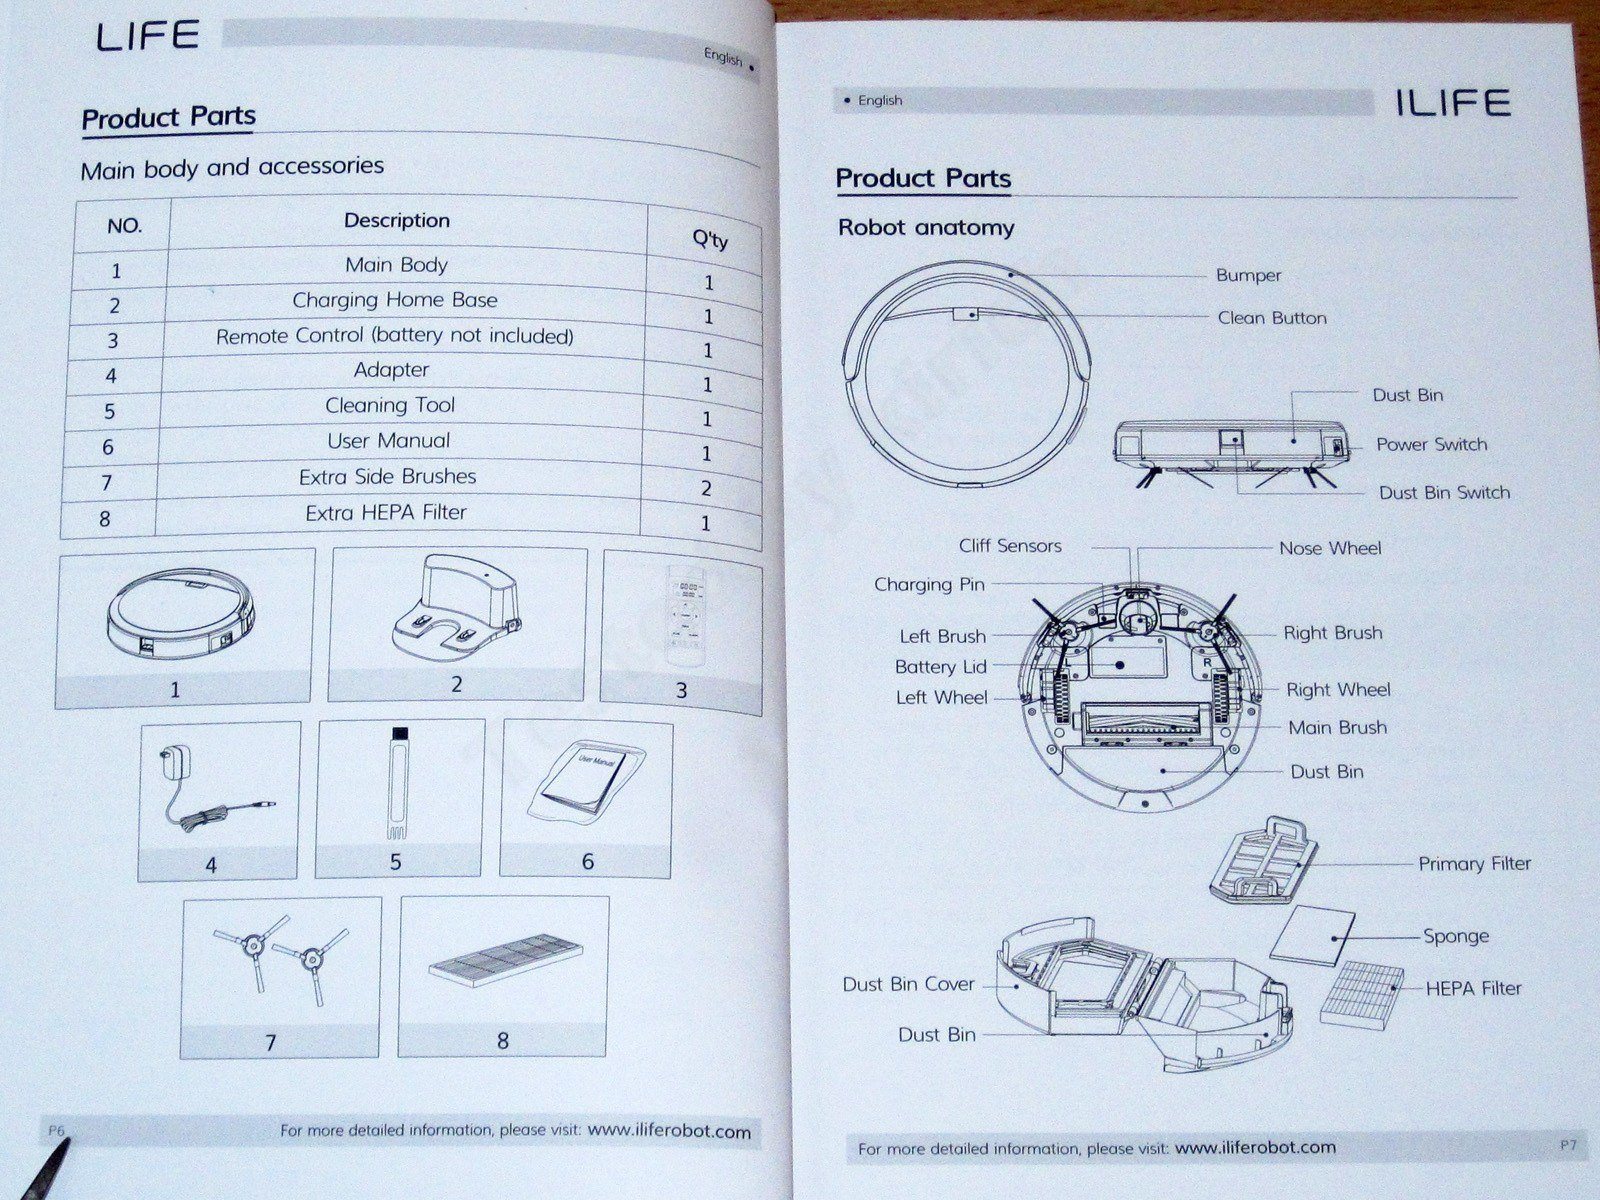
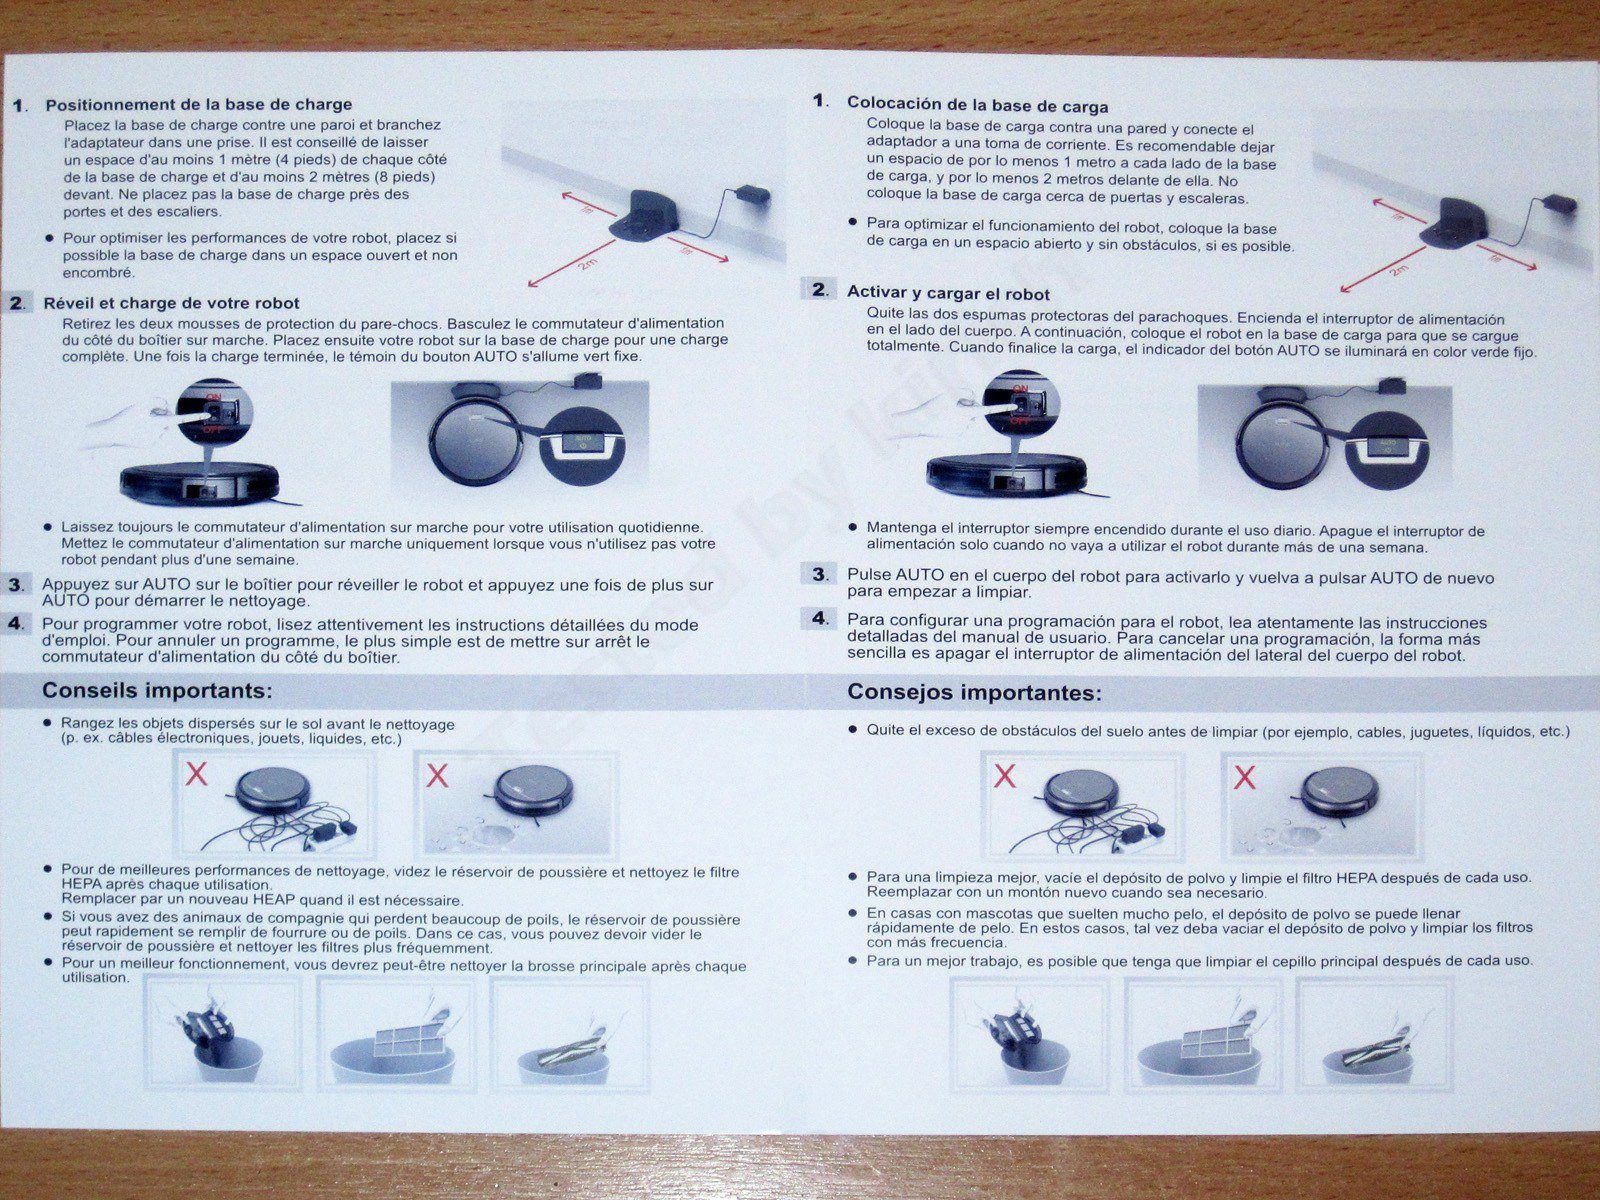
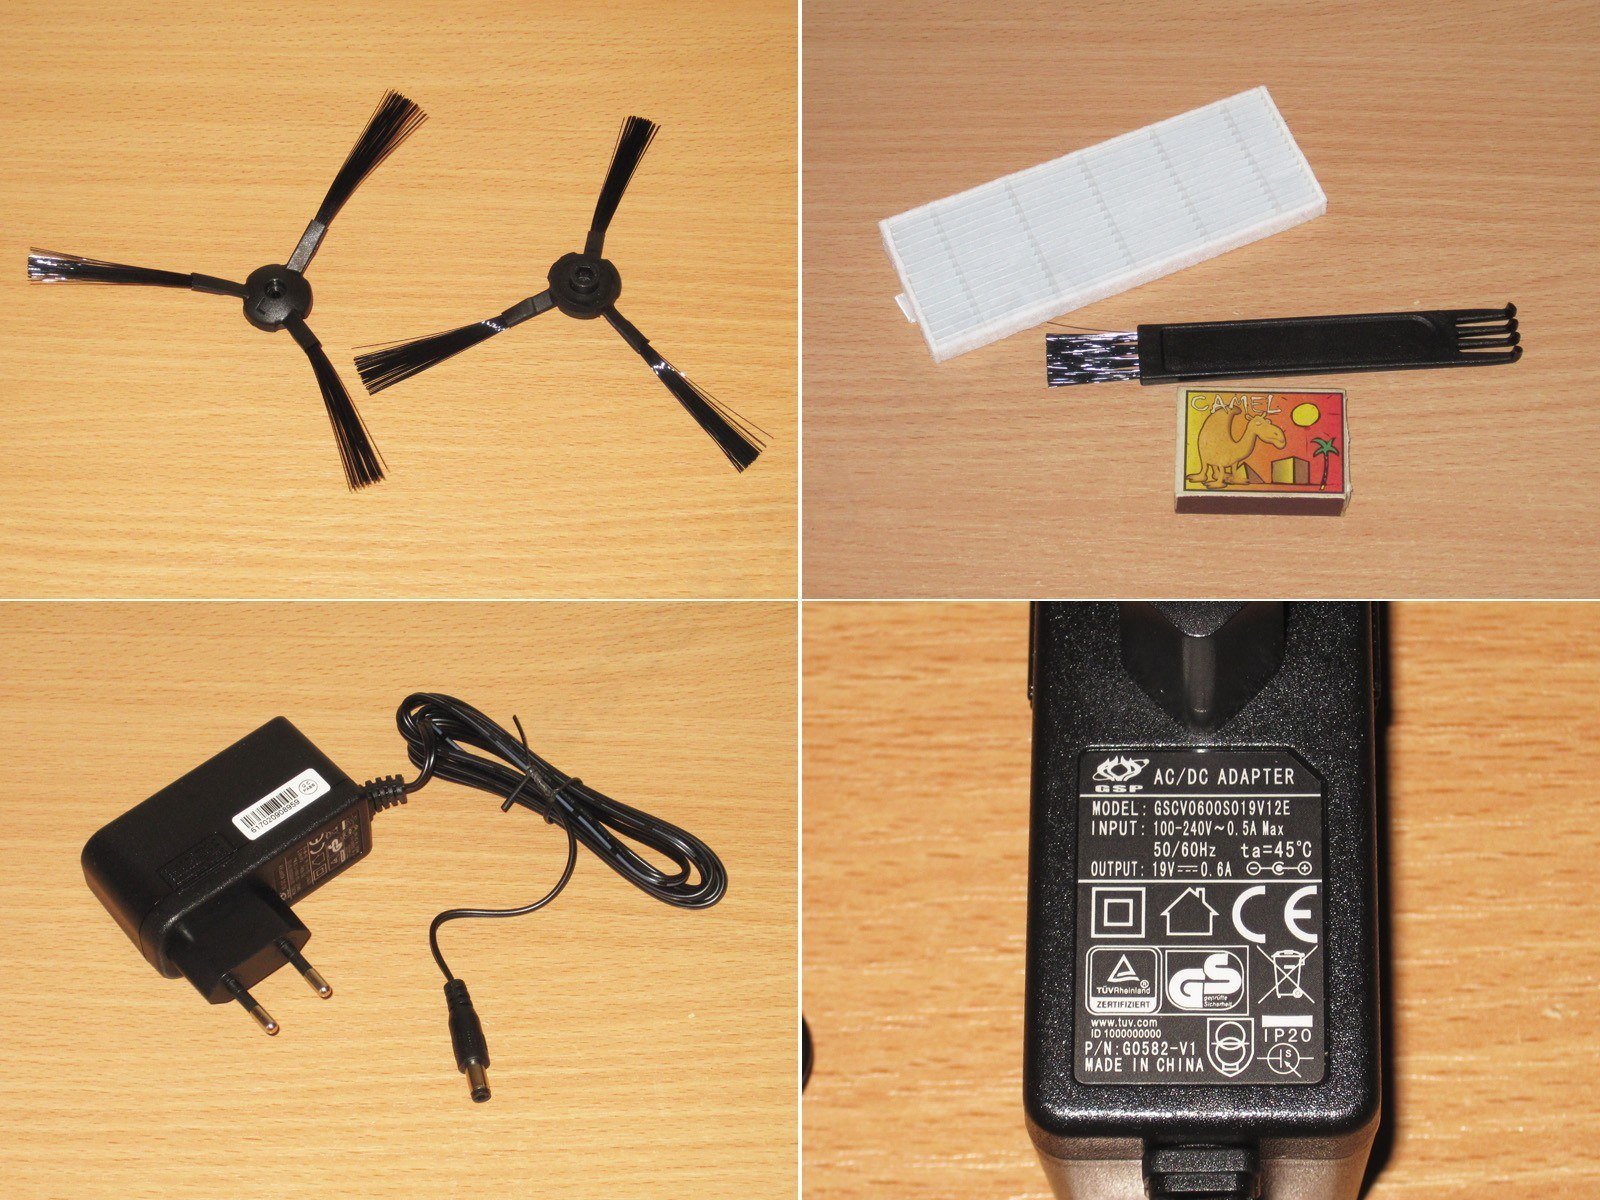
Let me tell you a little about what came in the box.
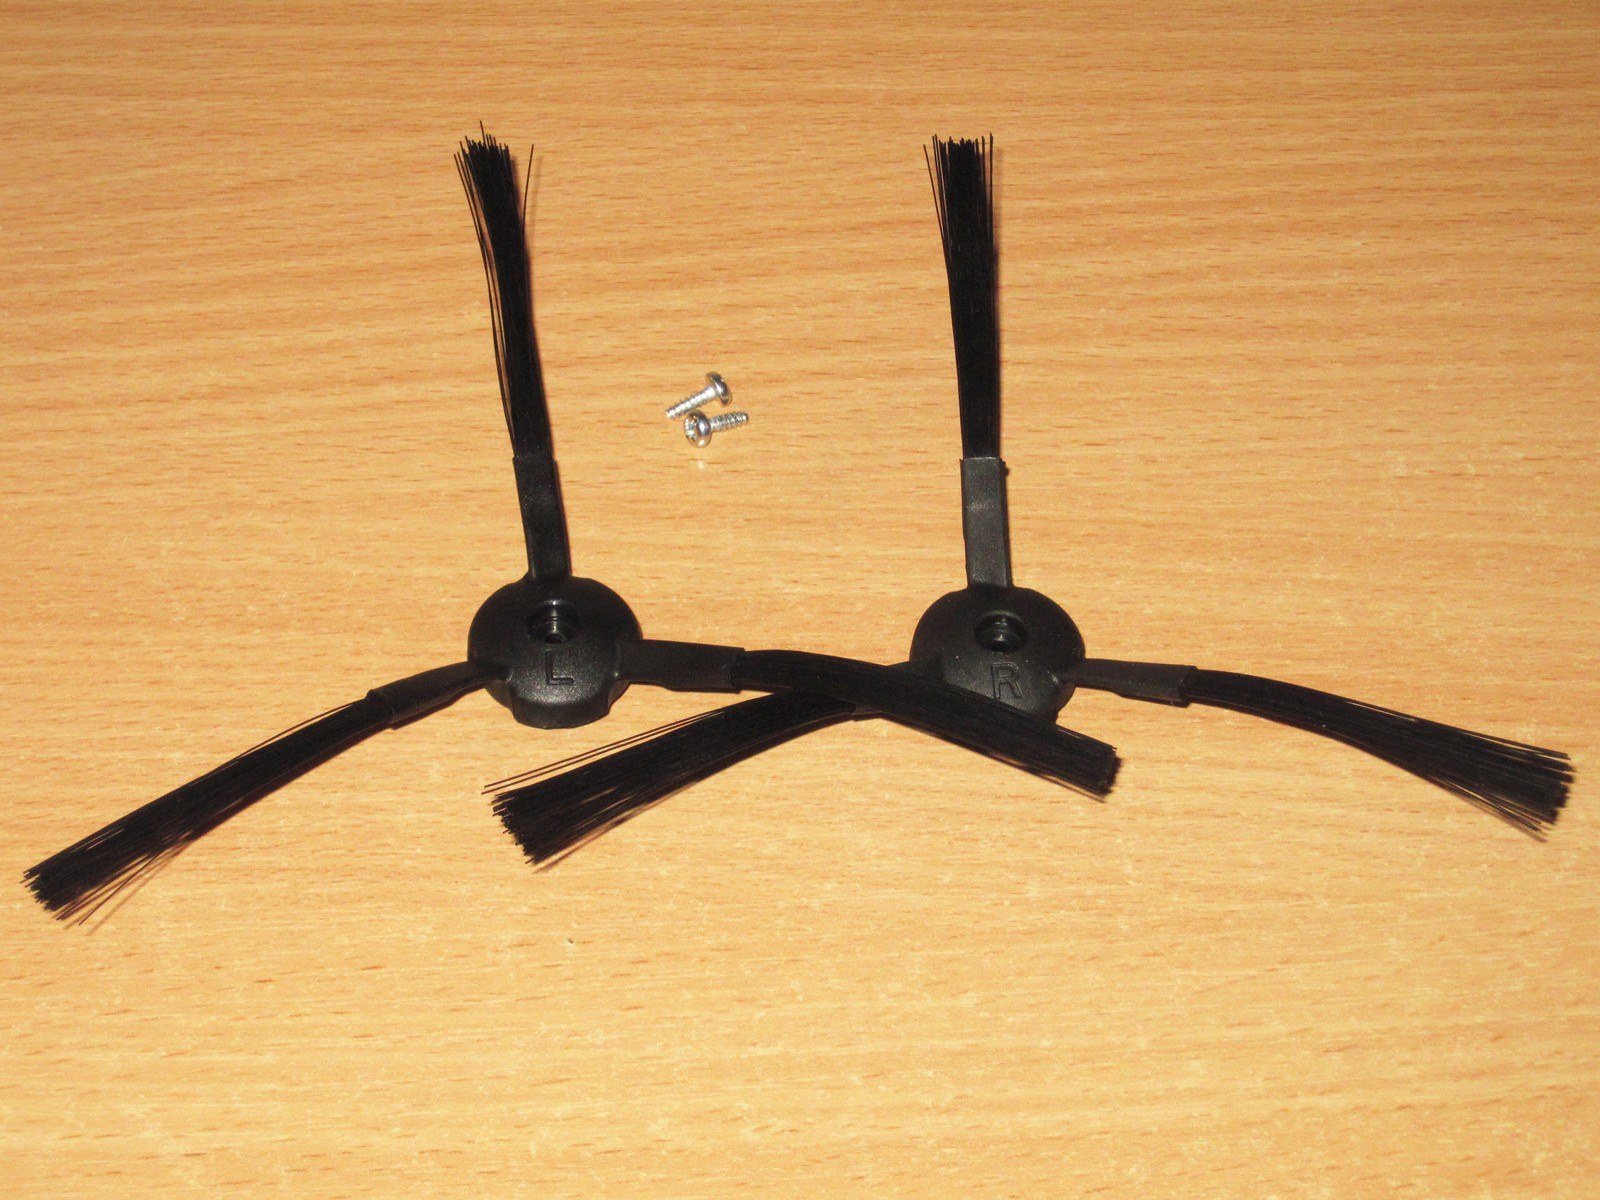
1. Two brushes, supplied as a pair because the left and right brushes are different. They are marked L and R accordingly. The design is flexible, apparently for the safety of both objects and the vacuum itself.
2. A spare filter and a brush for cleaning the mechanism and dust bin.
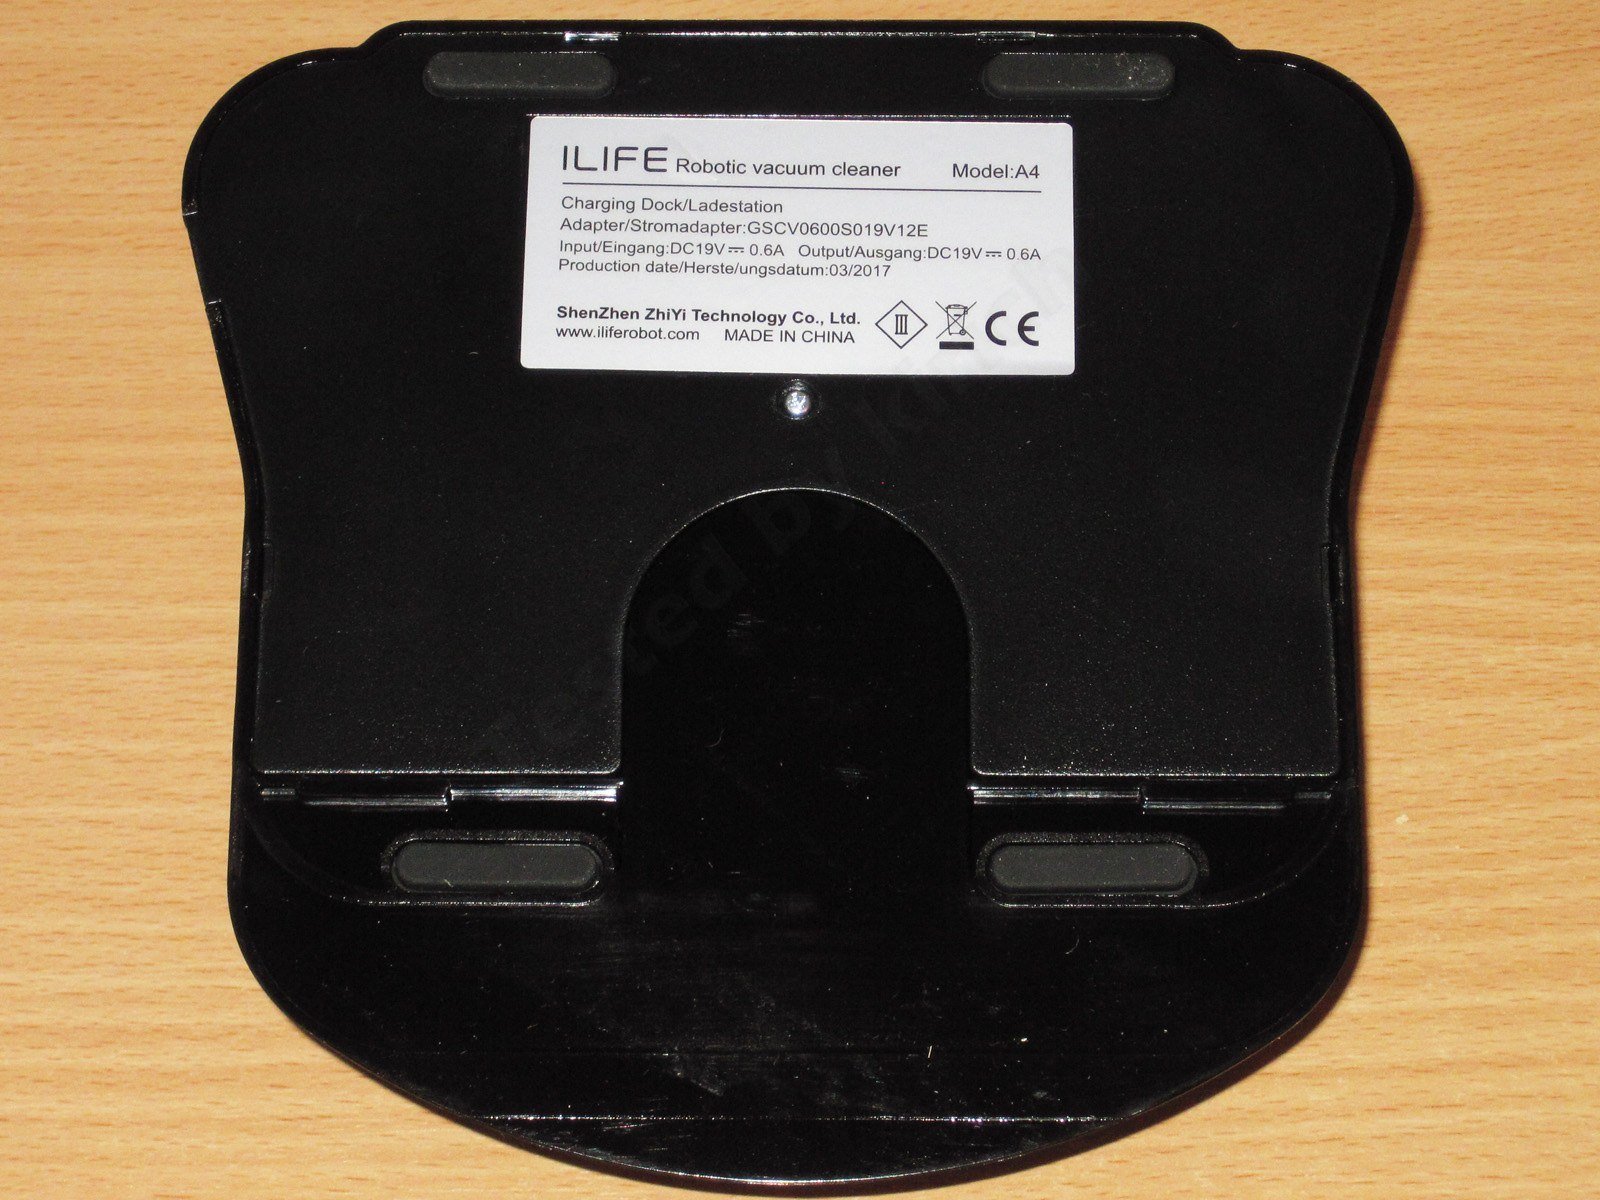
3, 4. A power supply with a European plug, rated for 19 V and up to 0.6 A. I didn't take it apart, but even just handling it left me with a good impression. It doesn't get particularly warm during use.
The remote reminded me a bit of an air conditioner remote. But I rarely see dual LEDs in remotes.
It was also unusual to find batteries included—and quite new ones, with an expiration date in 2020. Products usually don't come with batteries because of certain restrictions.
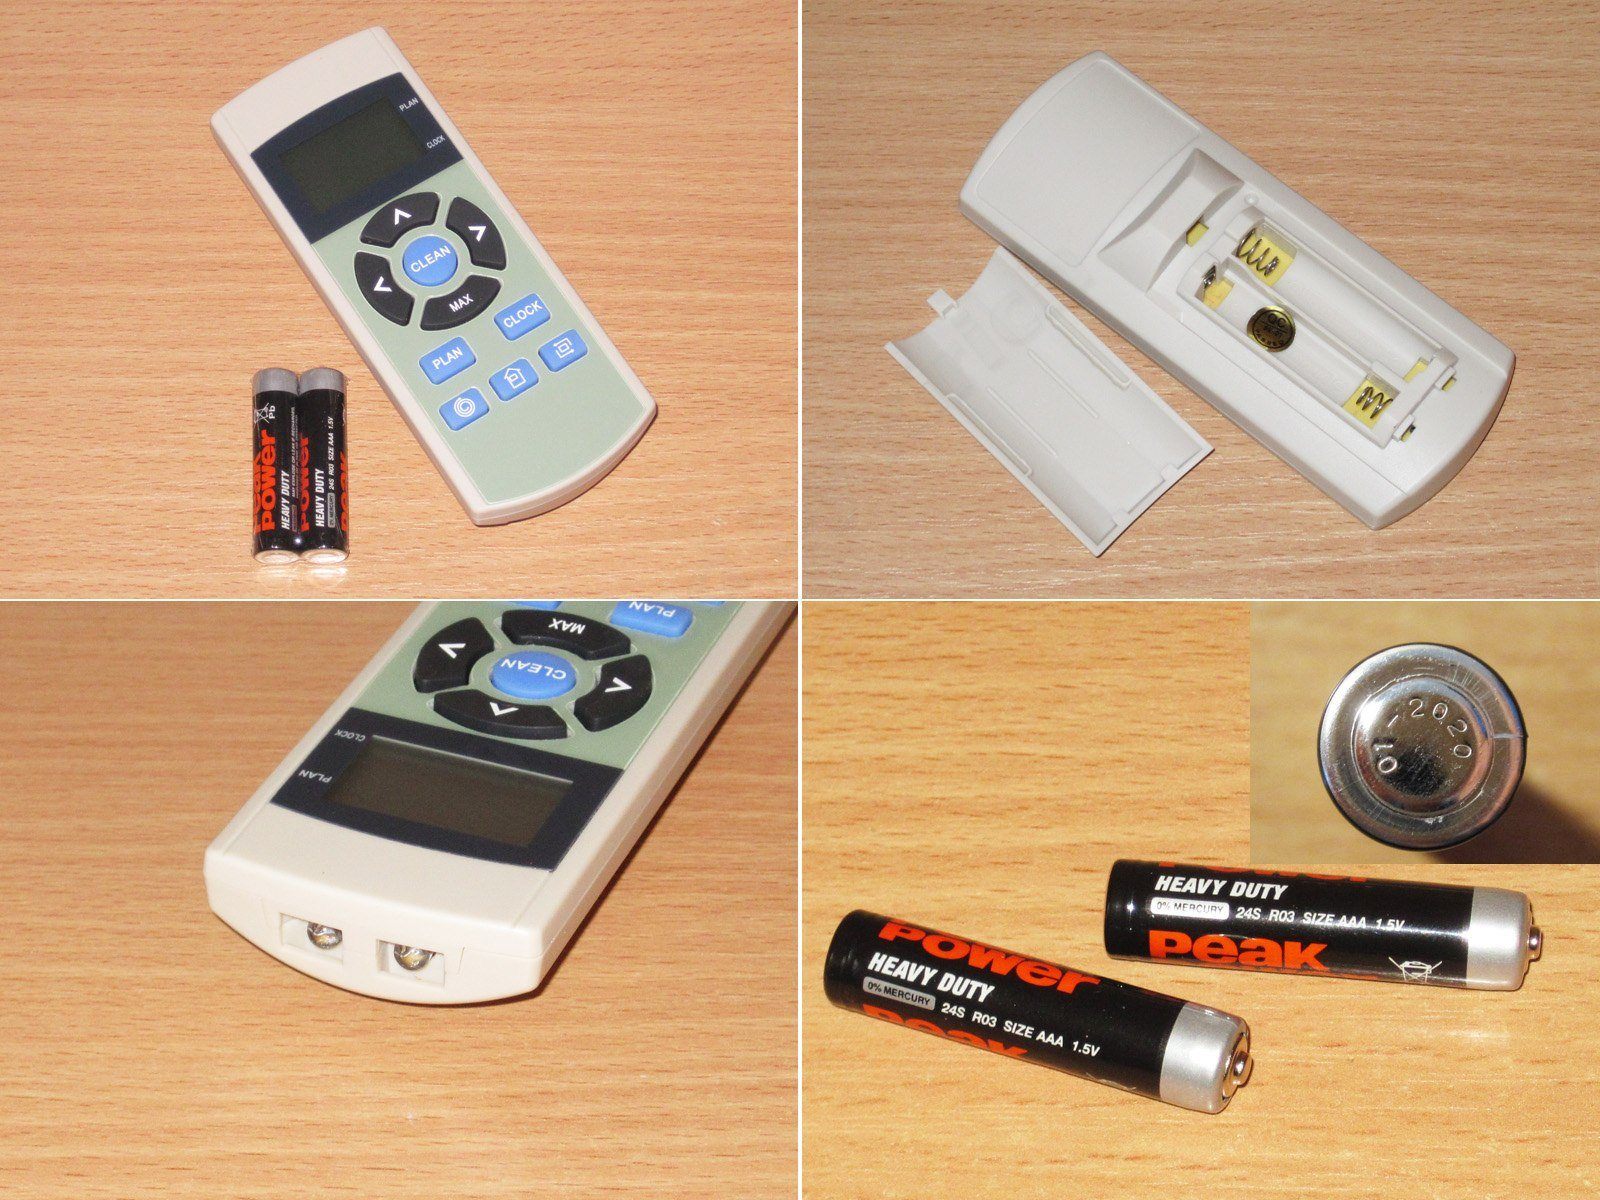
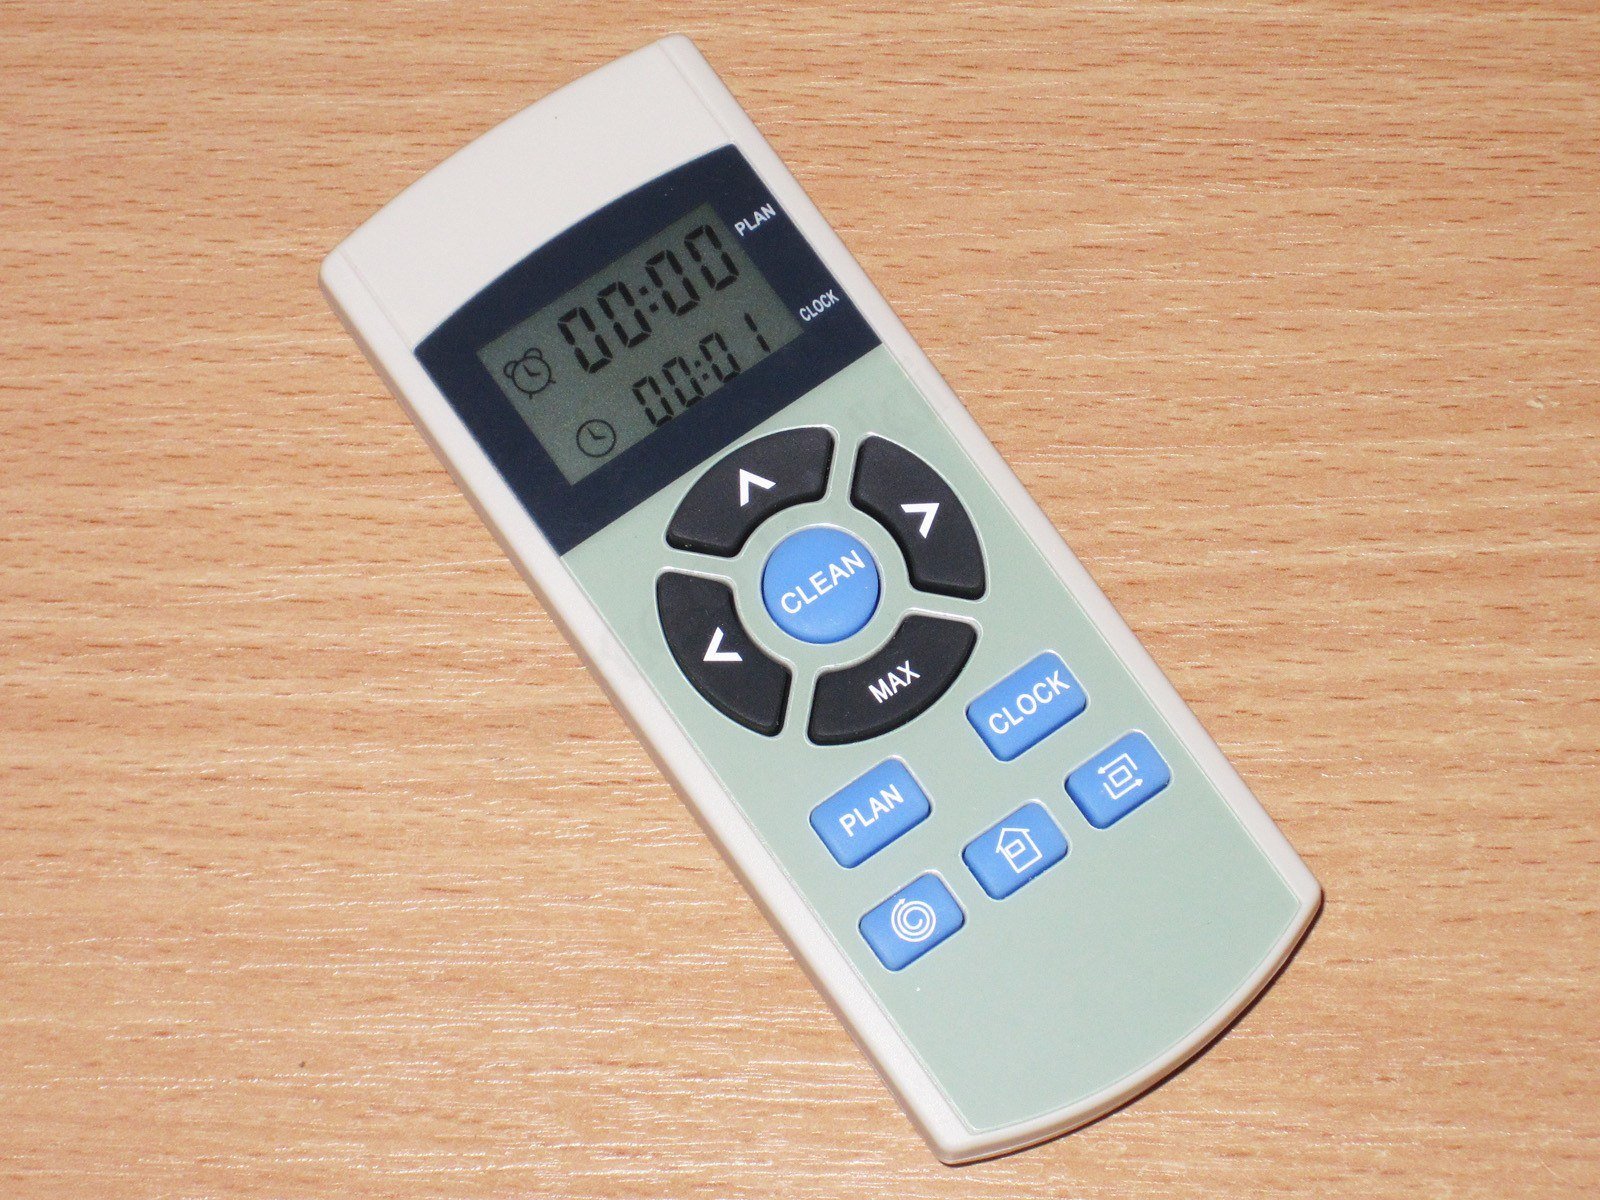
There is an LCD at the top of the remote, showing the scheduled start time as well as the current time.
Below it are three navigation buttons for setting the time, and a MAX button that switches to higher suction power. This mode is recommended for carpets and floor coverings.
The button in the center starts automatic cleaning. In this mode, the vacuum moves around the room in a more or less random pattern.
The Plan and Clock buttons set the scheduled start time and the current time, respectively.
The three buttons at the bottom activate spot cleaning, automatic return to the charging base, and edge cleaning around the room.
Since the vacuum is battery-powered, it comes with this charging base. To charge, the vacuum simply drives onto it and starts charging.
The manual recommends placing it with at least a meter of clear space on either side and a full two meters in front. In practice, I found that while the two-meter clearance is right, you can safely reduce the space on the left and right to as little as 30 cm.
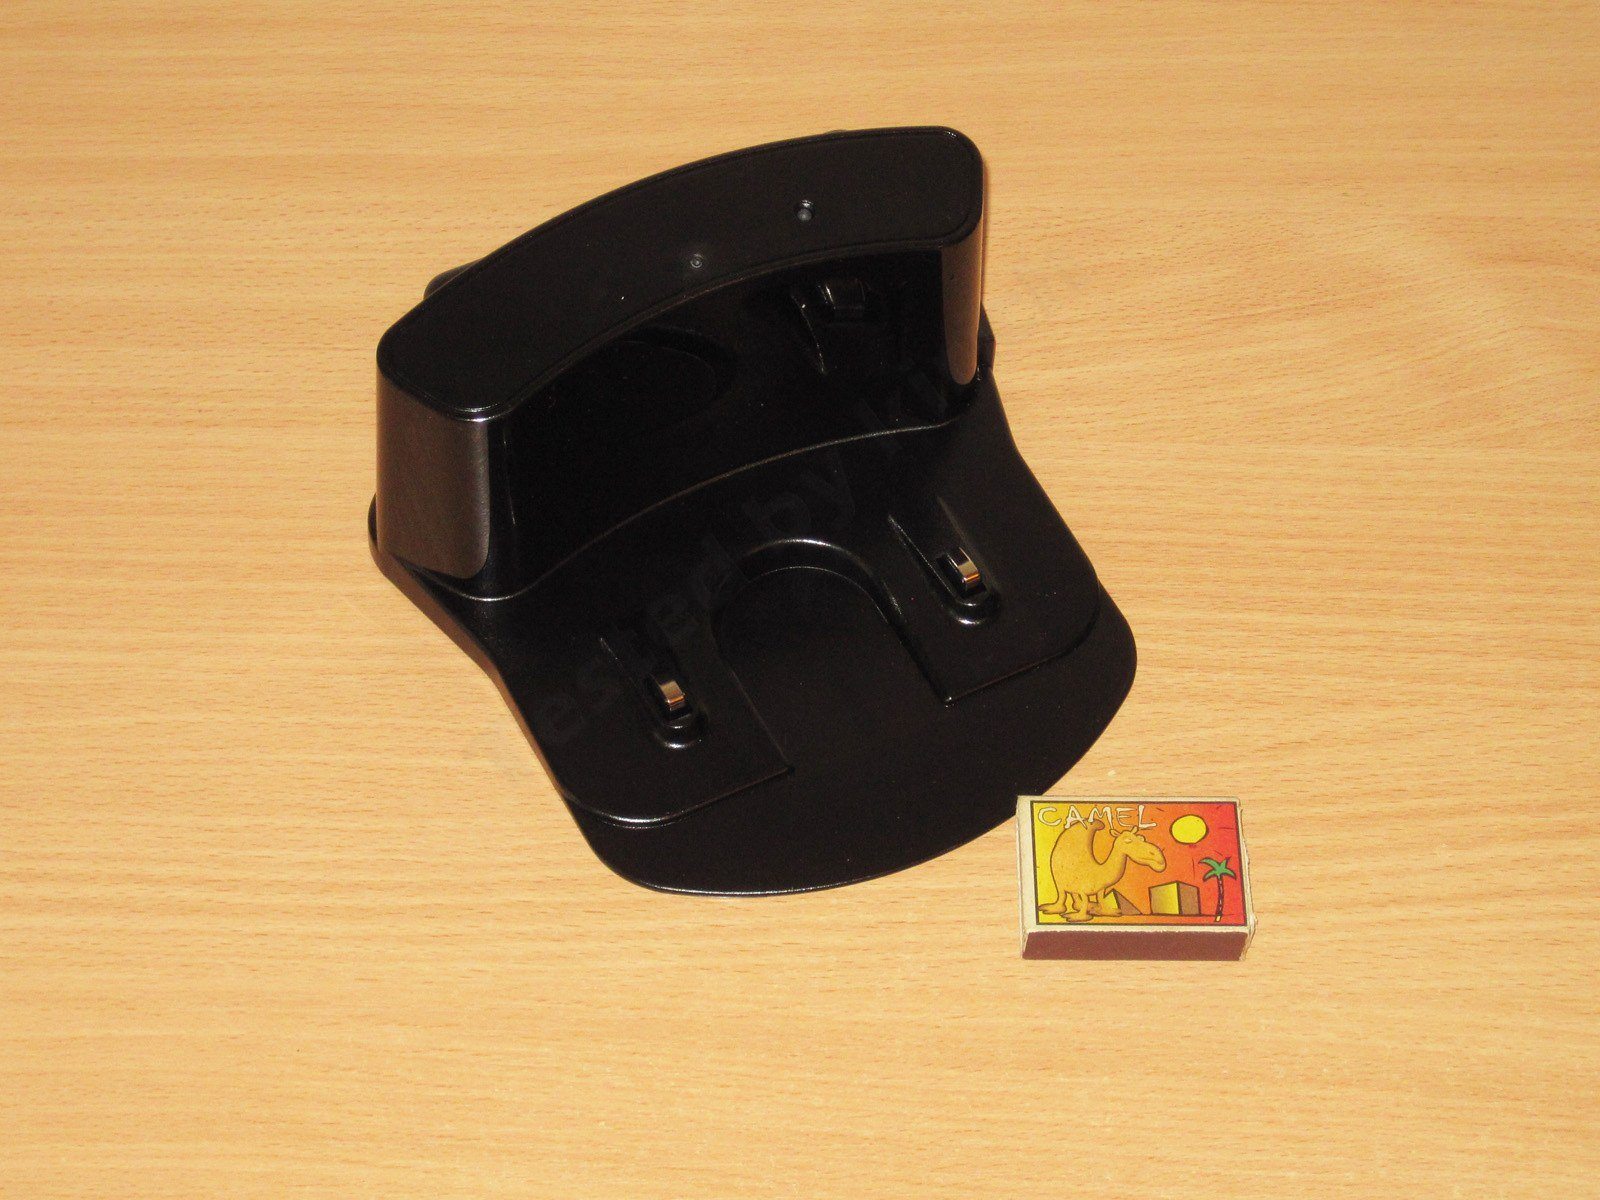
There are two spring-loaded charging contacts on the bottom. The power supply connector is on the side, and an LED indicating that the base is powered is on top. Charging-complete indication is provided by the button's backlight.
I didn't include a separate photo of the power indicator LED for no reason. Despite the otherwise neat finish, I noticed a mold line running right down the center of the charging base. It's a small thing, but it detracts a little from the overall impression.

Rubber feet and general information on the bottom.
A little about the charging base's internals.
It's very awkward to take apart: one screw and four tight clips.
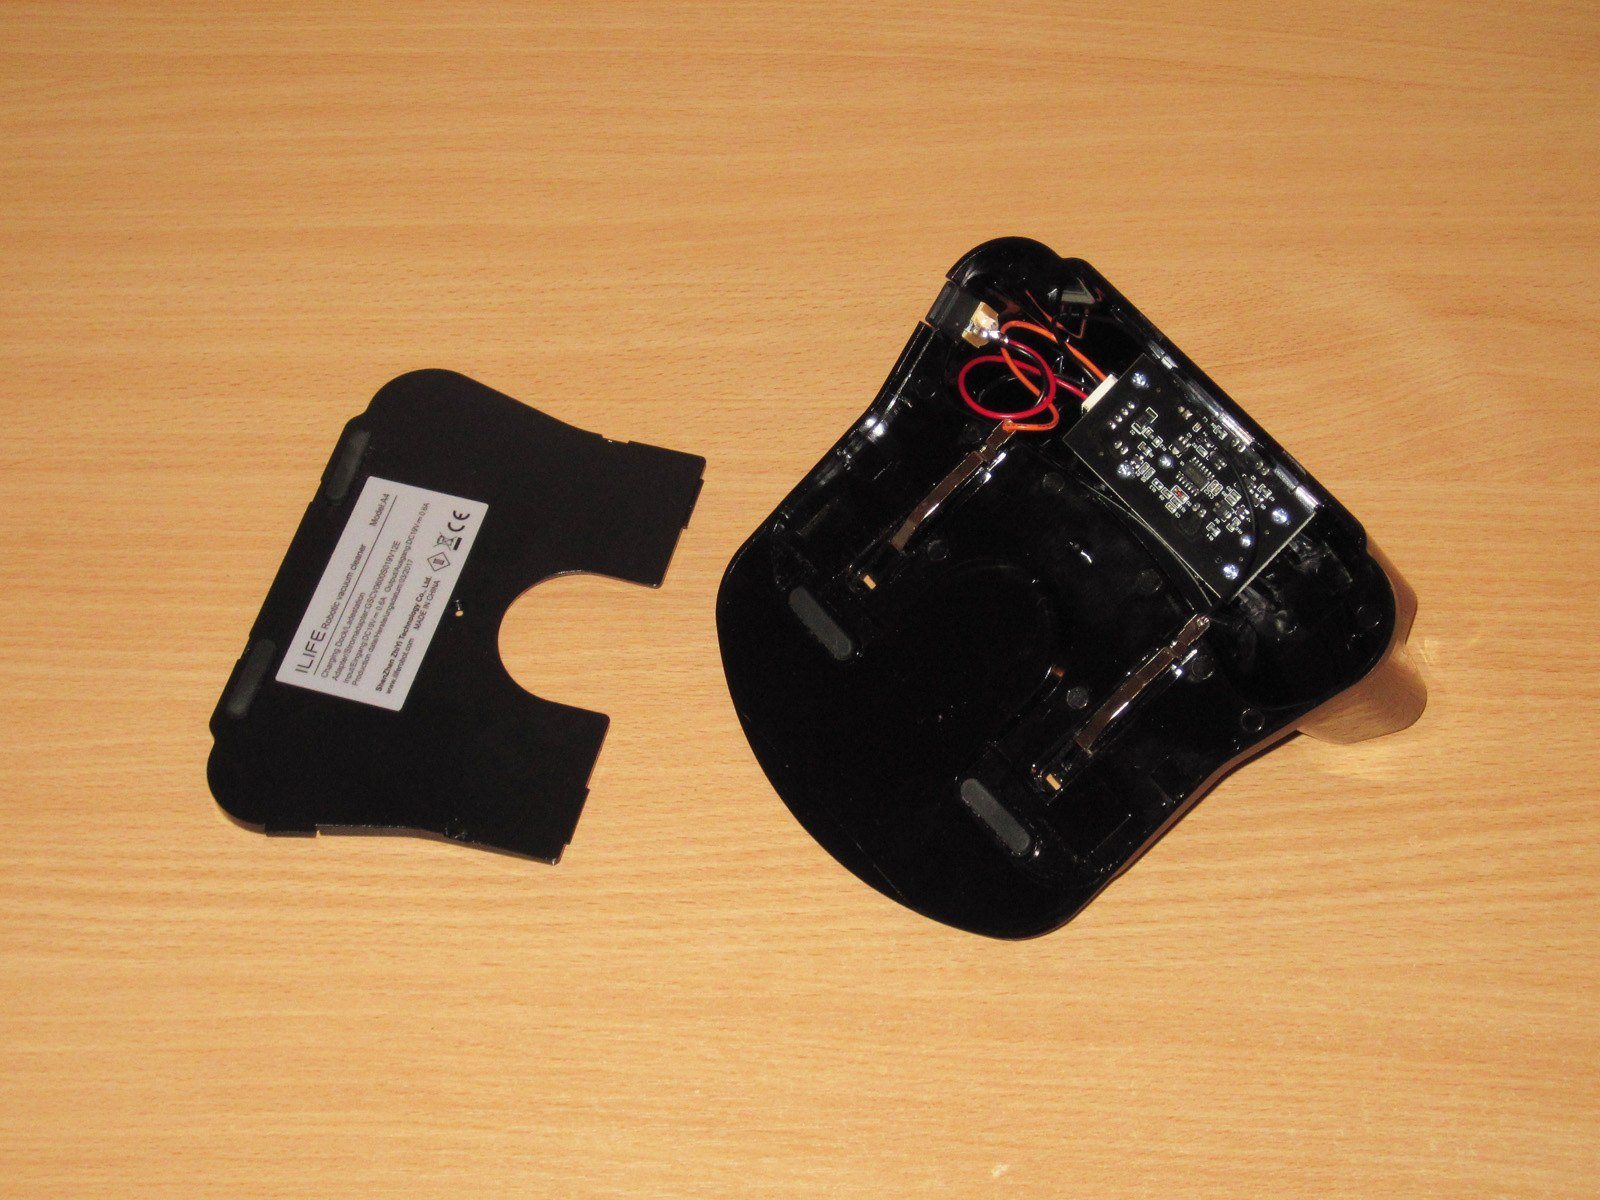
Inside is a control board. More precisely, it's a “beacon” that the vacuum heads for when it's “hungry.”
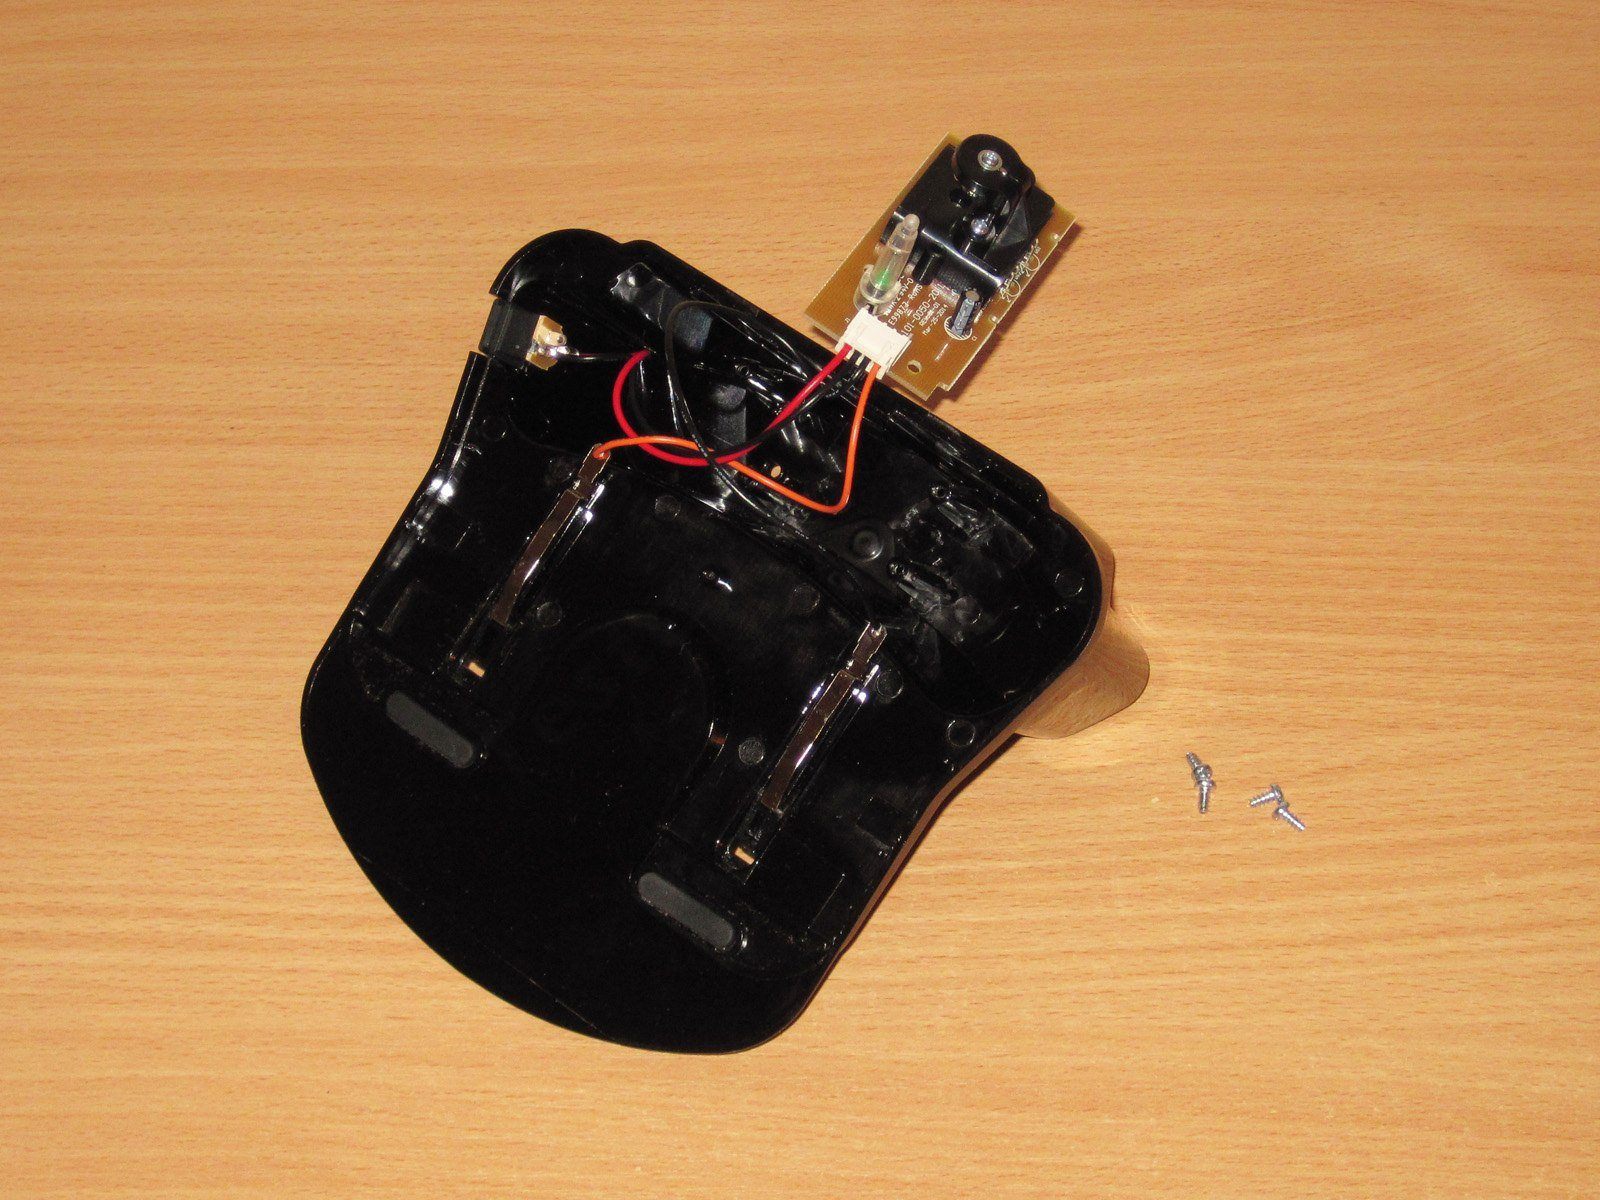
Most of the board is taken up by a multichannel emitter in a plastic housing. A pair of LEDs can be seen at the back.
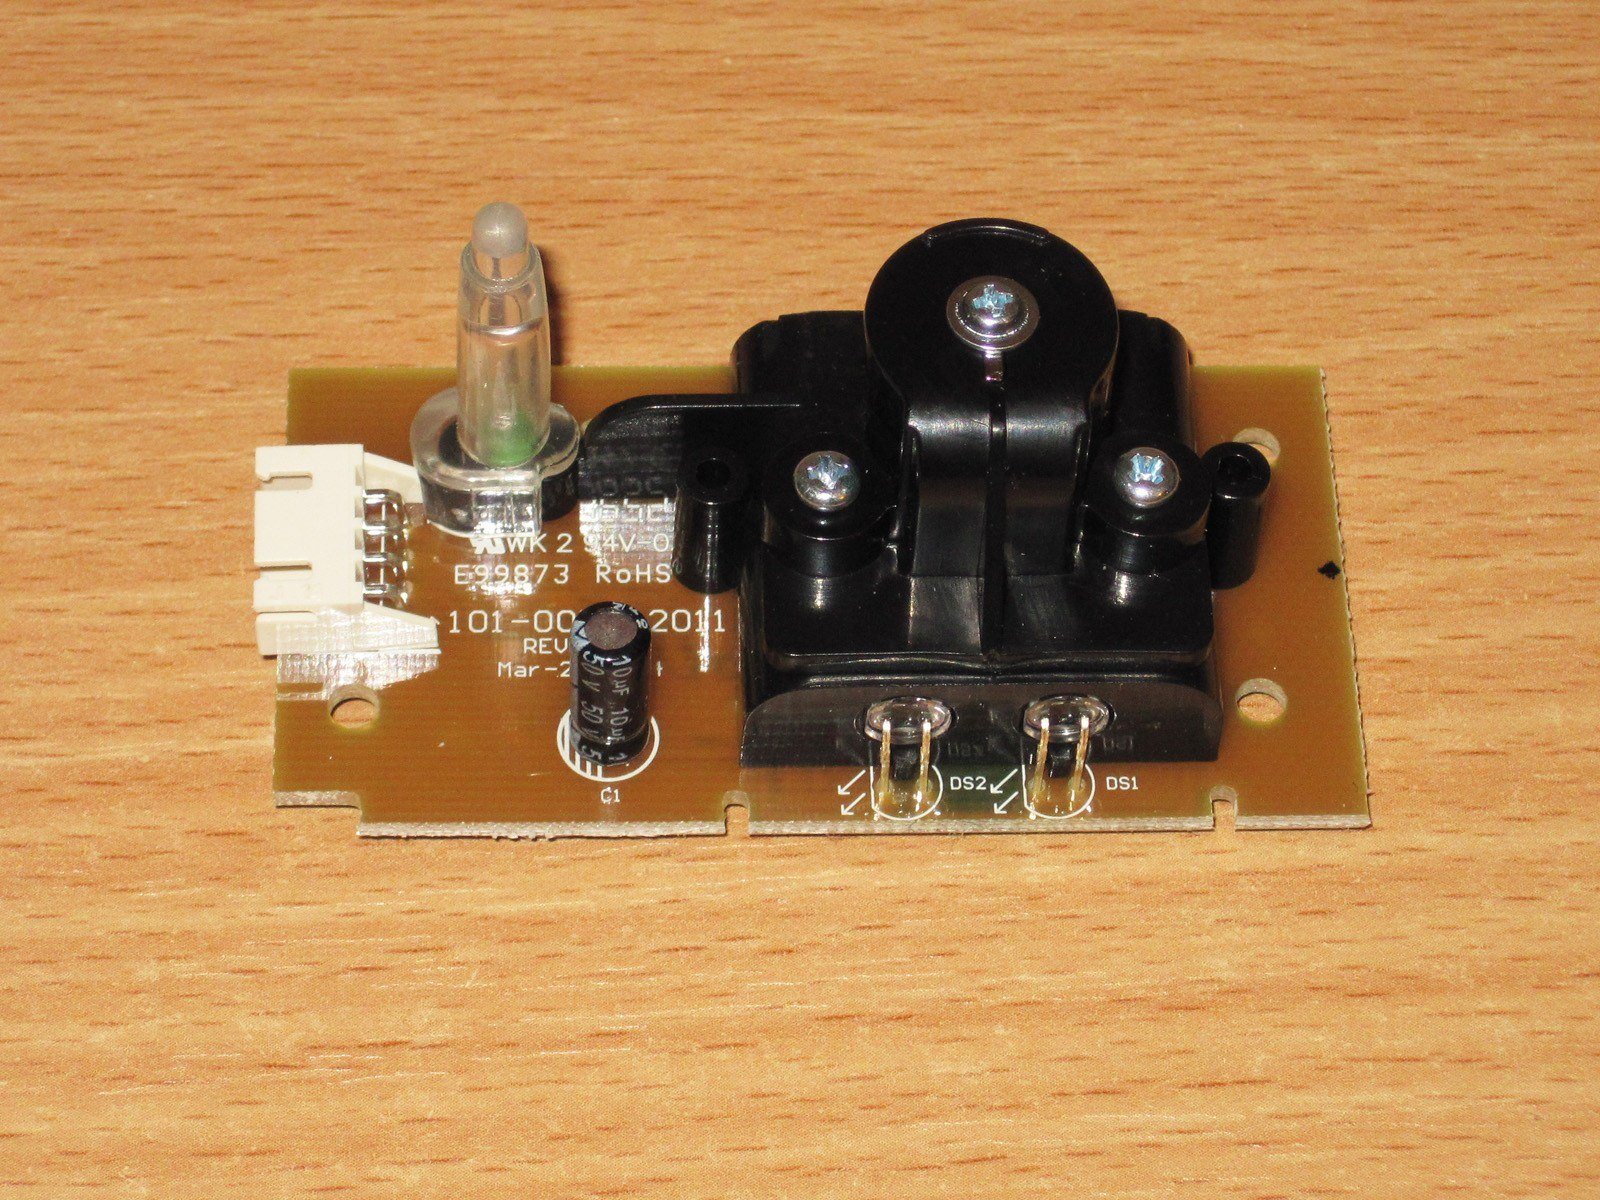
At the front are the emitter windows and a circular mirror.
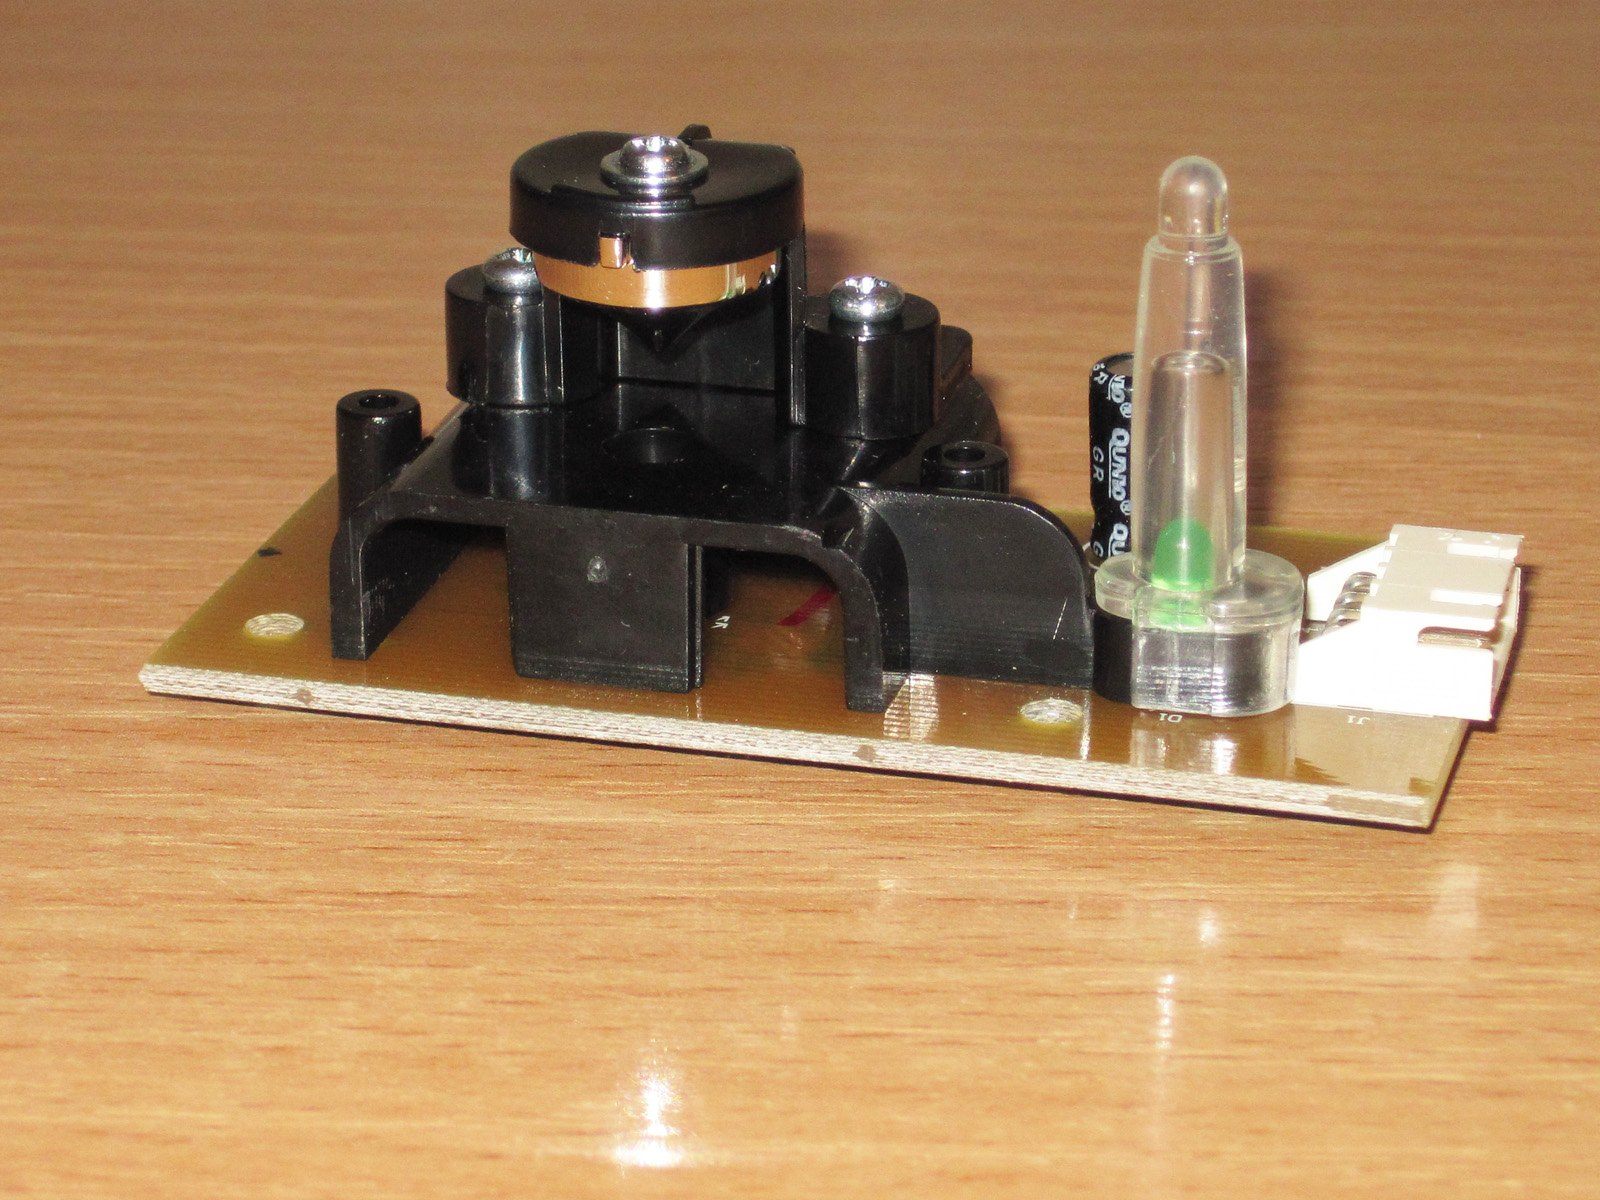
The system is fairly simple. One of the IR LEDs shines up at the circular mirror from below. For the vacuum, this is a landmark that says, “The base is somewhere around here.”
There are another pair of LEDs farther inside, but their light is directed into two beams. I assume their modulation is different as well.
The vacuum first detects the general signal and moves toward it. As soon as it picks up the signal from the directional LEDs, it crawls toward them. There are two beams, and it keeps trying to move in a way that lets it see both. That's how the automatic return-to-base system works.
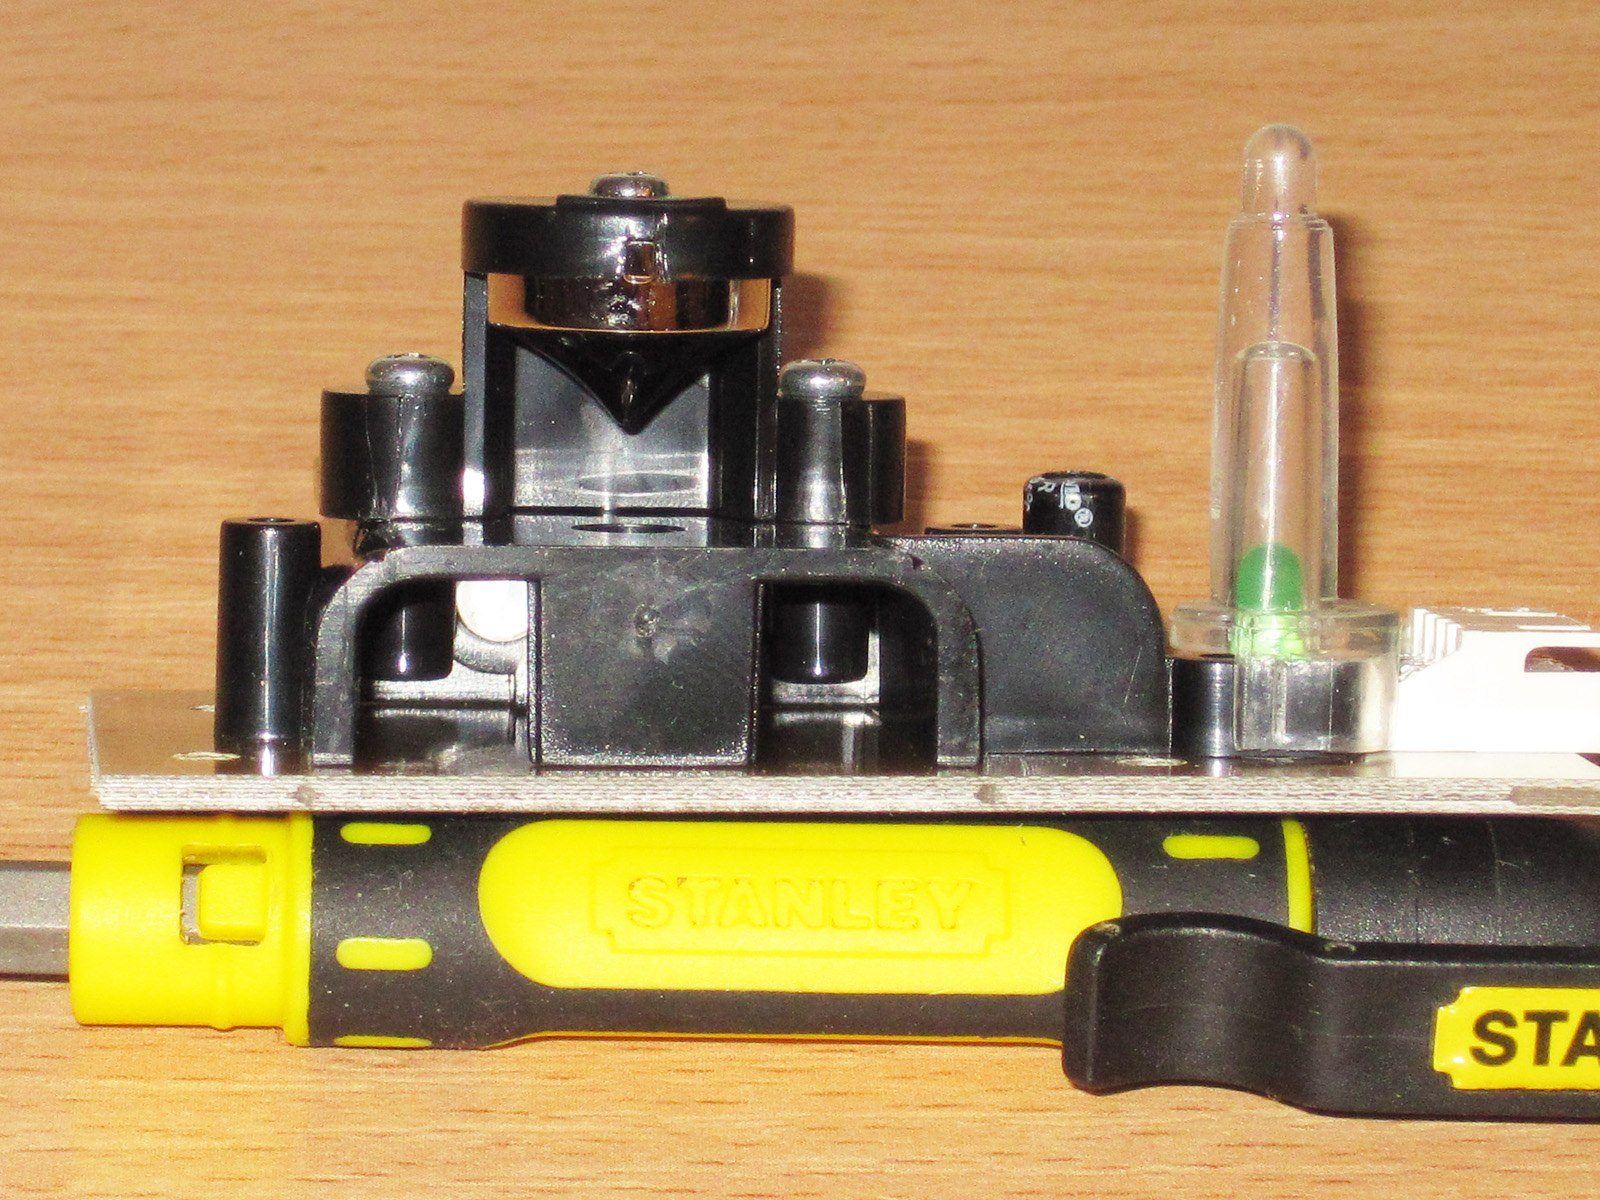
There's nothing particularly interesting on the bottom, just a small, neatly made board.

And here's the handsome fellow himself. There was a protective film stuck to the top, which I removed right away because it looked noticeably worse with it on.
The vacuum's design is tablet-shaped :) It's about 30 cm in diameter and 7.5 cm tall.
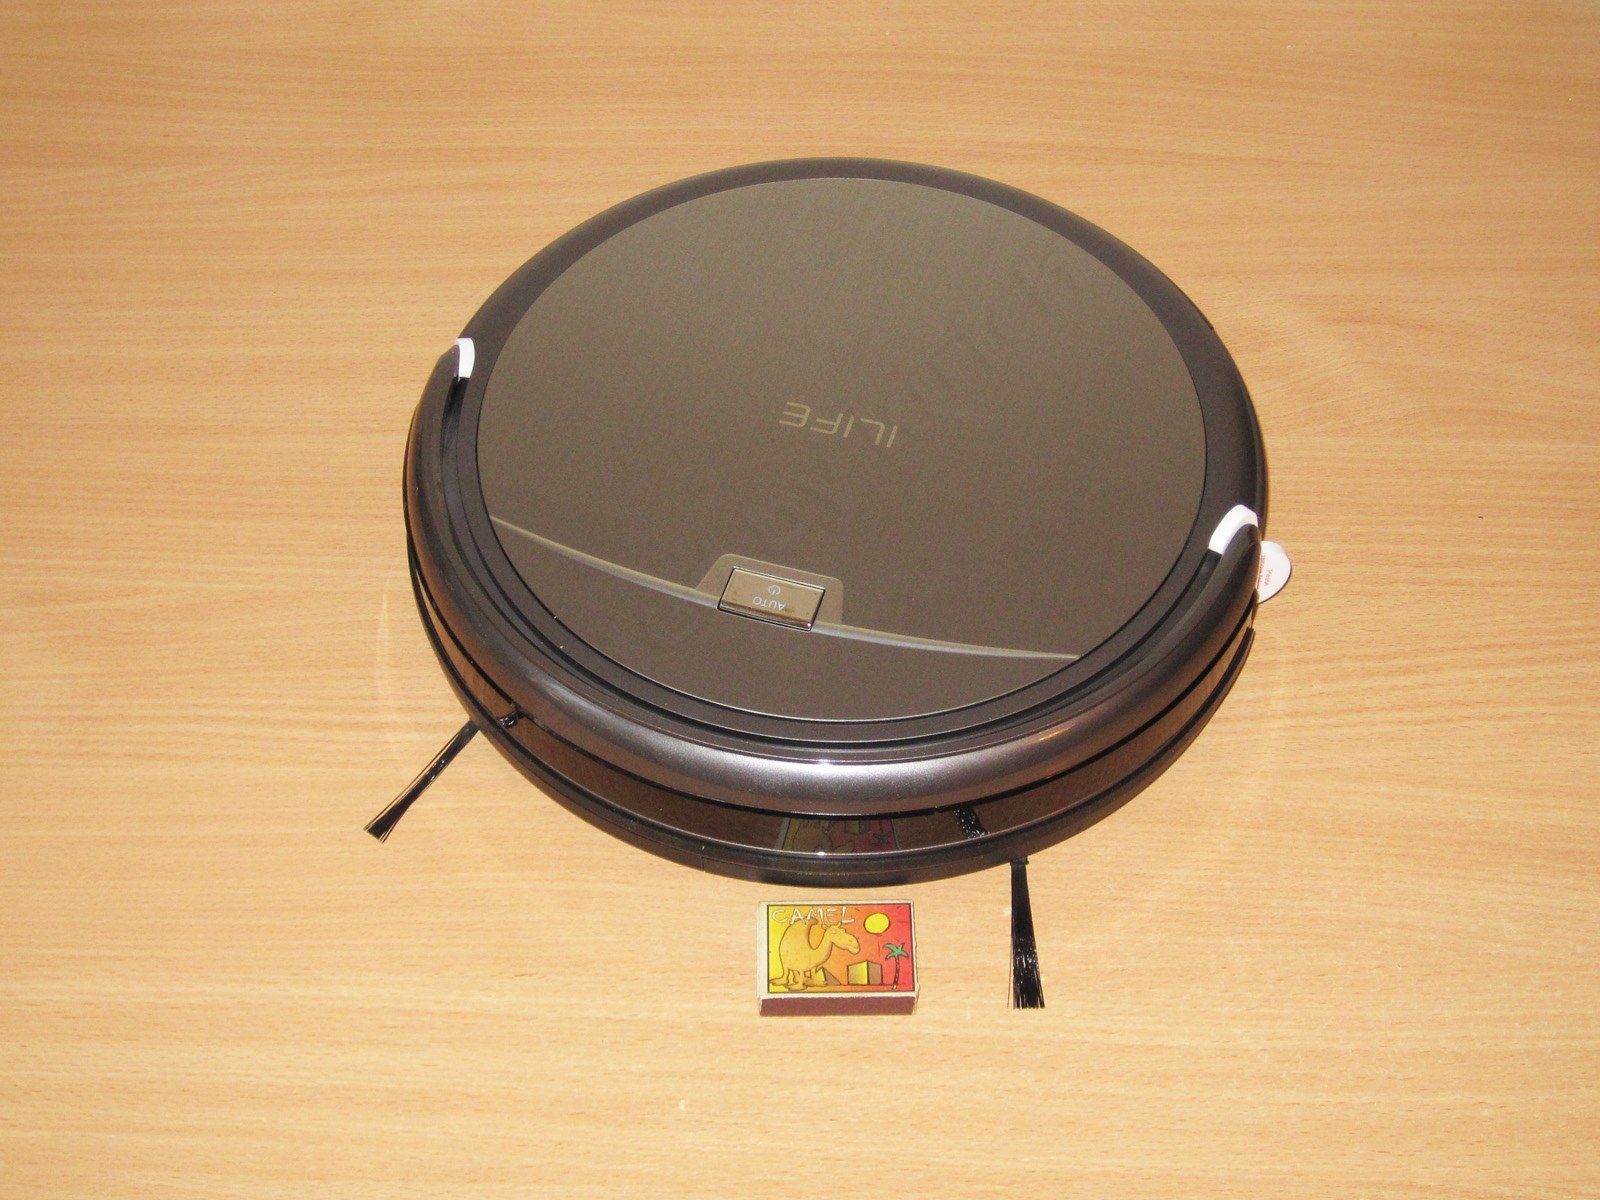
The main control on top of the unit is the power button.
The button lights up in three colors:
Solid green — operating and fully charged when docked.
Flashing green — standby mode
Solid yellow — automatic “parking.”
Flashing yellow — charging
Red — error.
Pressing the button once turns the device on, switching it from off to standby mode. Pressing it again starts the room-cleaning mode.

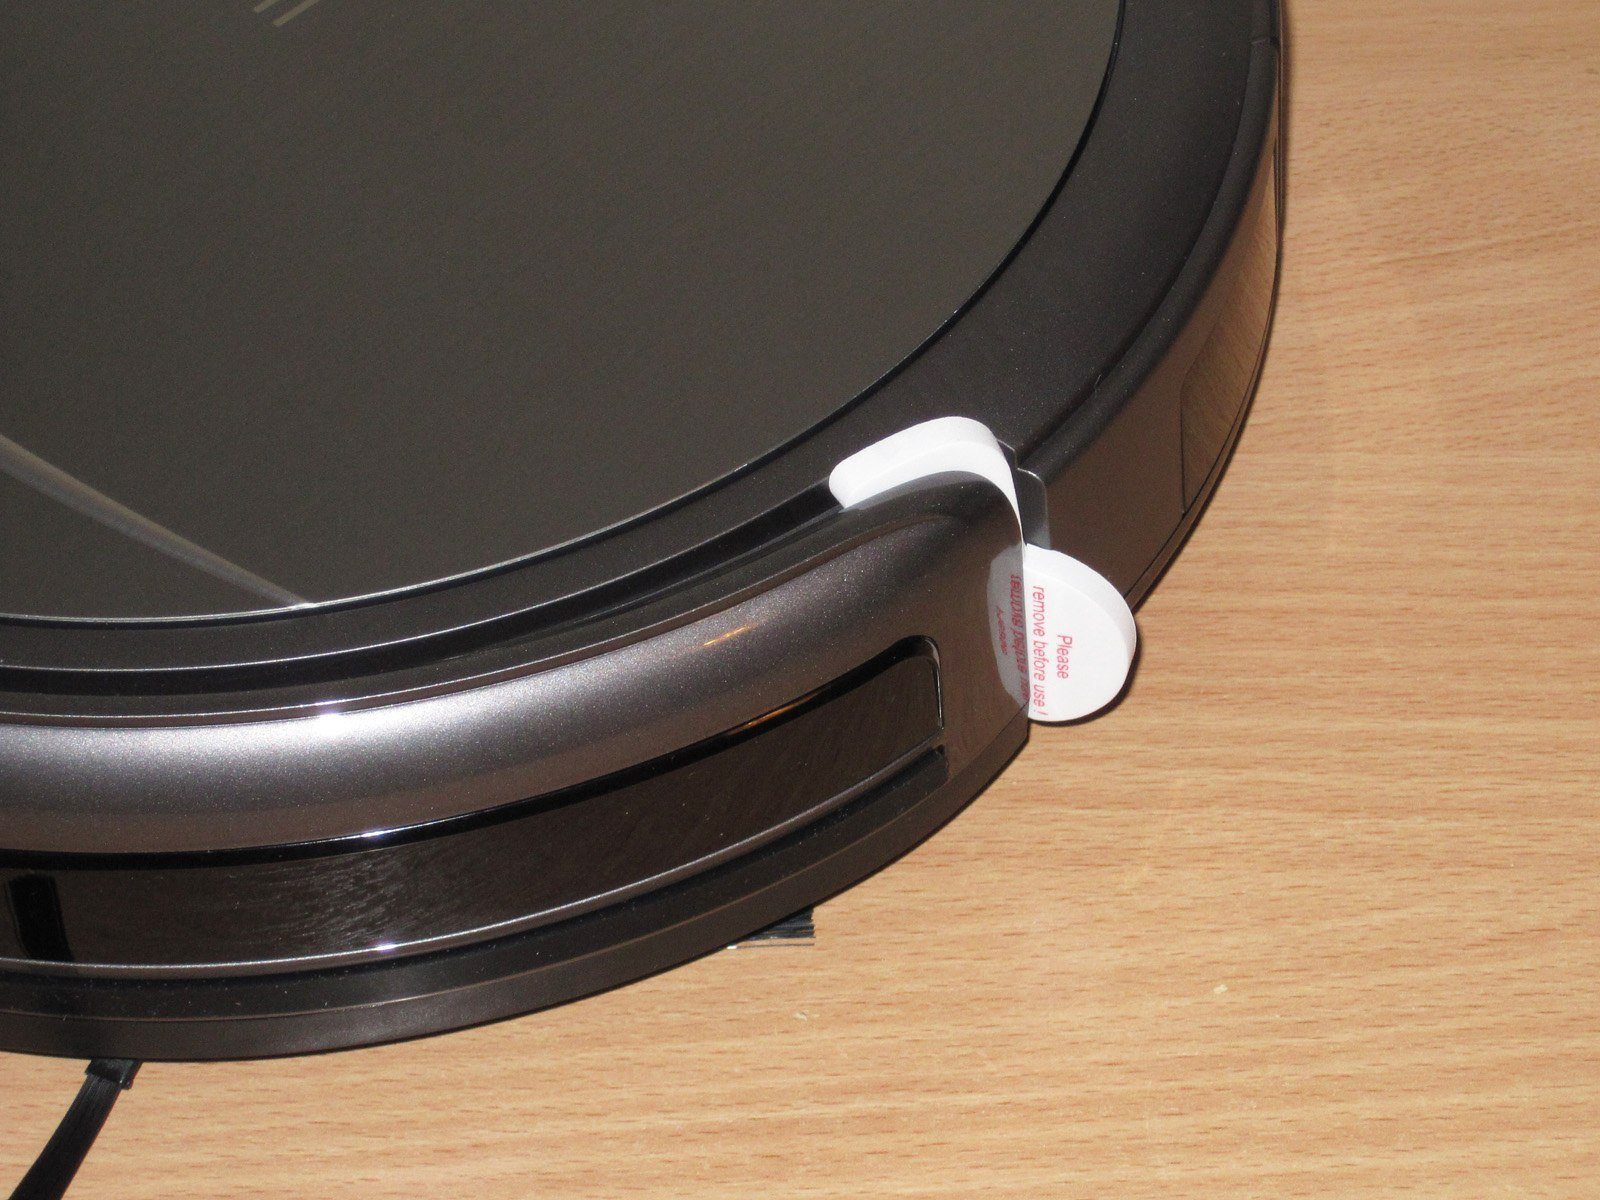
The front section of the housing is hinged. To prevent damage to the mechanism during shipping, spacers are fitted and must be removed before use.
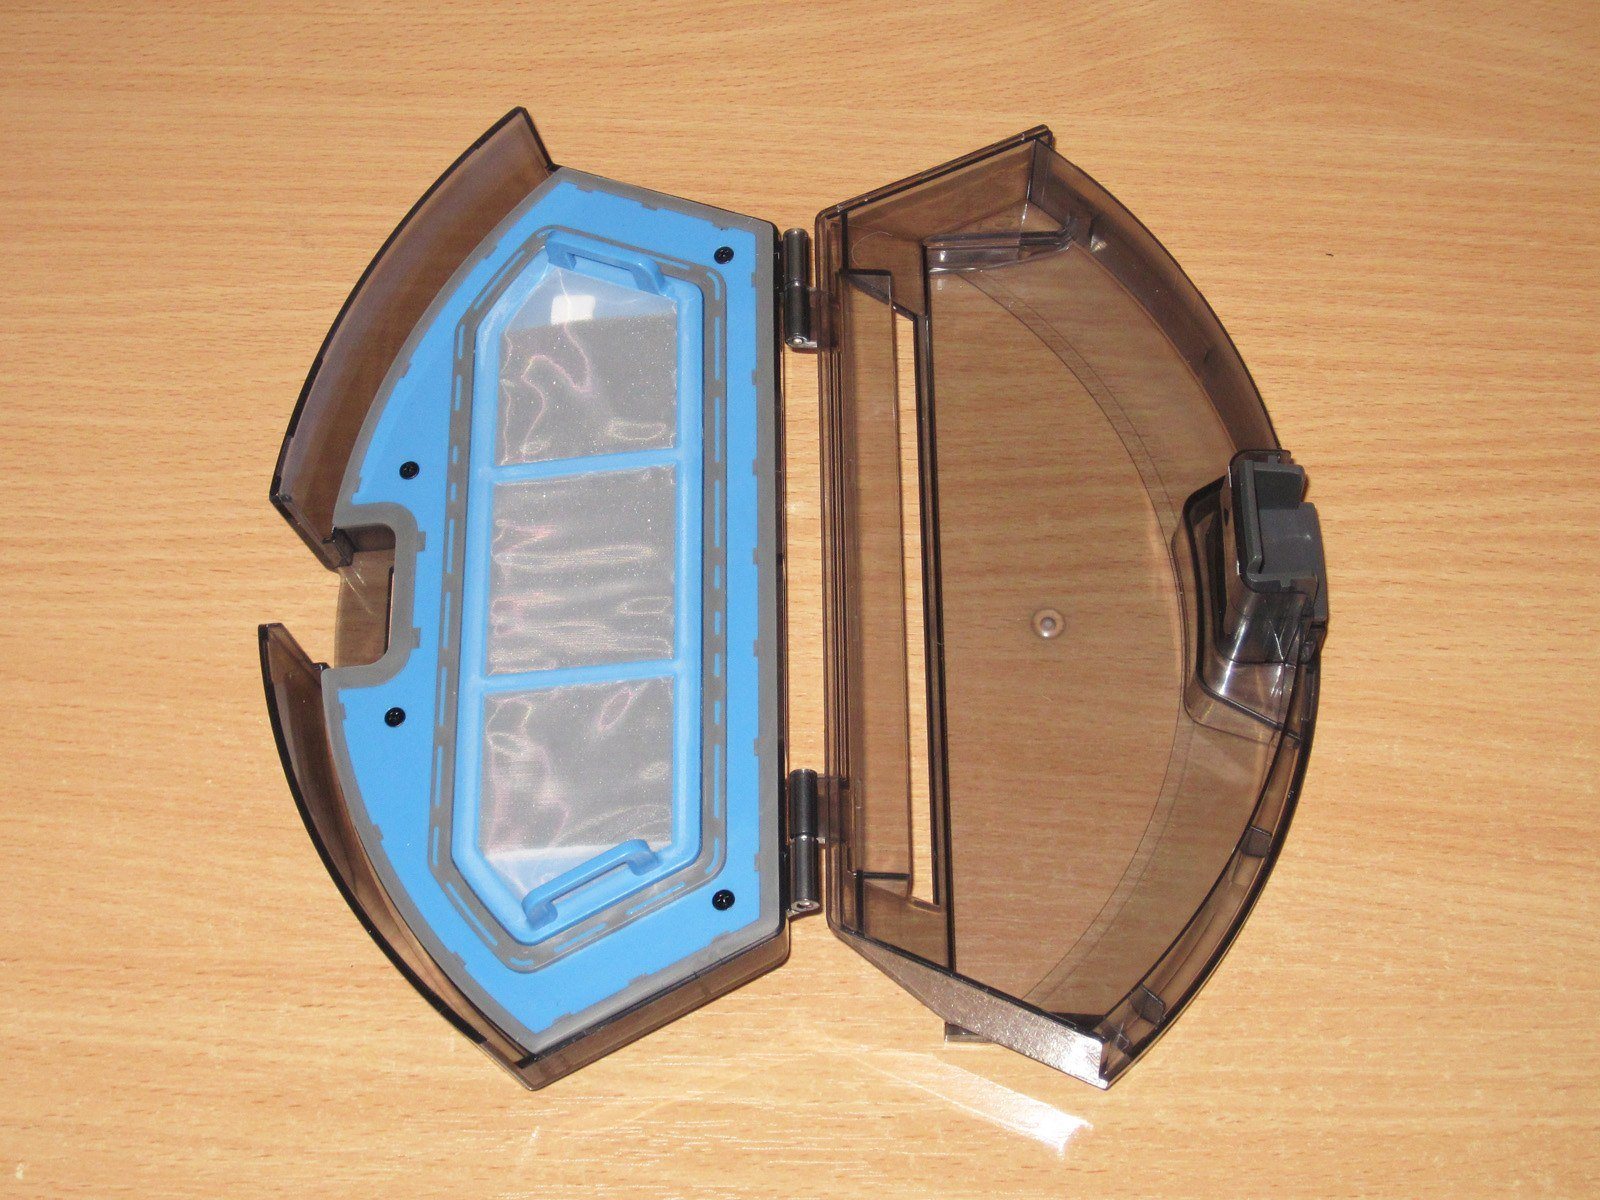
The dust bin is at the back and comes out very easily. To remove it, press down on the button in the middle of the bin housing and pull it out.
The bin isn’t airtight; there’s a large gap at the front, so it’s best to remove a full bin carefully and empty it over a trash bag.

The bin opens very easily, which is both a plus and a minus: you could accidentally spill its contents. A fine air filter sits on top, filtering the air entering the pump turbine.
There’s more to see underneath: brushes, wheels, and sensors.
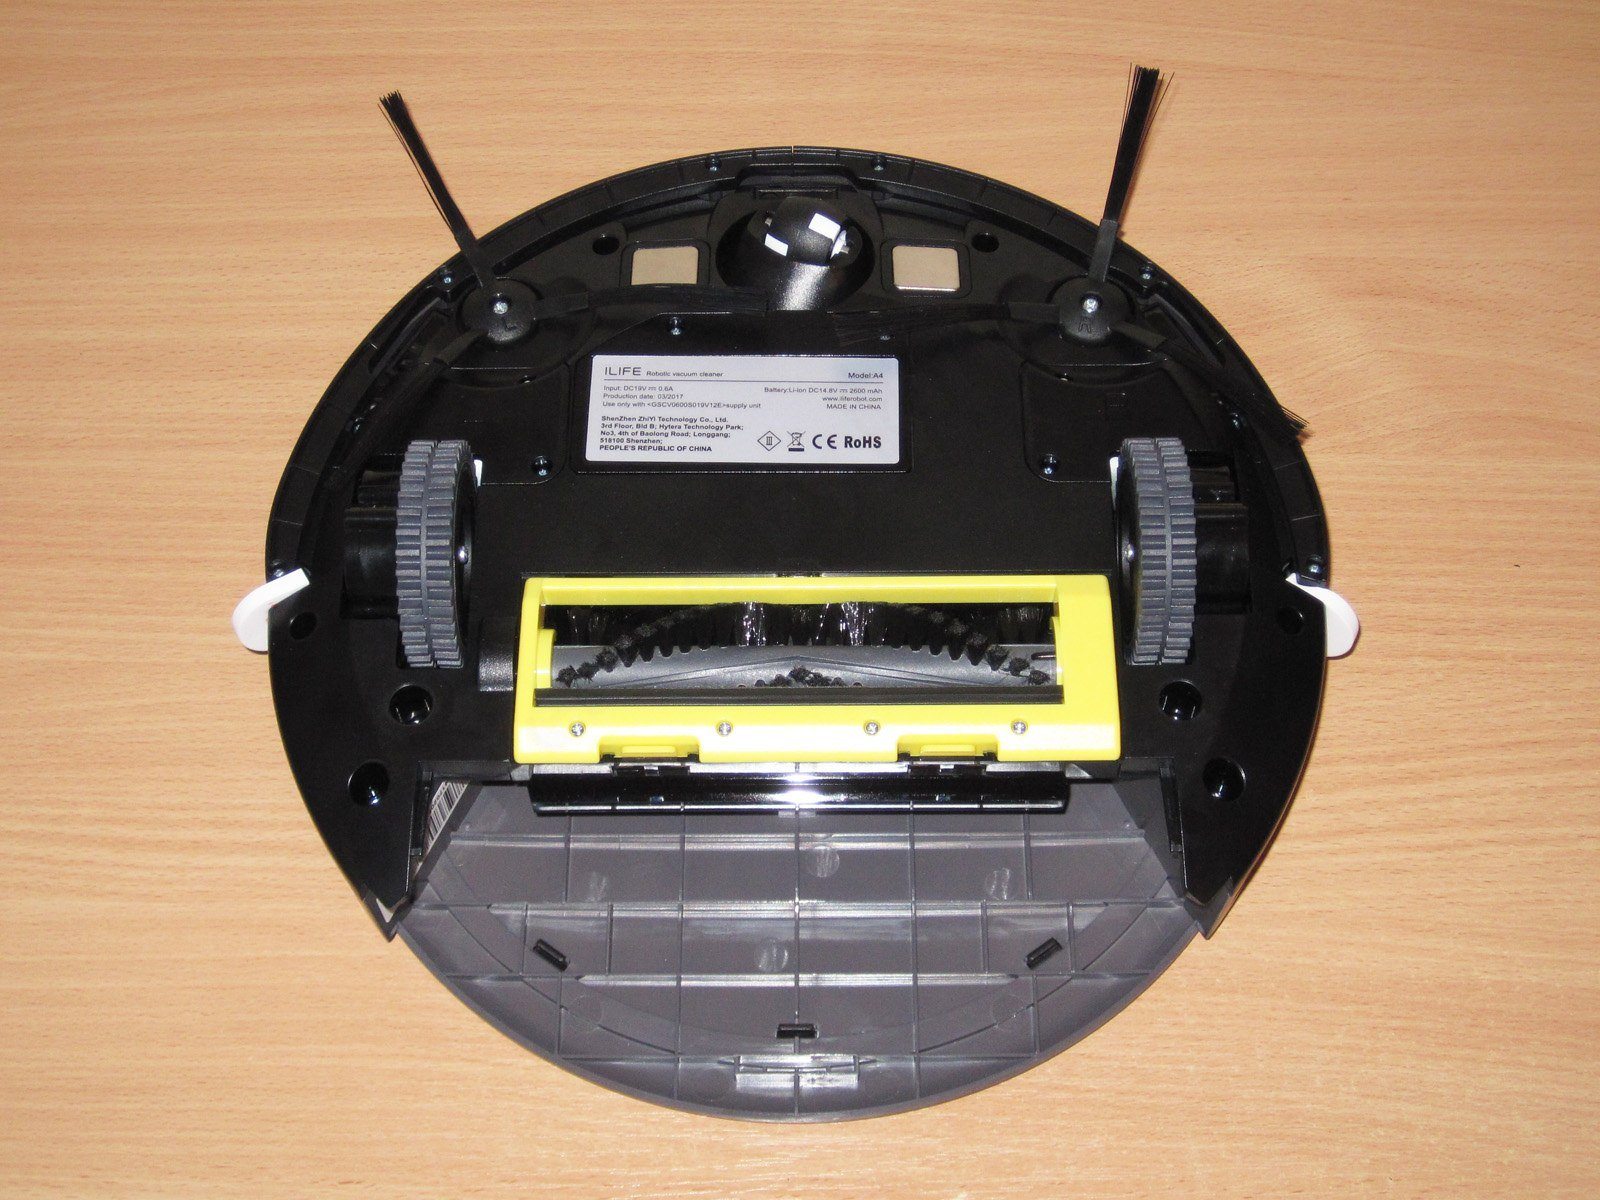
The main cleaning mechanism is a rotating brush. Strictly speaking, calling this device a vacuum cleaner is a bit of a stretch, since suction is what does the work in a regular vacuum. This one doesn’t have a huge energy reserve, so the designers went with a compromise: the brush lifts dust off the floor and throws it upward, where the suction unit picks it up.
I think this works perfectly well for supplementary cleaning, but it won’t replace a powerful vacuum. For hard floors, though, it’s more than enough—I’ve tested it many times :)
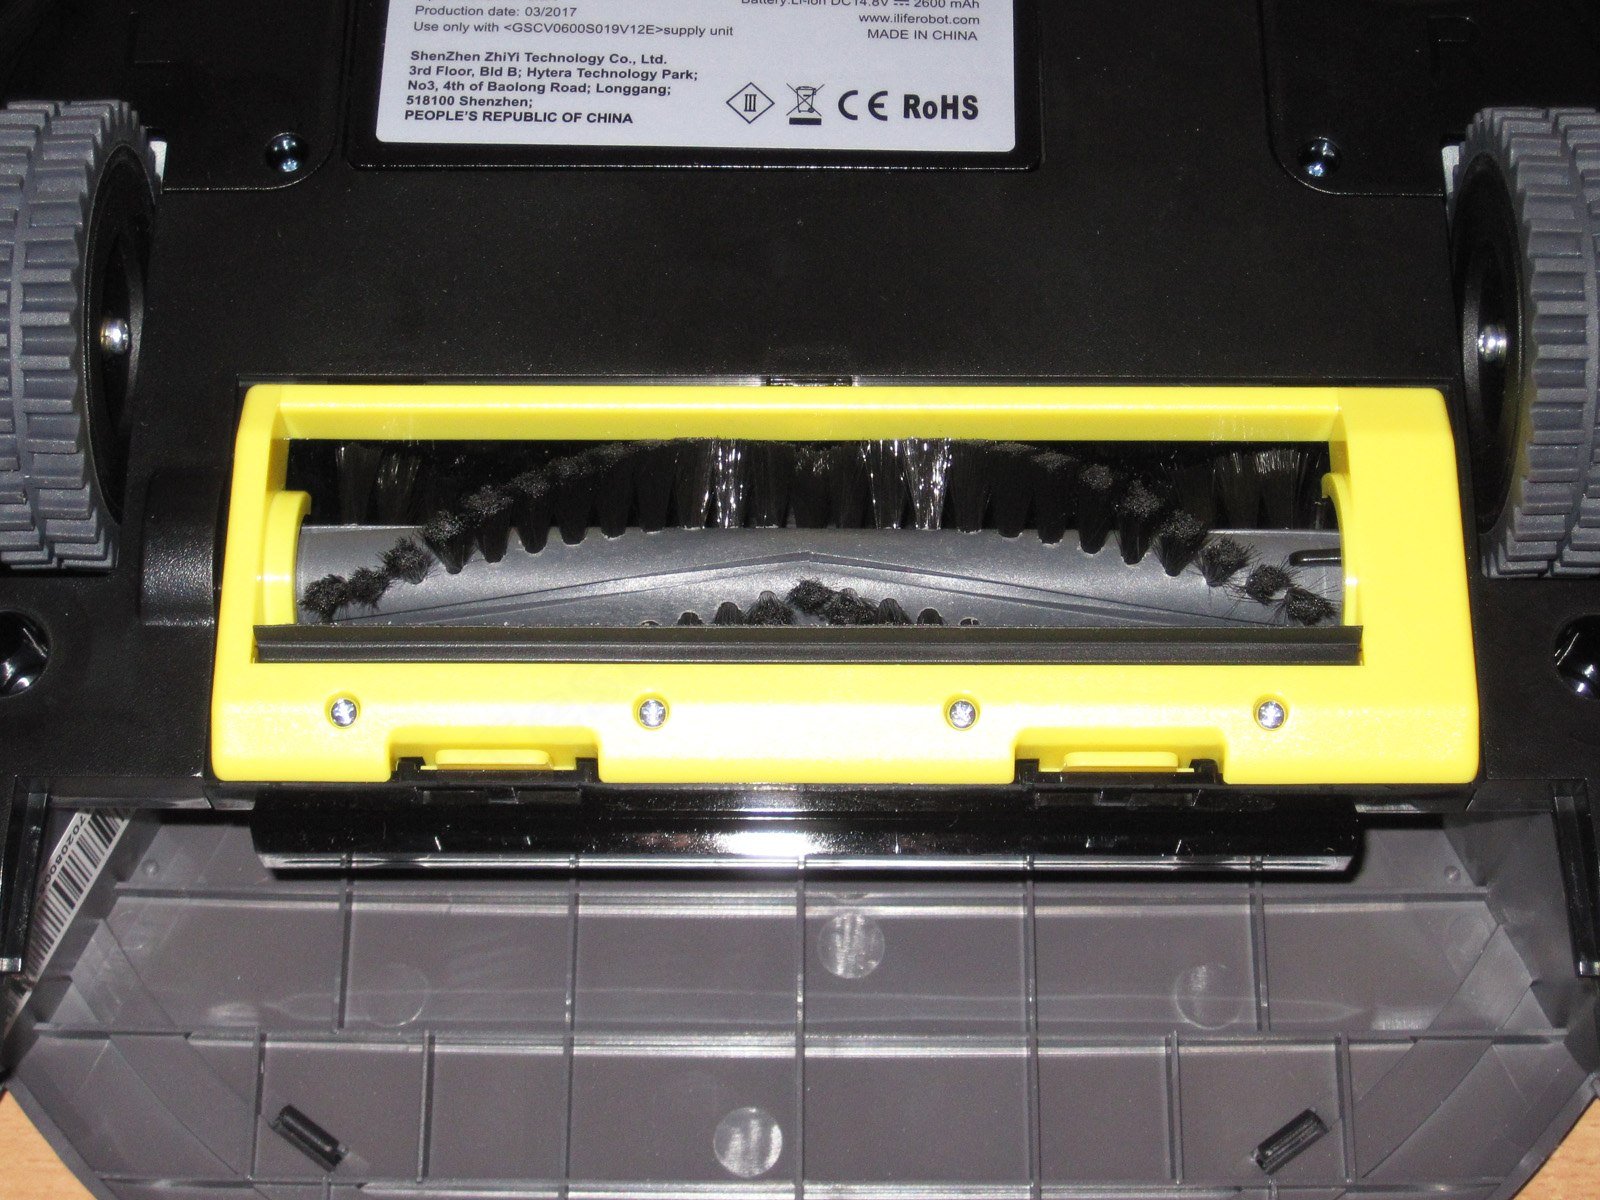
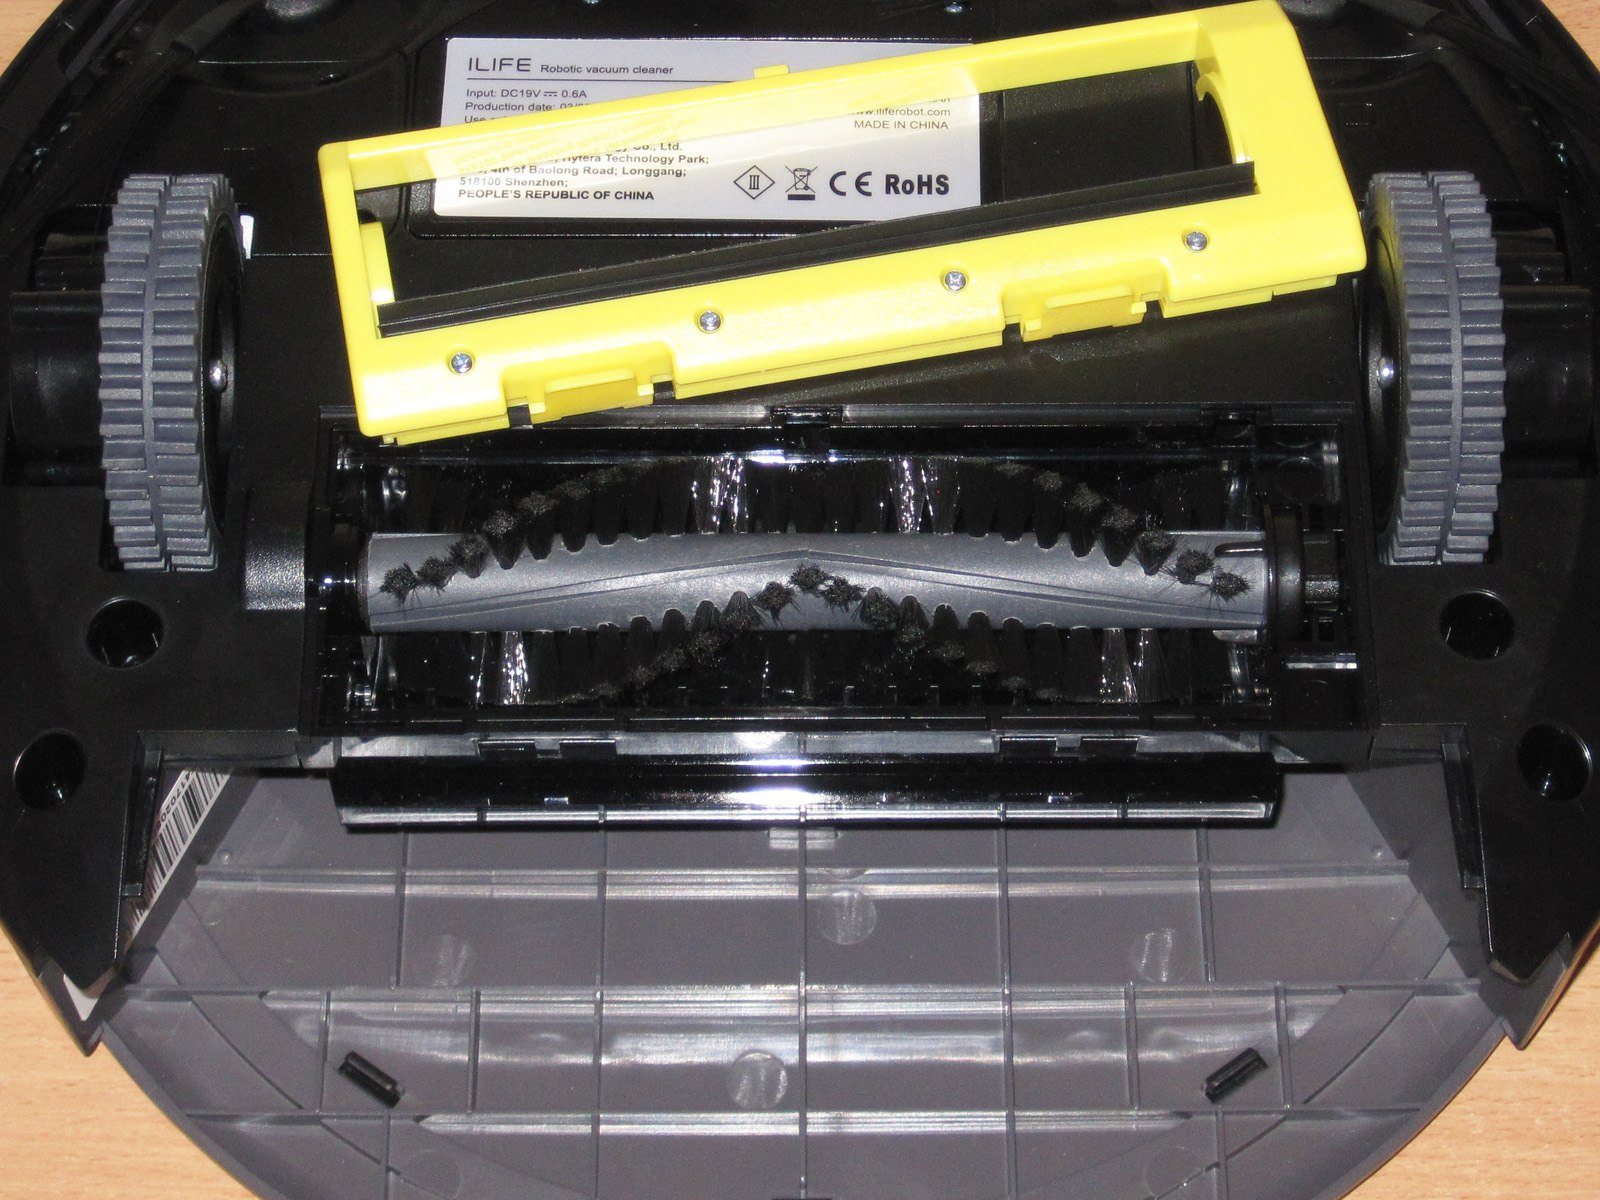
The brush comes out of its mechanism very easily. It’s covered on top by a plastic frame with a small rubber strip.
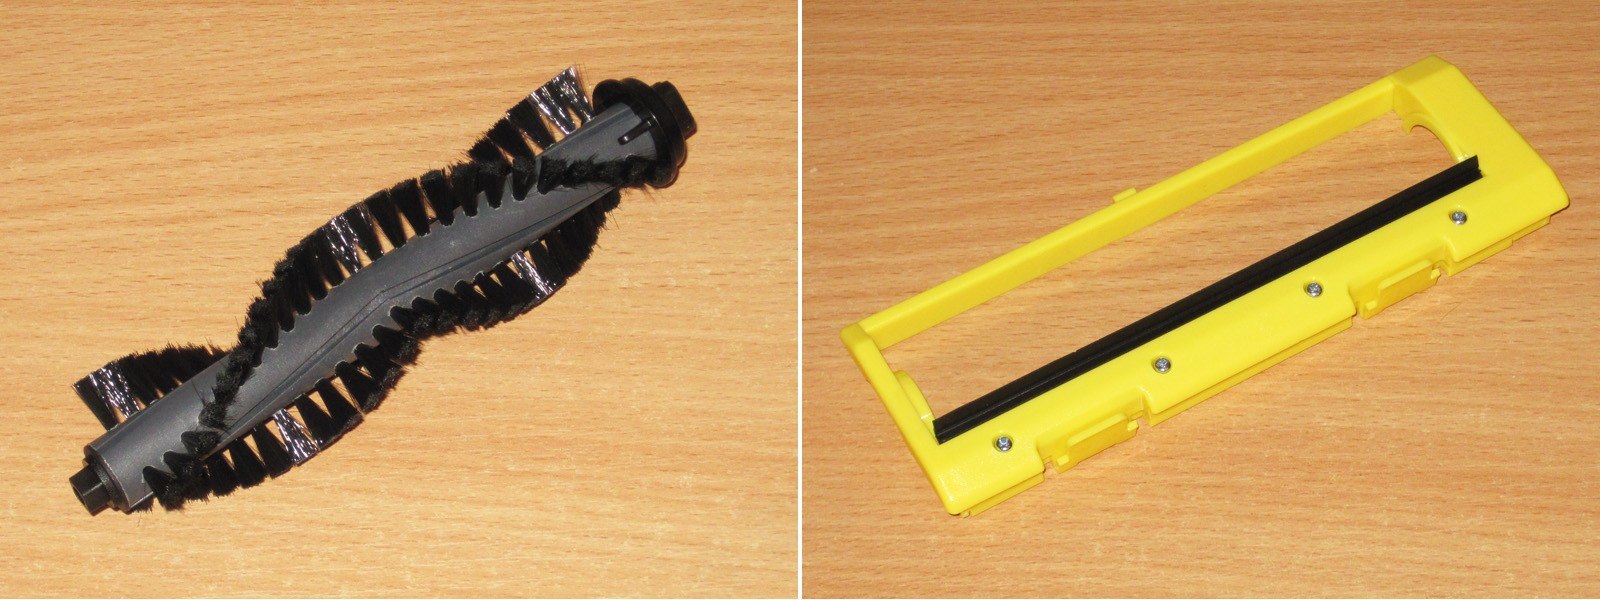
Putting it back was just as easy. First, insert it into the drive unit, then fit the other end of the brush into place, and close the cover.
I should mention that this brush sometimes likes to wind up threads and hair. Somehow, it even managed to snag one of my slippers :)
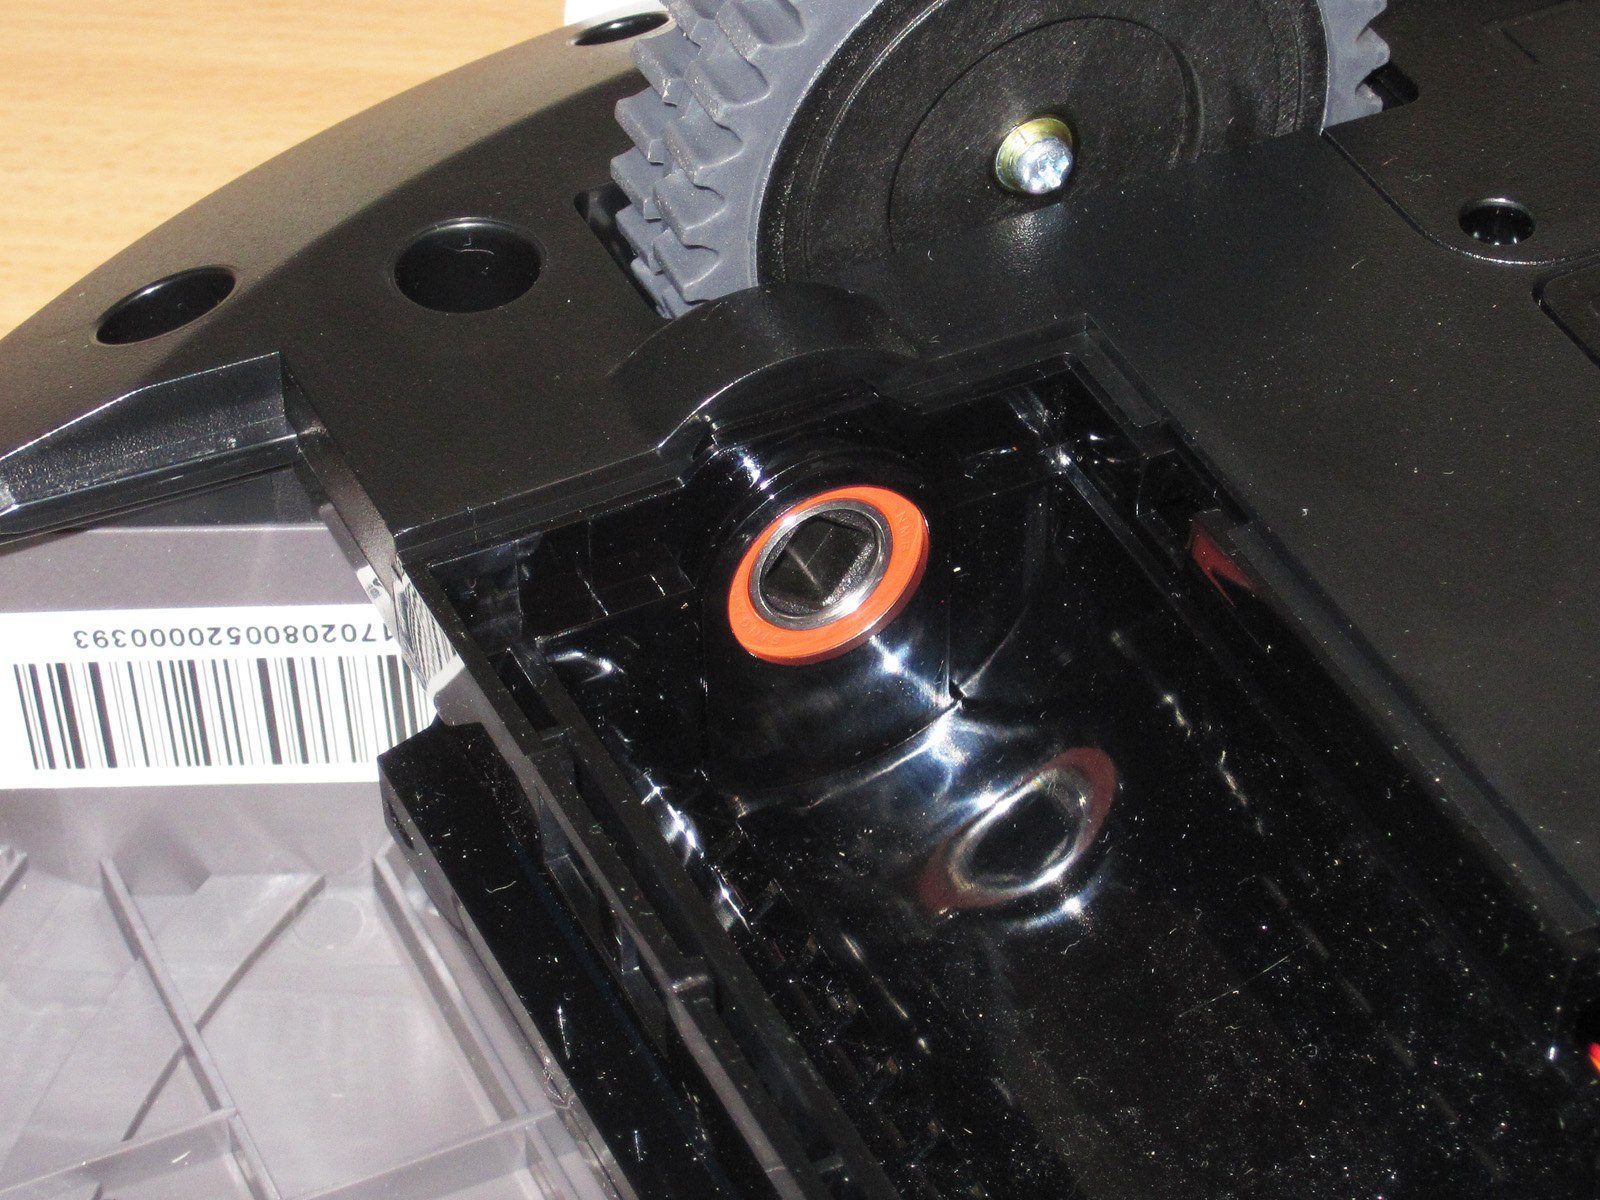
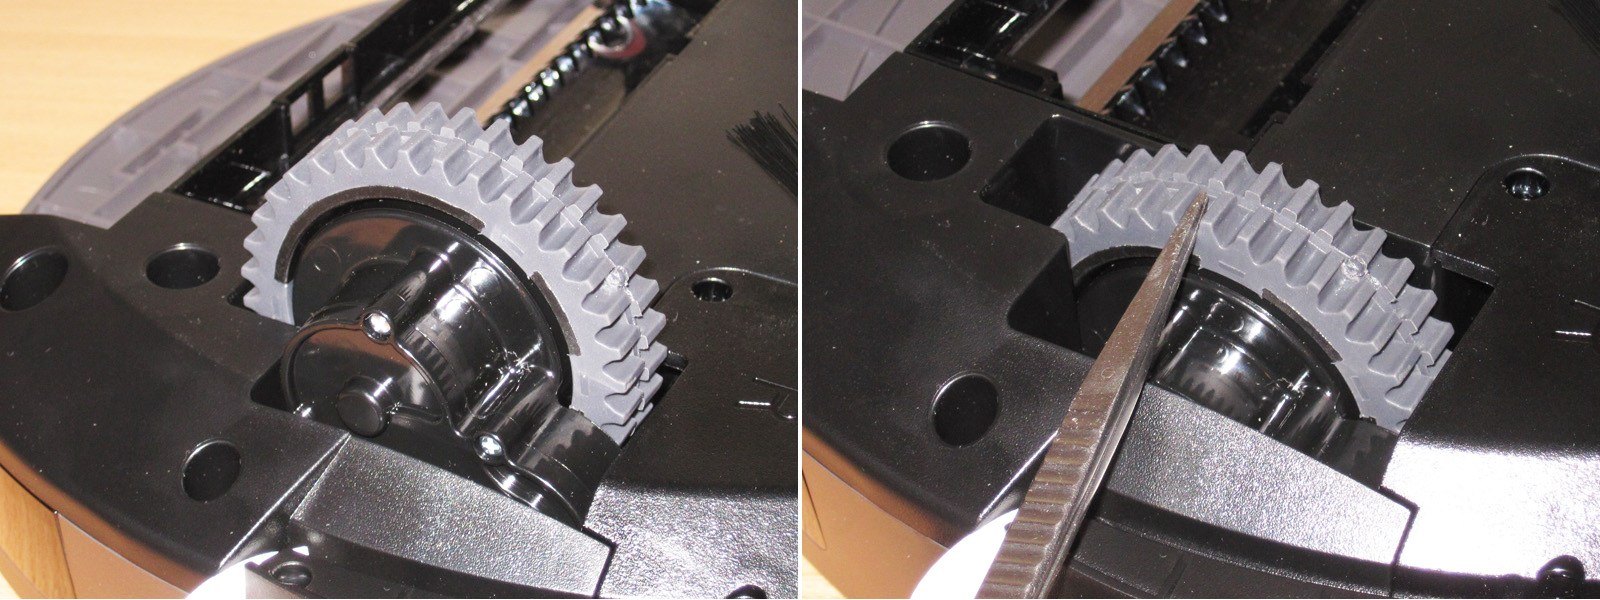
The vacuum moves on a pair of rubberized wheels with fairly deep treads.
Both wheels are spring-loaded, so I haven’t had any traction problems.
A freely rotating roller with markers for the built-in sensor serves as the third wheel. One of the drop sensors is also located at the front to keep the vacuum from falling down stairs. When it approaches the edge of a surface, it stops and then reverses. But since I don’t have a two-story house or a split-level apartment yet, this feature isn’t important to me for now.

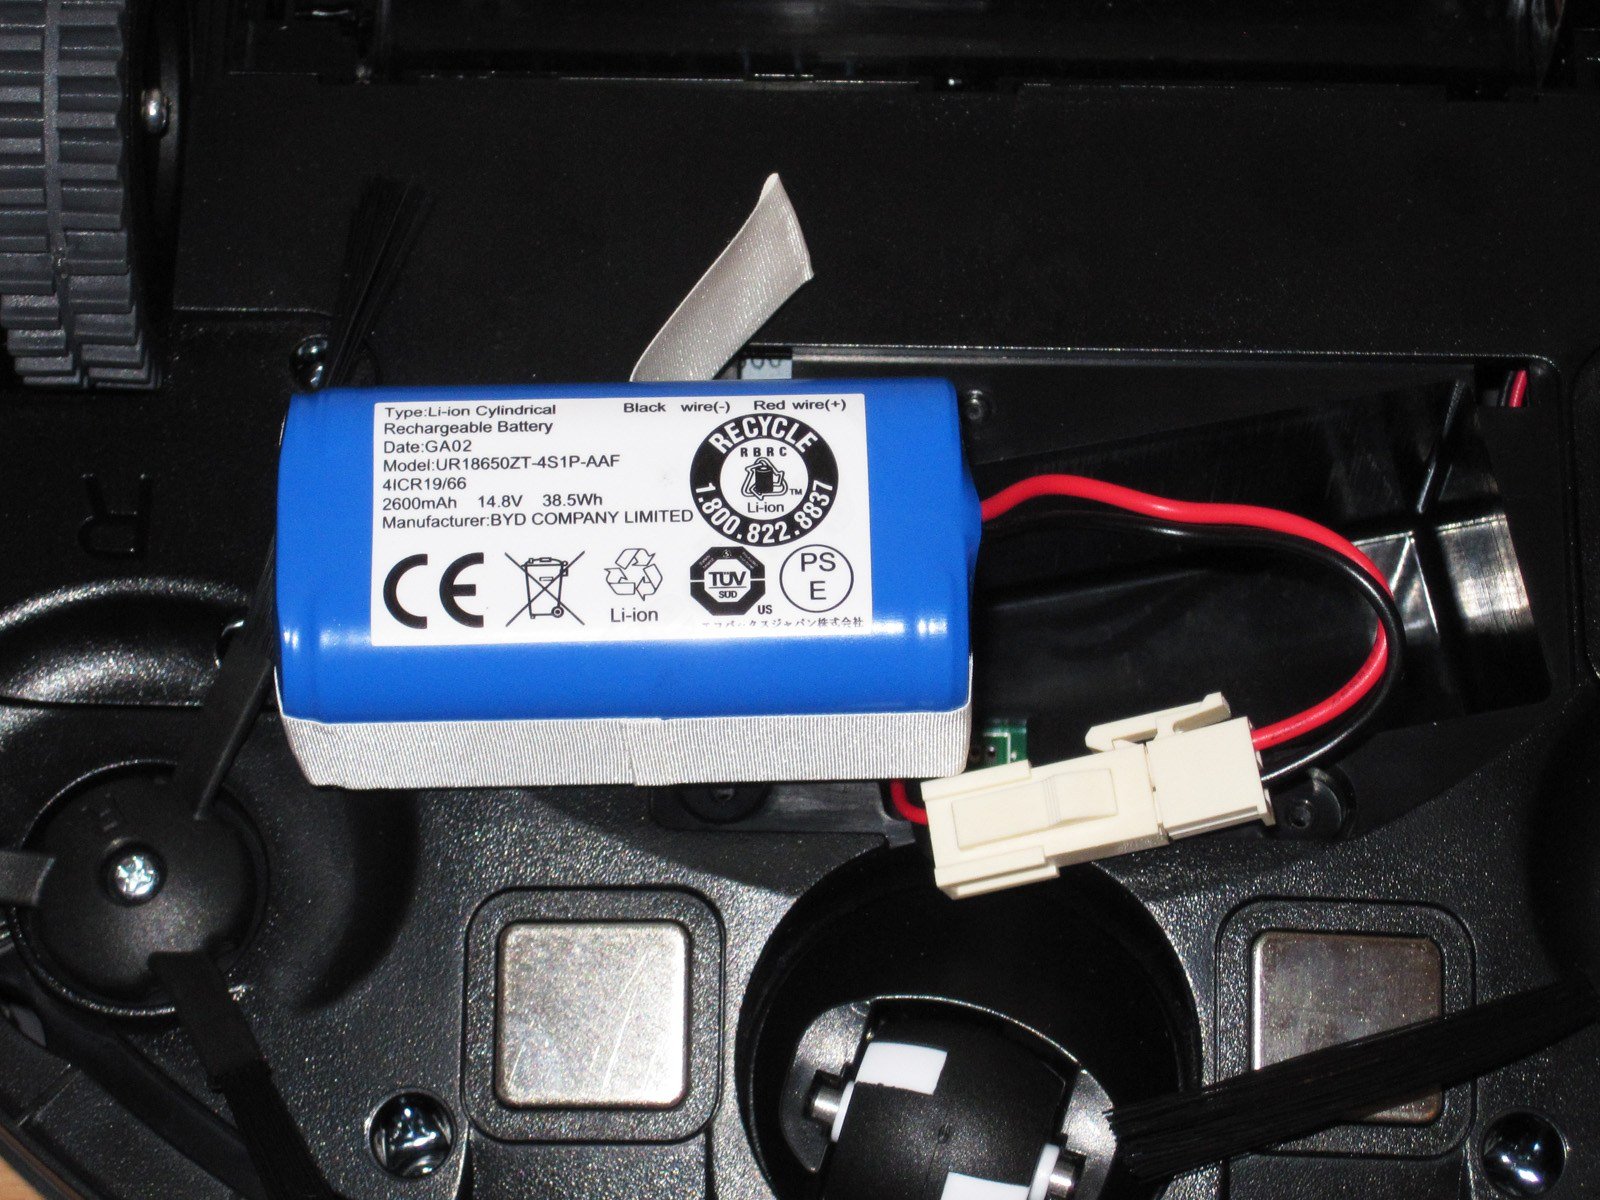
There’s also a sticker on the underside listing the vacuum’s model and the specifications of its battery. The battery is under the cover with the sticker. I’ll point out that there’s a special pull tab to make it easier to remove—a small plus for the engineers.

The battery connects via a terminal block, another small plus.
Since I’m writing this review from a techie’s perspective, I’ll keep pointing out places where I think the engineers got things right, and how I might have done things myself.
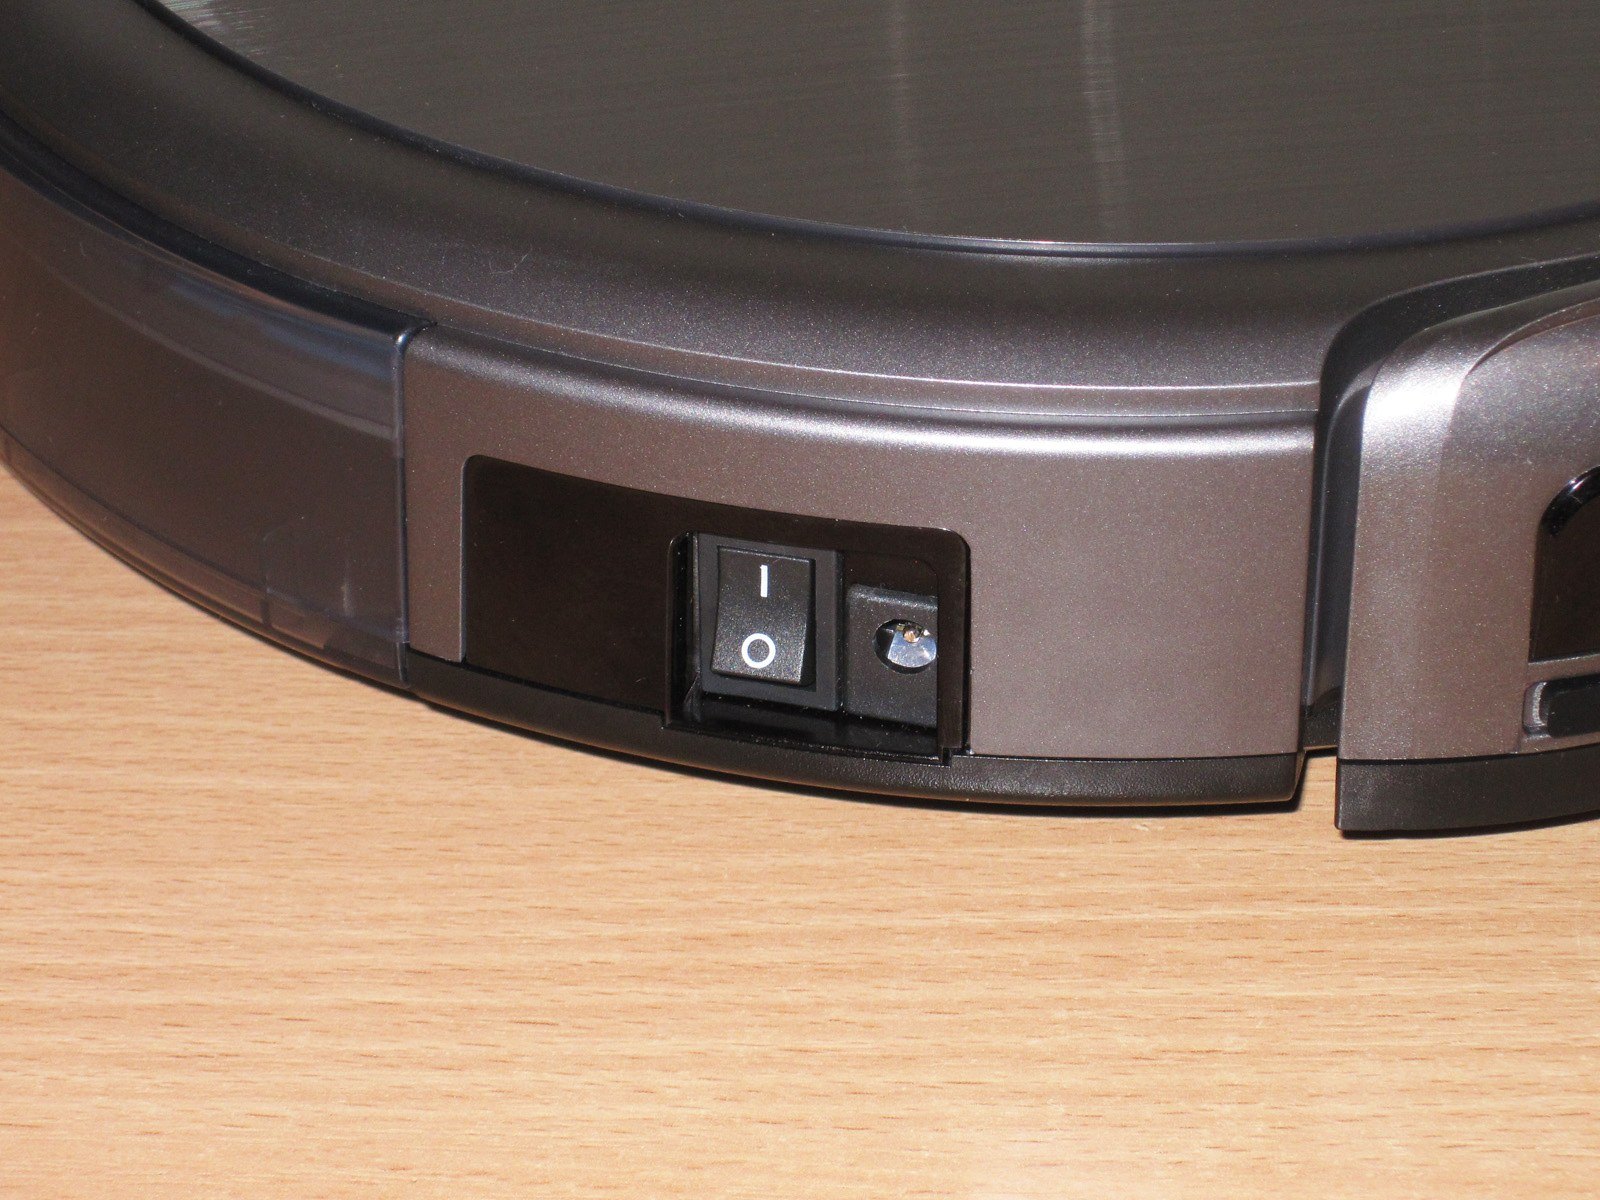
The second control is on the side: a switch that completely cuts power to the device. The charging jack is next to it.
The jack is useful if the charging dock breaks, but I would have added some kind of dust cap.
There are two more drop sensors near the front brushes. As I mentioned above, they aren’t particularly useful in my case, but I don’t think their location is ideal: over time, dust from the brush will clog the sensors and stop them from working properly. Static electricity from brush friction is another thing to consider; it can build up and make dust stick to the sensors even more.
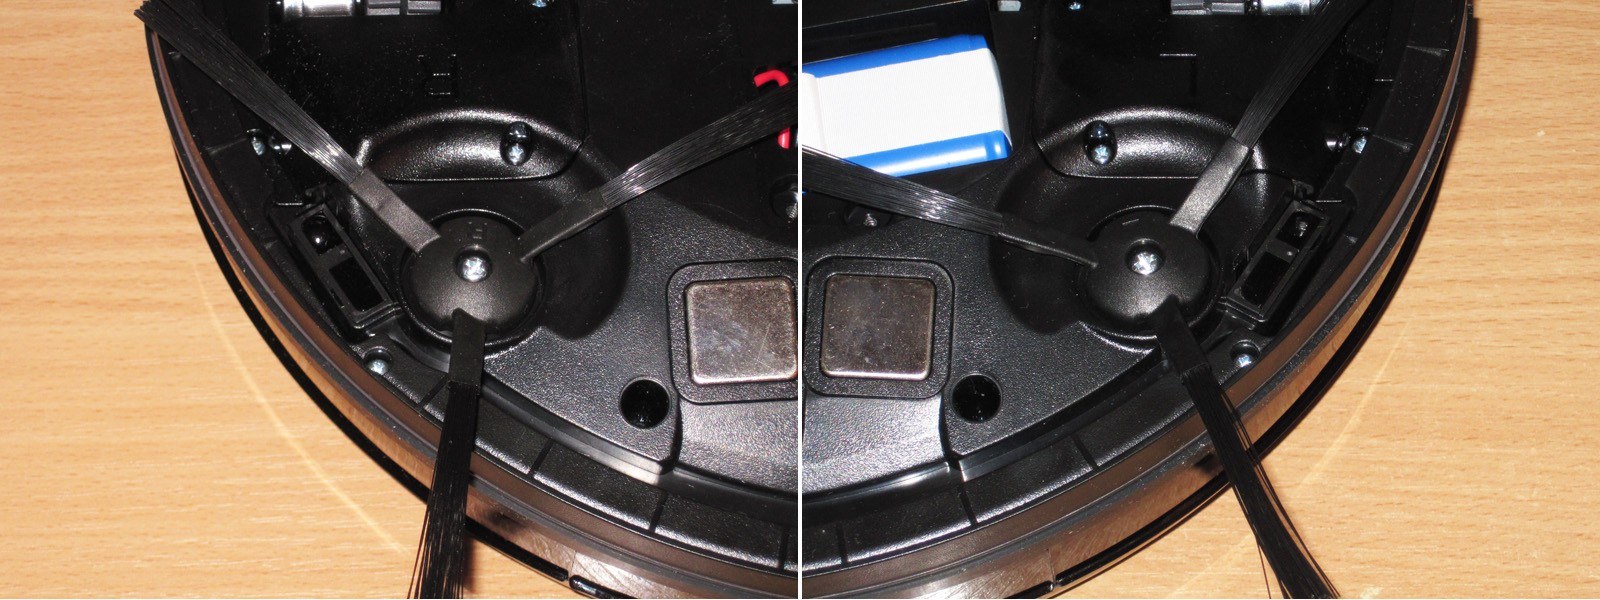
While inspecting it, I decided to take the vacuum apart completely. Removing the wheels proved a little tricky: the only way to remove them properly is to take off part of the front trim, since one of the screws is underneath it. And the chance that the mechanism will need to be removed at some point is definitely not zero.


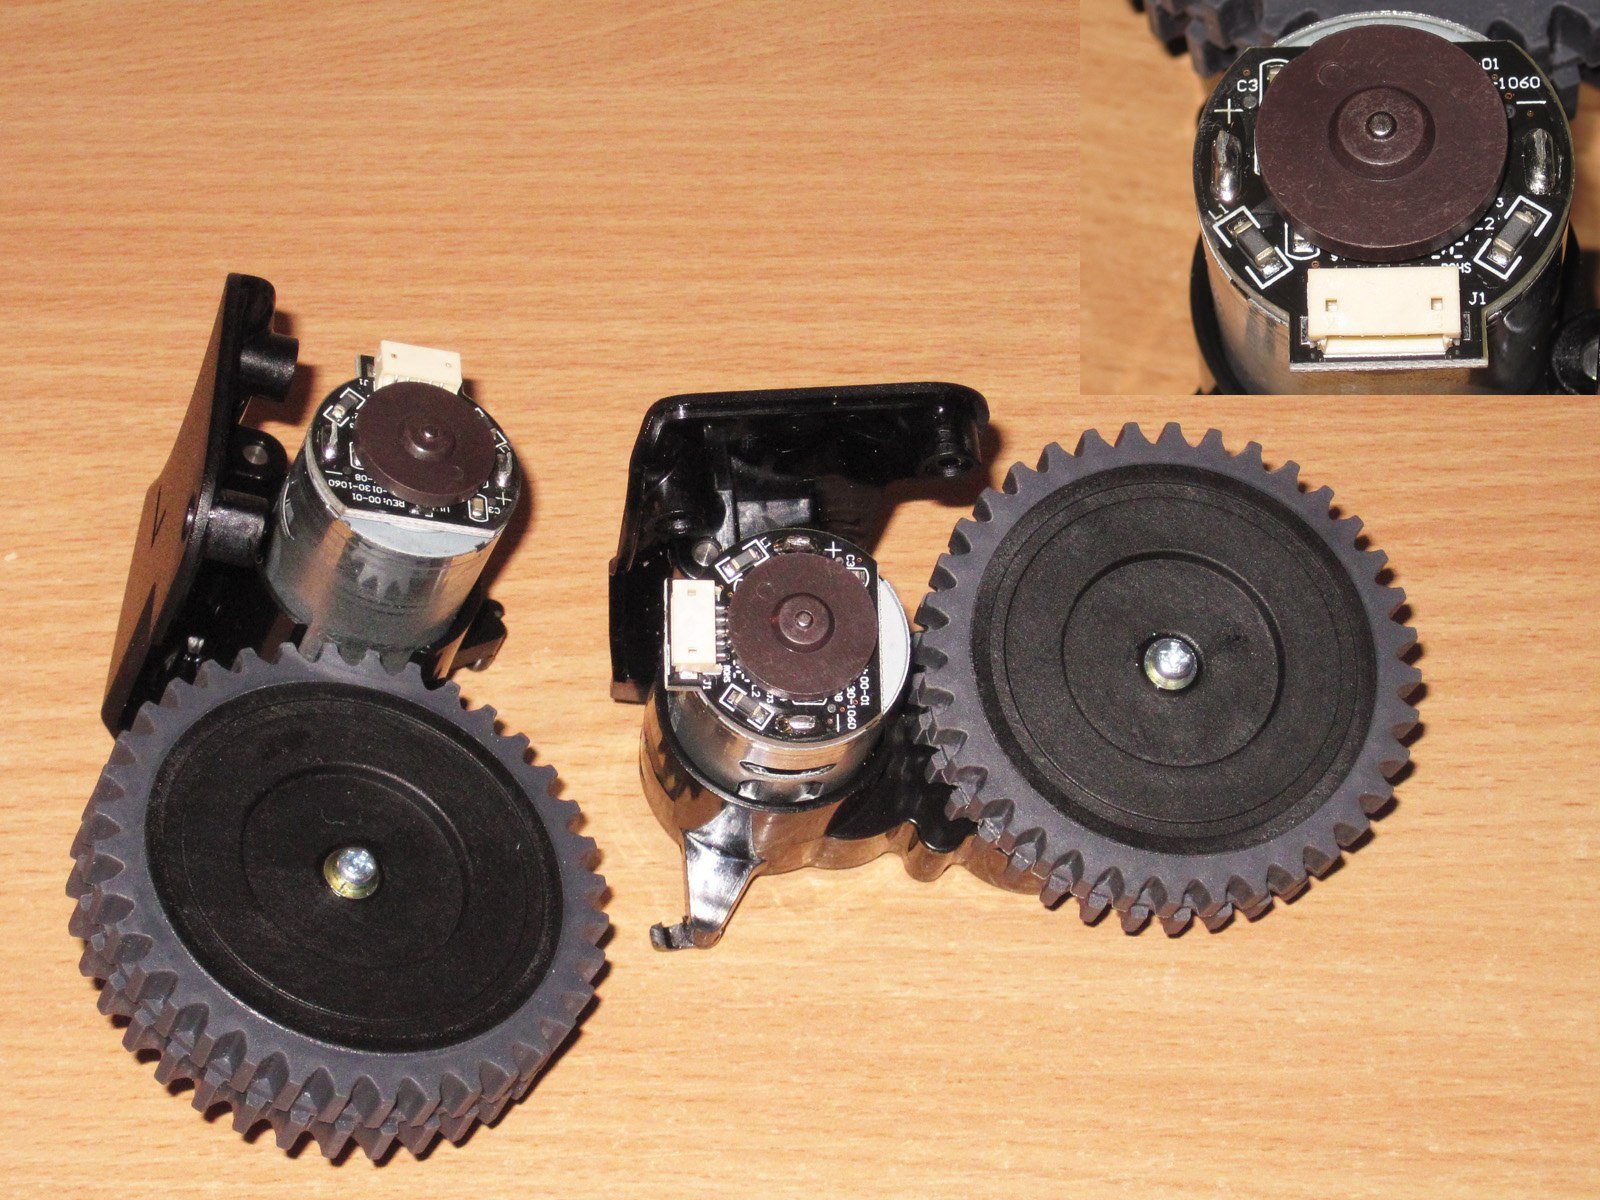
The wheels consist of a gearmotor and the wheel itself. There is a spring underneath, which has to be removed to take the wheel off completely. The spring can be removed and reinstalled without any tools.

Small motors are used, and I should point out that there are boards with noise-suppression chokes installed at the back. Another small plus for the manufacturer for not skimping on these.
You can also see brown discs at the back of the motors. These are ring magnets for the tachometer sensors. Since the motors are independent, the electronics use them to keep the wheels turning at the same speed so the vacuum can travel in a straight line.
Incidentally, exactly the same speed-stabilization principle is used in automatic sliding doors, although the motor there is noticeably larger.
Unscrew the brushes. The manufacturer could have included a small Phillips screwdriver, since this is a user-replaceable part. A point off for the poorly thought-out package contents.
After removing the brushes, I took off the front section. As I mentioned above, it is spring-loaded for two reasons: to cushion impacts if the vacuum runs into a chair leg that the sensor has missed, and to operate the impact-detection mechanism.
Although the term “impact” is somewhat inaccurate: the vacuum doesn't move very fast, so there won't be a hard impact, more of a firm touch.
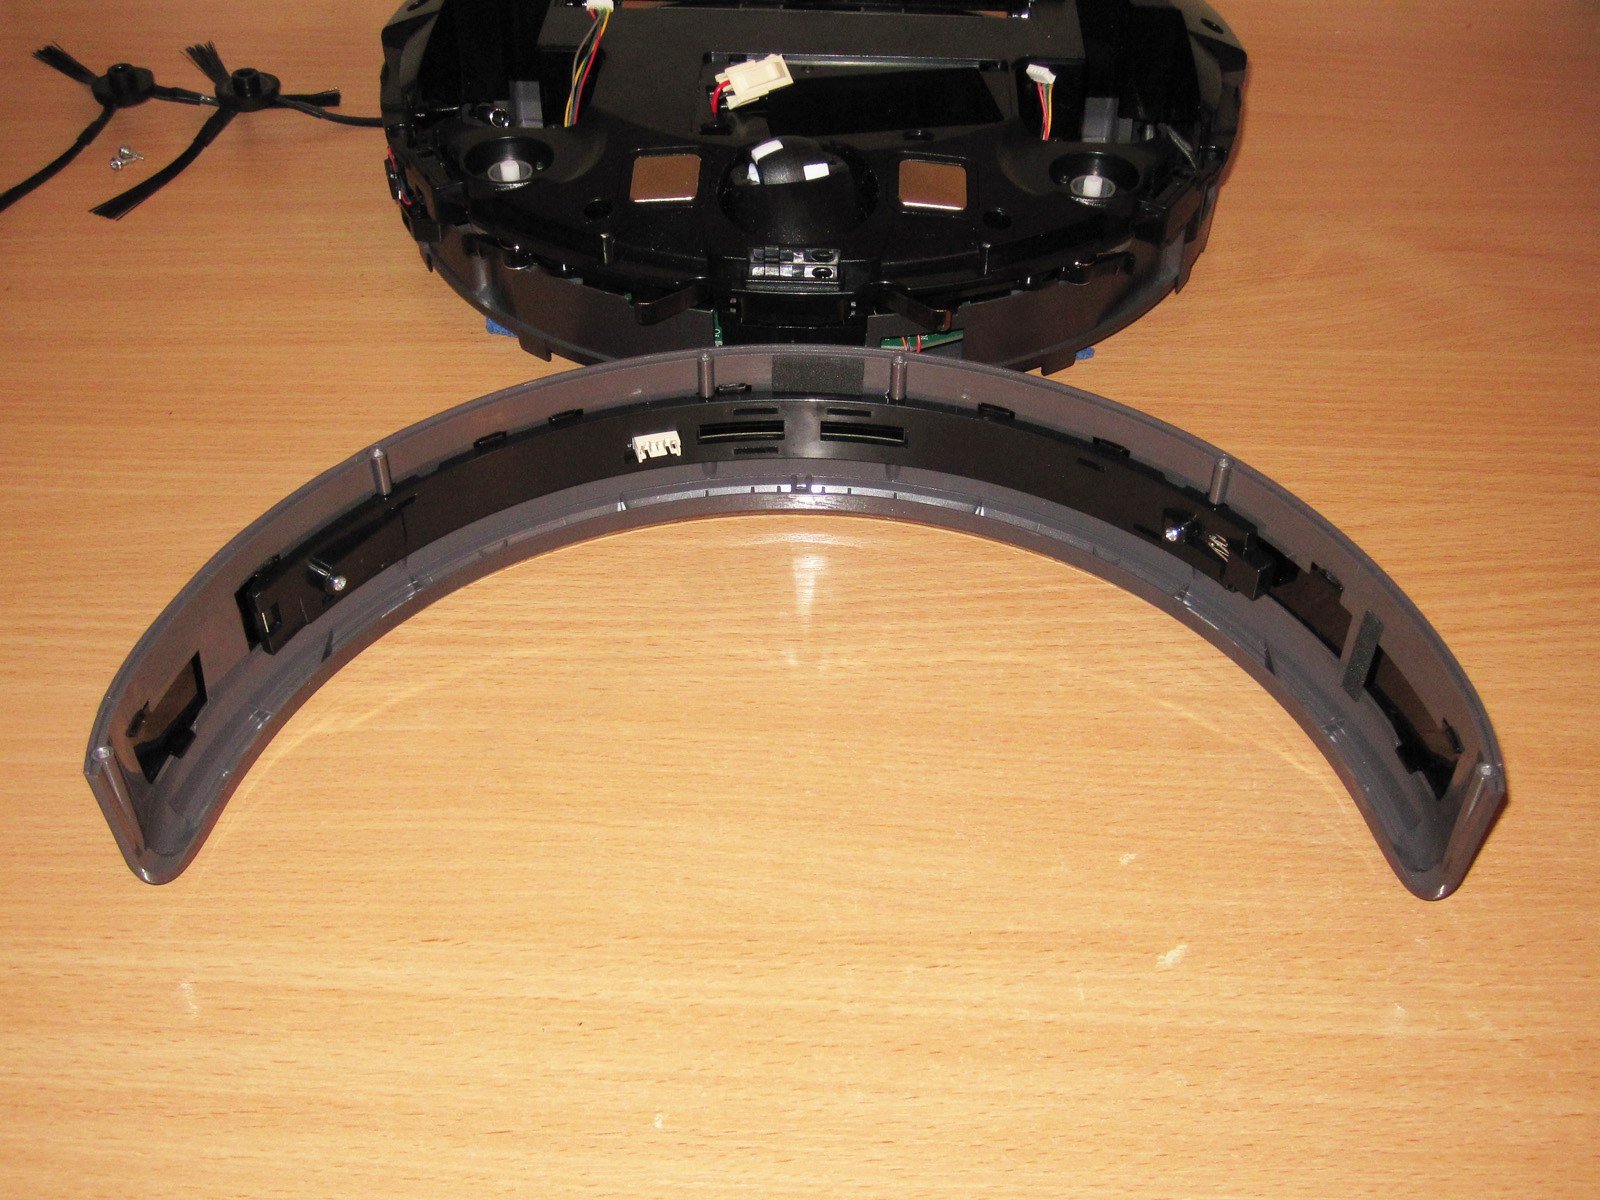
The entire front section is taken up by a flexible circuit board with 20 IR LEDs and two IR sensors. The sensors are the same type used with remote controls, so I assume they also receive commands from the remote. But their main purpose is obstacle detection.
The vacuum slows down as it approaches an obstacle and makes contact very gently.
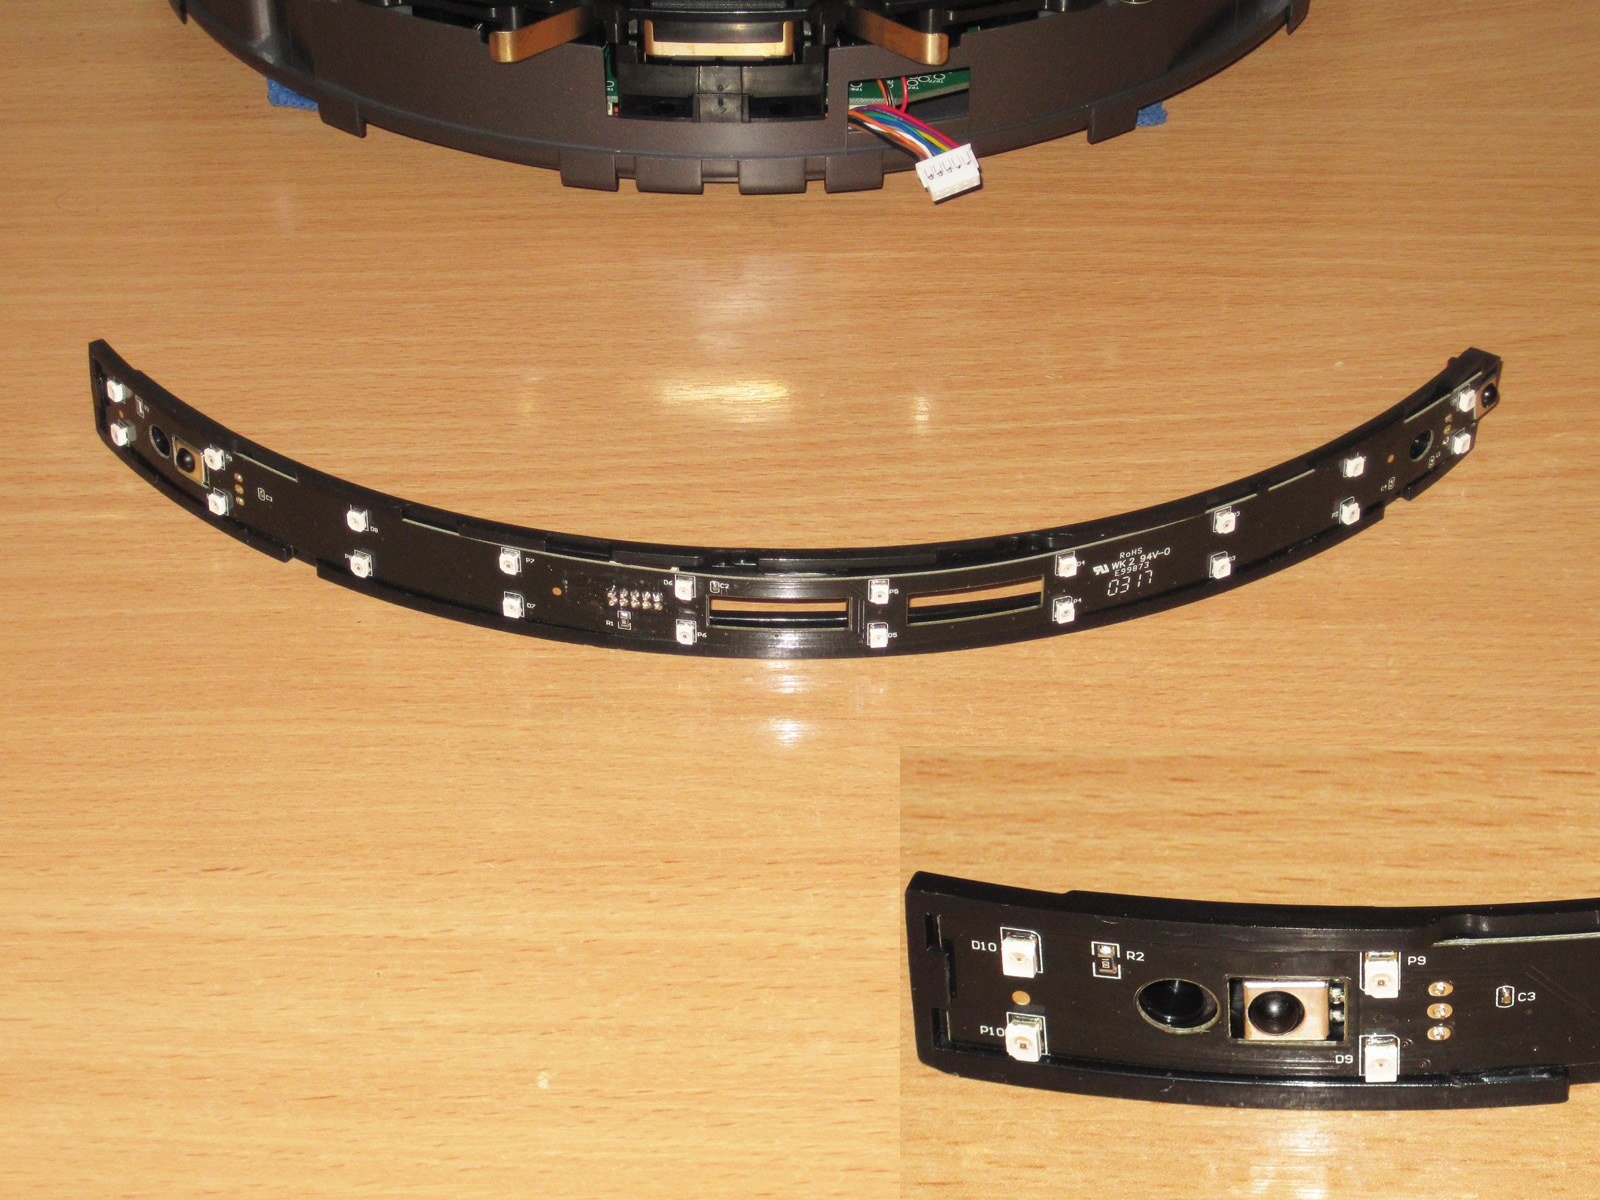
While handling this unit, I also noticed the fairly high build quality. I should also mention that most of the wires are neatly routed through special channels in the housing.
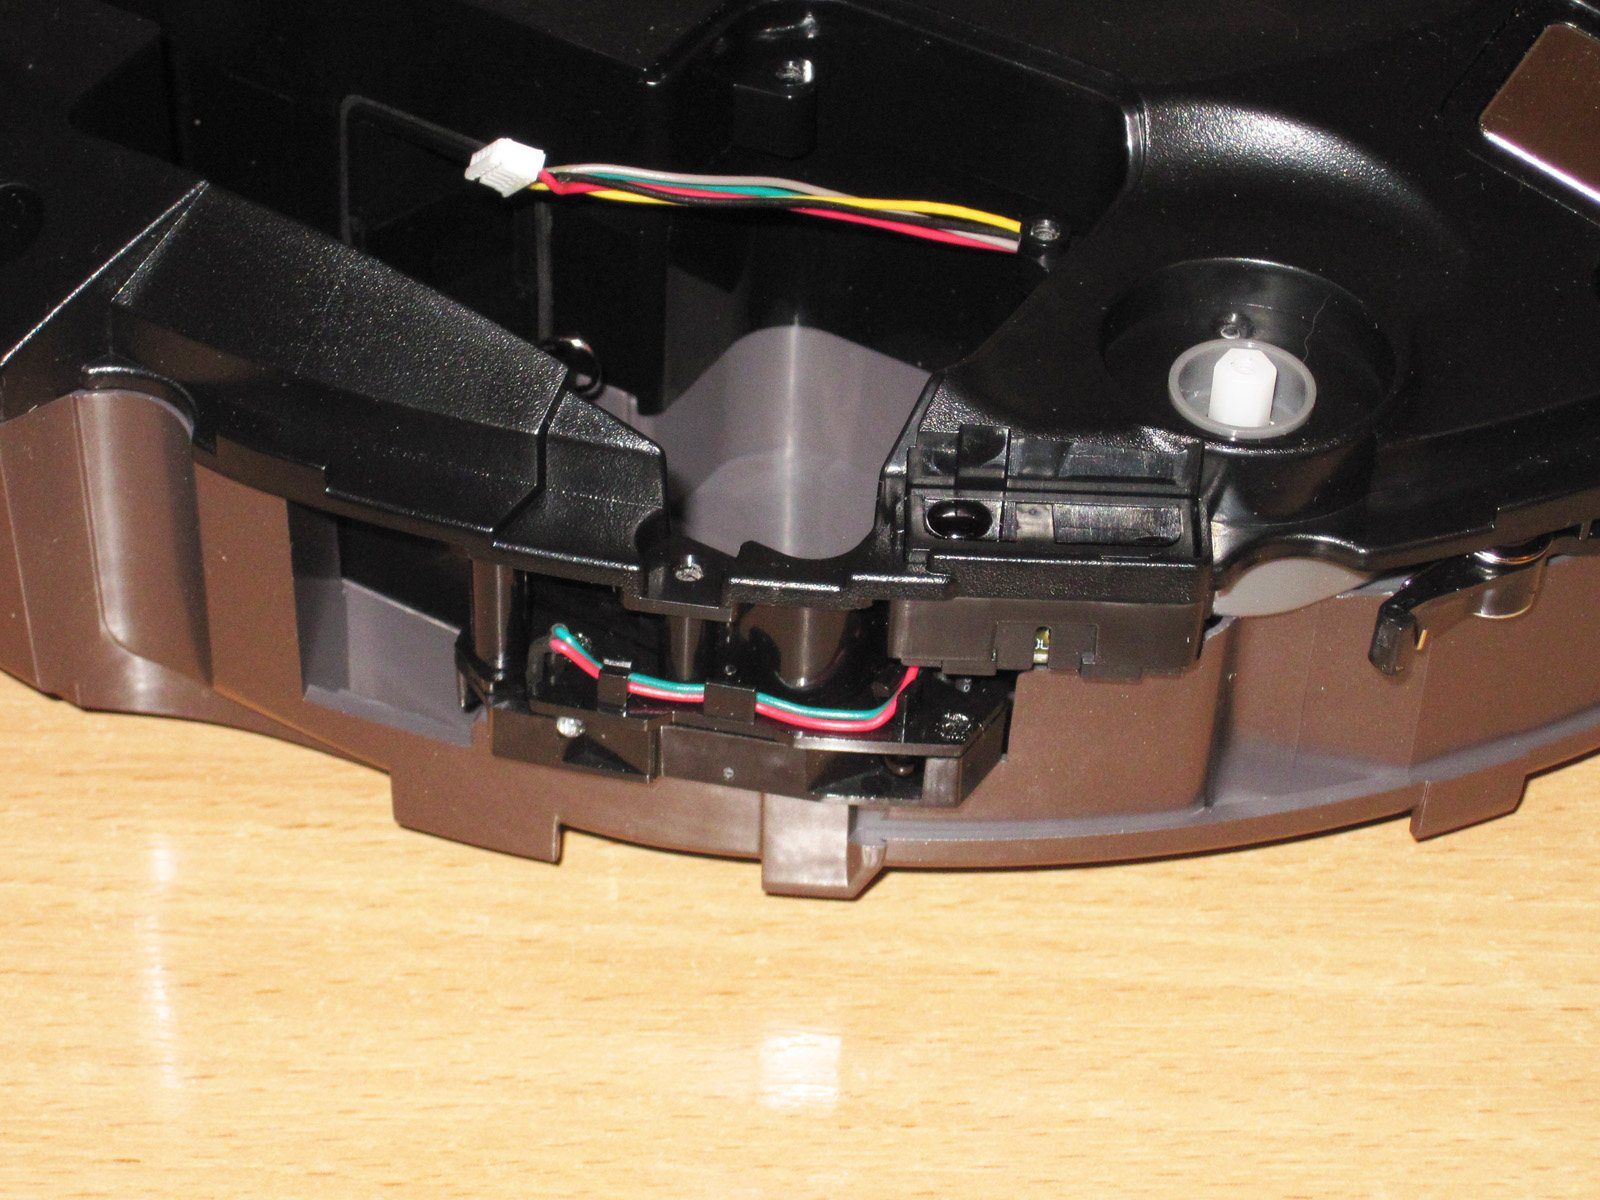
All right, let's remove the top cover and take a look inside.

The developers intended the vacuum to open up like a book, but it didn't quite work out: the wire to the button board is very short, so you can't open it up without disconnecting the button.

The frame with the electronics. The wheel drives, control button, and front section have been removed.
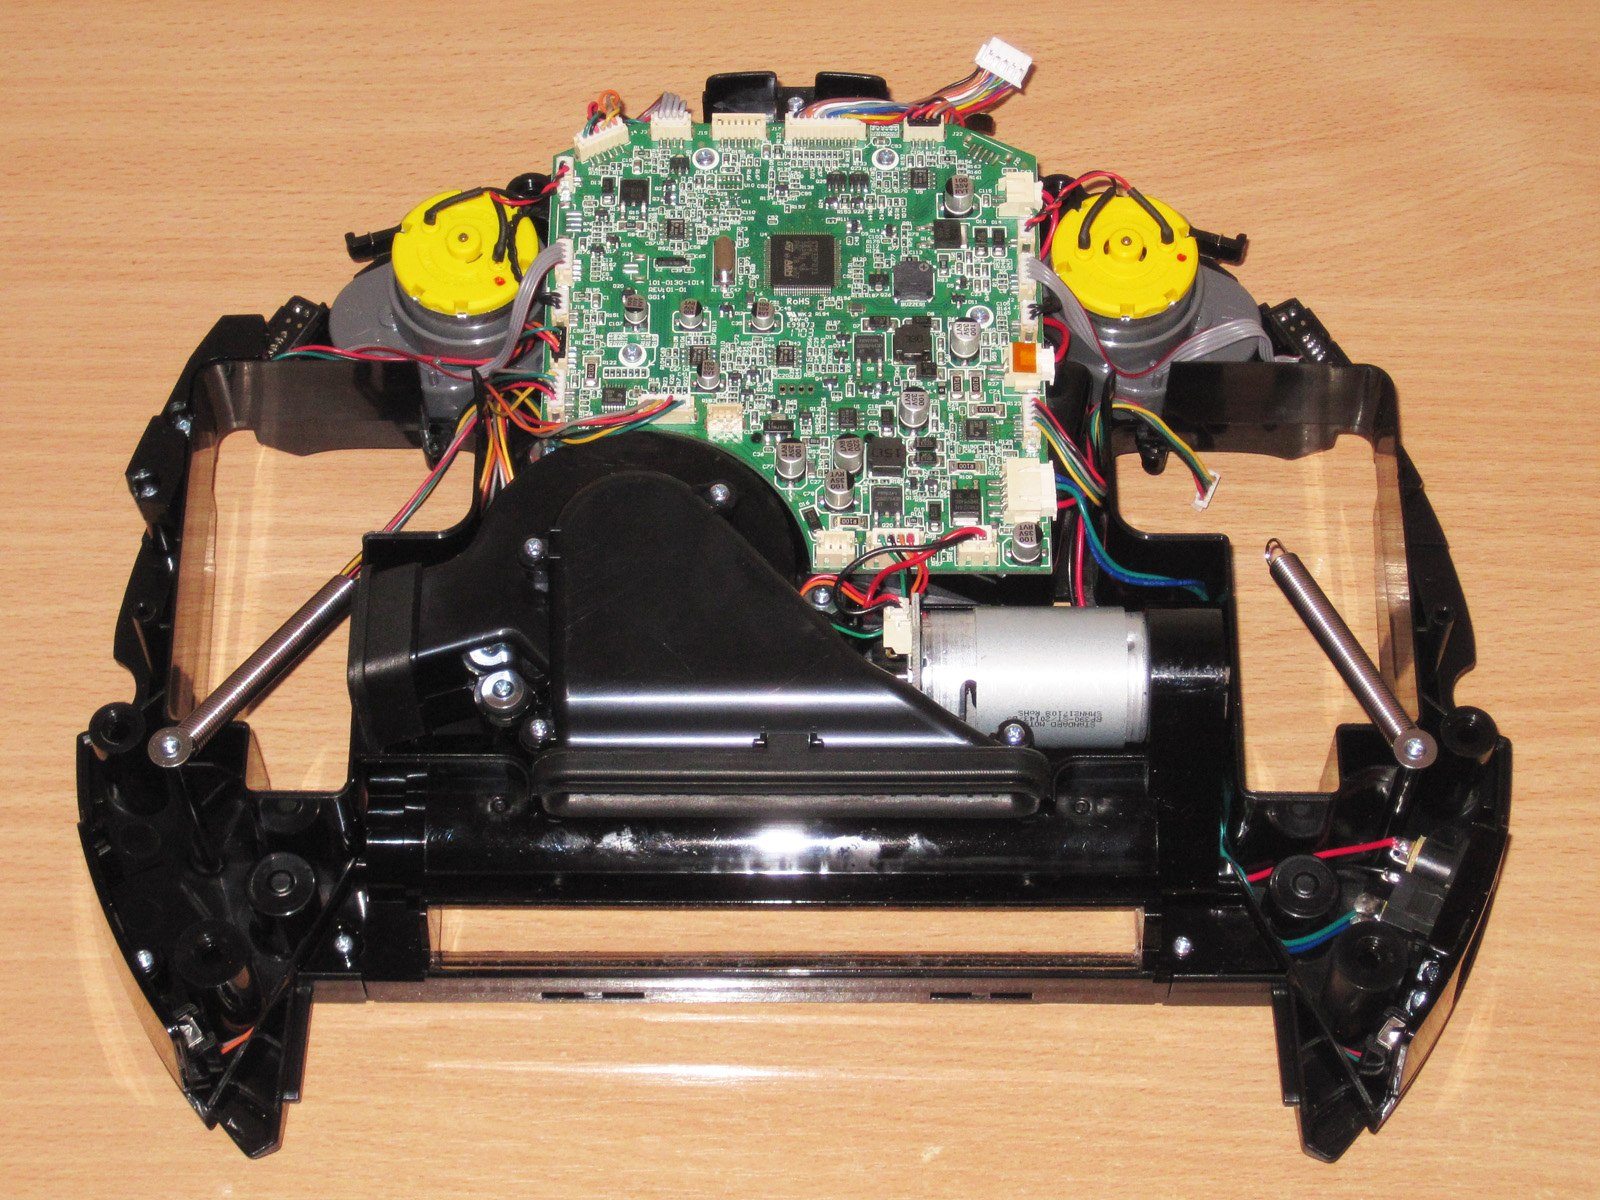
Of course, I received this product for review, so there may be bias and all that, but I'll say it anyway: I really like the quality of the control board assembly. I can say unequivocally that it's no worse than what you'd find in branded devices. The PCB is well made, the soldering is good, and the overall design is well thought out.
I'll go even further: when I got this toy, I thought there'd be some simple little board inside, and I was genuinely surprised to find so much packed into it. Then I started counting the sensors, motors, and other components, and it all made sense.

1. The whole thing is controlled by an STM32F071RB with an ARM Cortex-M0 core. But honestly, I expected more from the way it works, though I'll get to that later.
2. The charging circuit is probably located near the power connector, along with some of the power electronics.
3, 4. Several operational amplifiers. I didn't investigate what they do; I can only guess that they're used either in the sensor circuits or for motor overload protection. The former seems more likely.
5. The motors are controlled by dedicated drivers, DRV8801.
6. There's also a “buzzer” on the board. Incidentally, the vacuum rarely makes any sounds, usually just to confirm that it's been switched on or off, or placed on the charging dock.

A closer look at the charging section. As I said above, everything is neat: little connectors, lovely :)
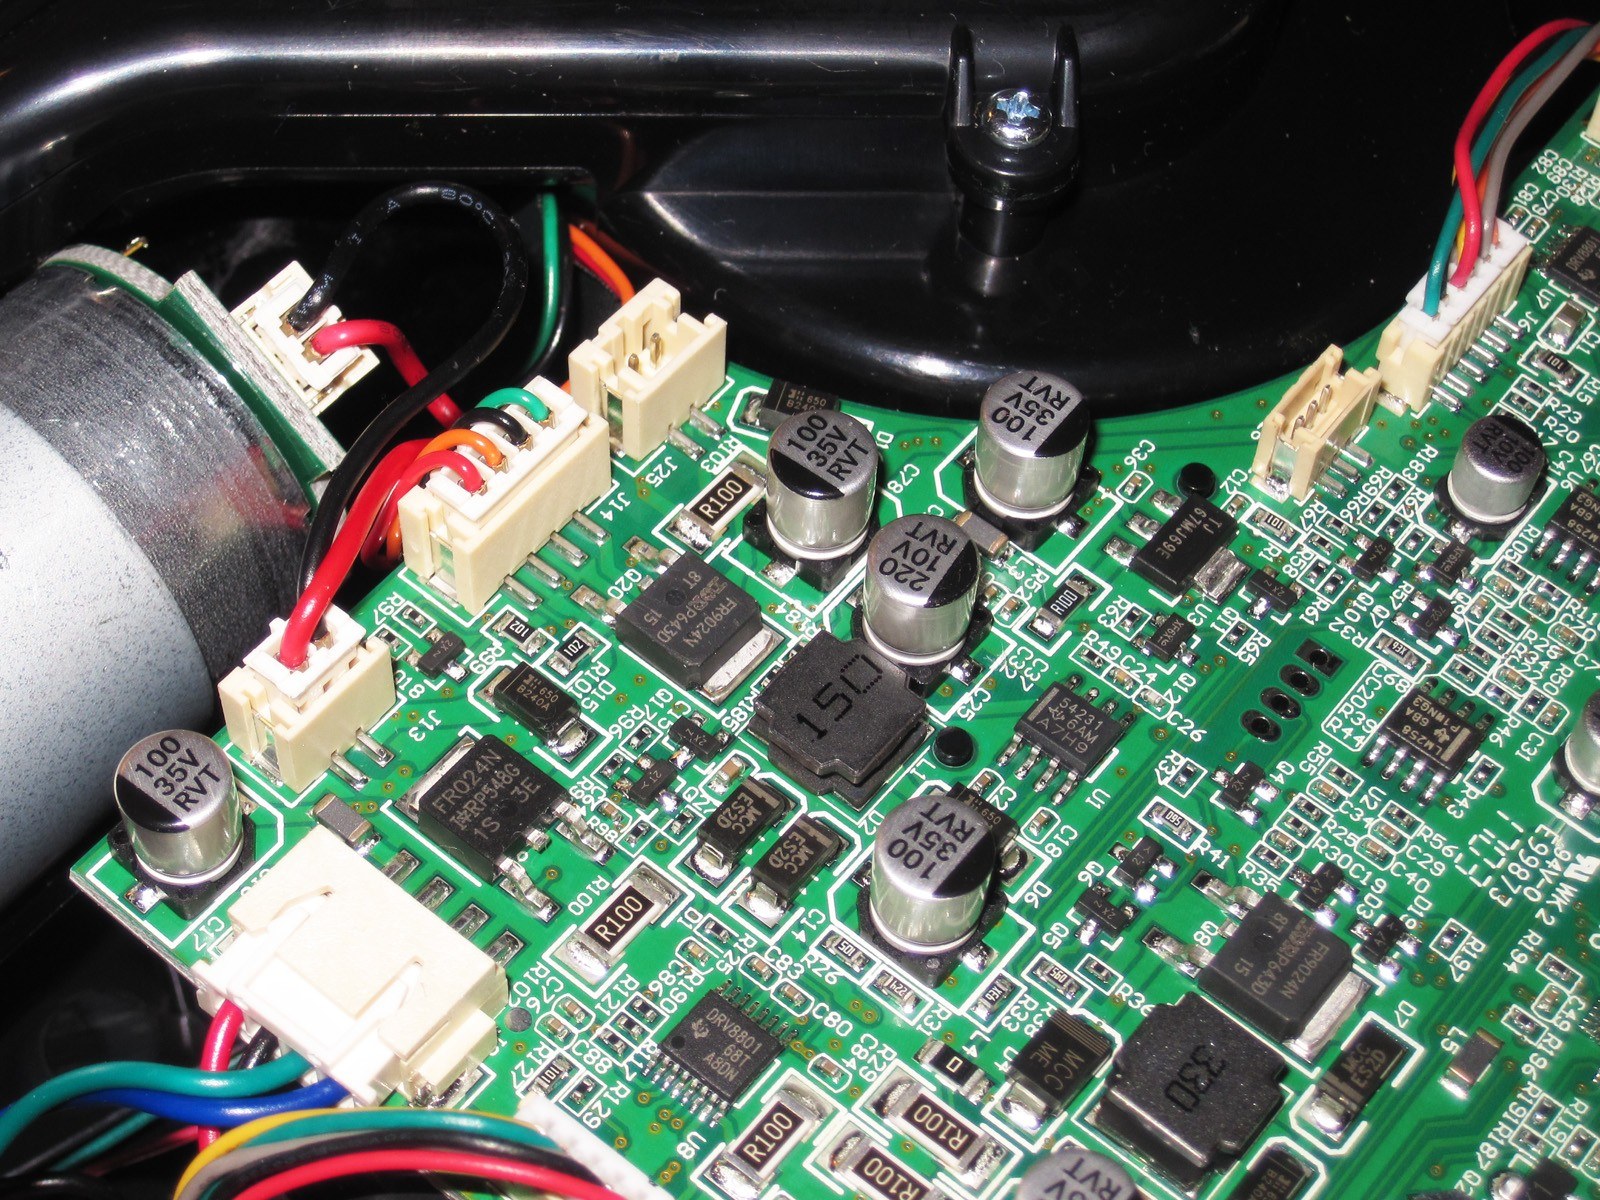
Not only are the motors driving the front brushes controlled independently, they also have separate protection.
During testing, a piece of plastic film got wrapped around one of the brushes and jammed it. The vacuum stayed in place, only occasionally trying to move. But after I freed the brush and let it continue without switching it off, only the brush that had remained free was working. Pressing the top button to switch it off and on reset the protection, and both brushes worked again on the next run. So I have no concerns about the protection.
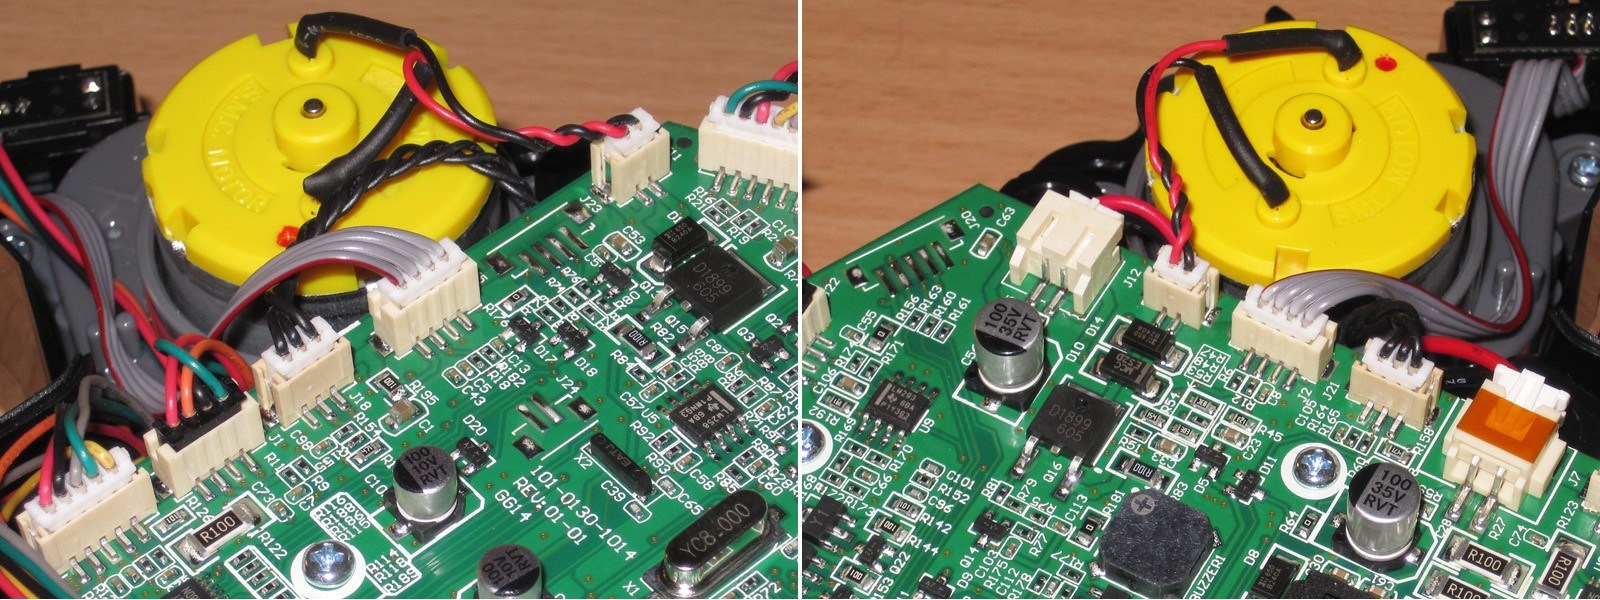
One of the motors drives the brushes. In my opinion, it's a bit oversized for this job, but I won't argue the point.

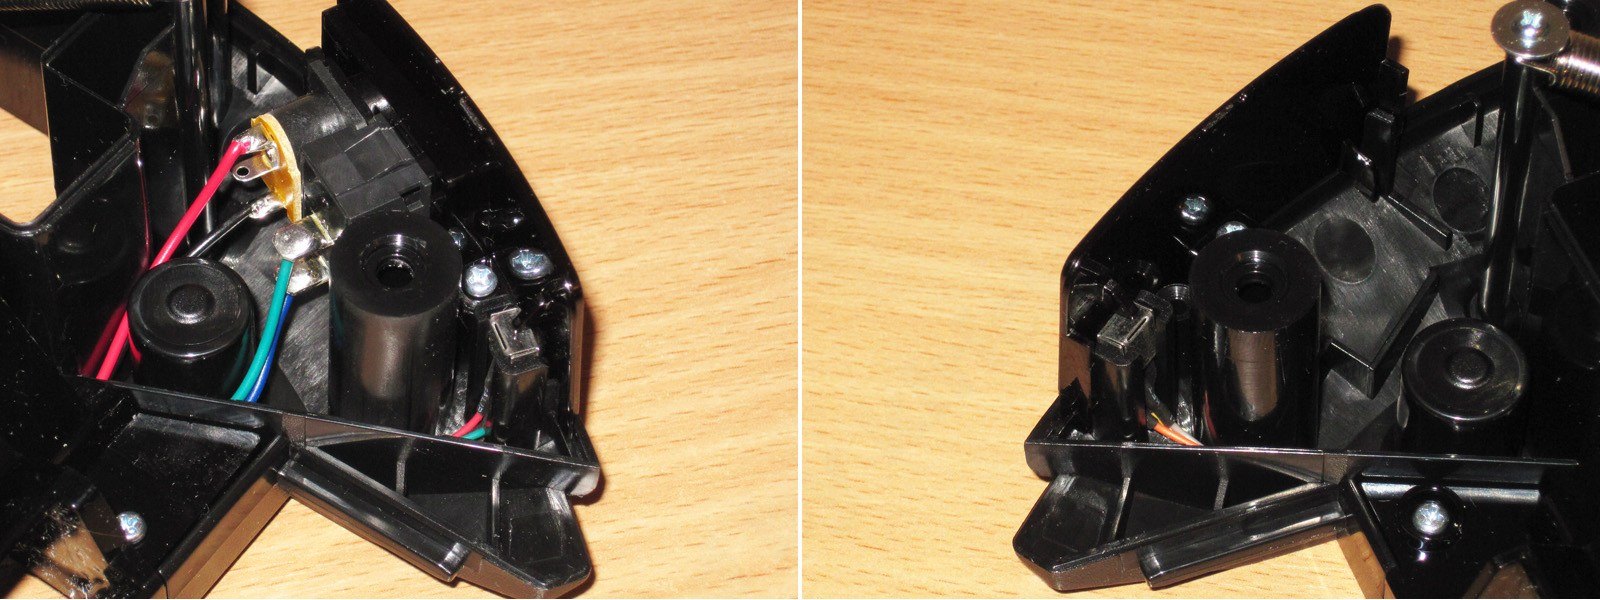
After opening the housing, I found some more sensors. Two of them are in the rear half of the housing: one near the power connector, and the other symmetrically on the opposite side.
The main brush drive motor. There are no tachometers here, since the motor always runs at a single speed.
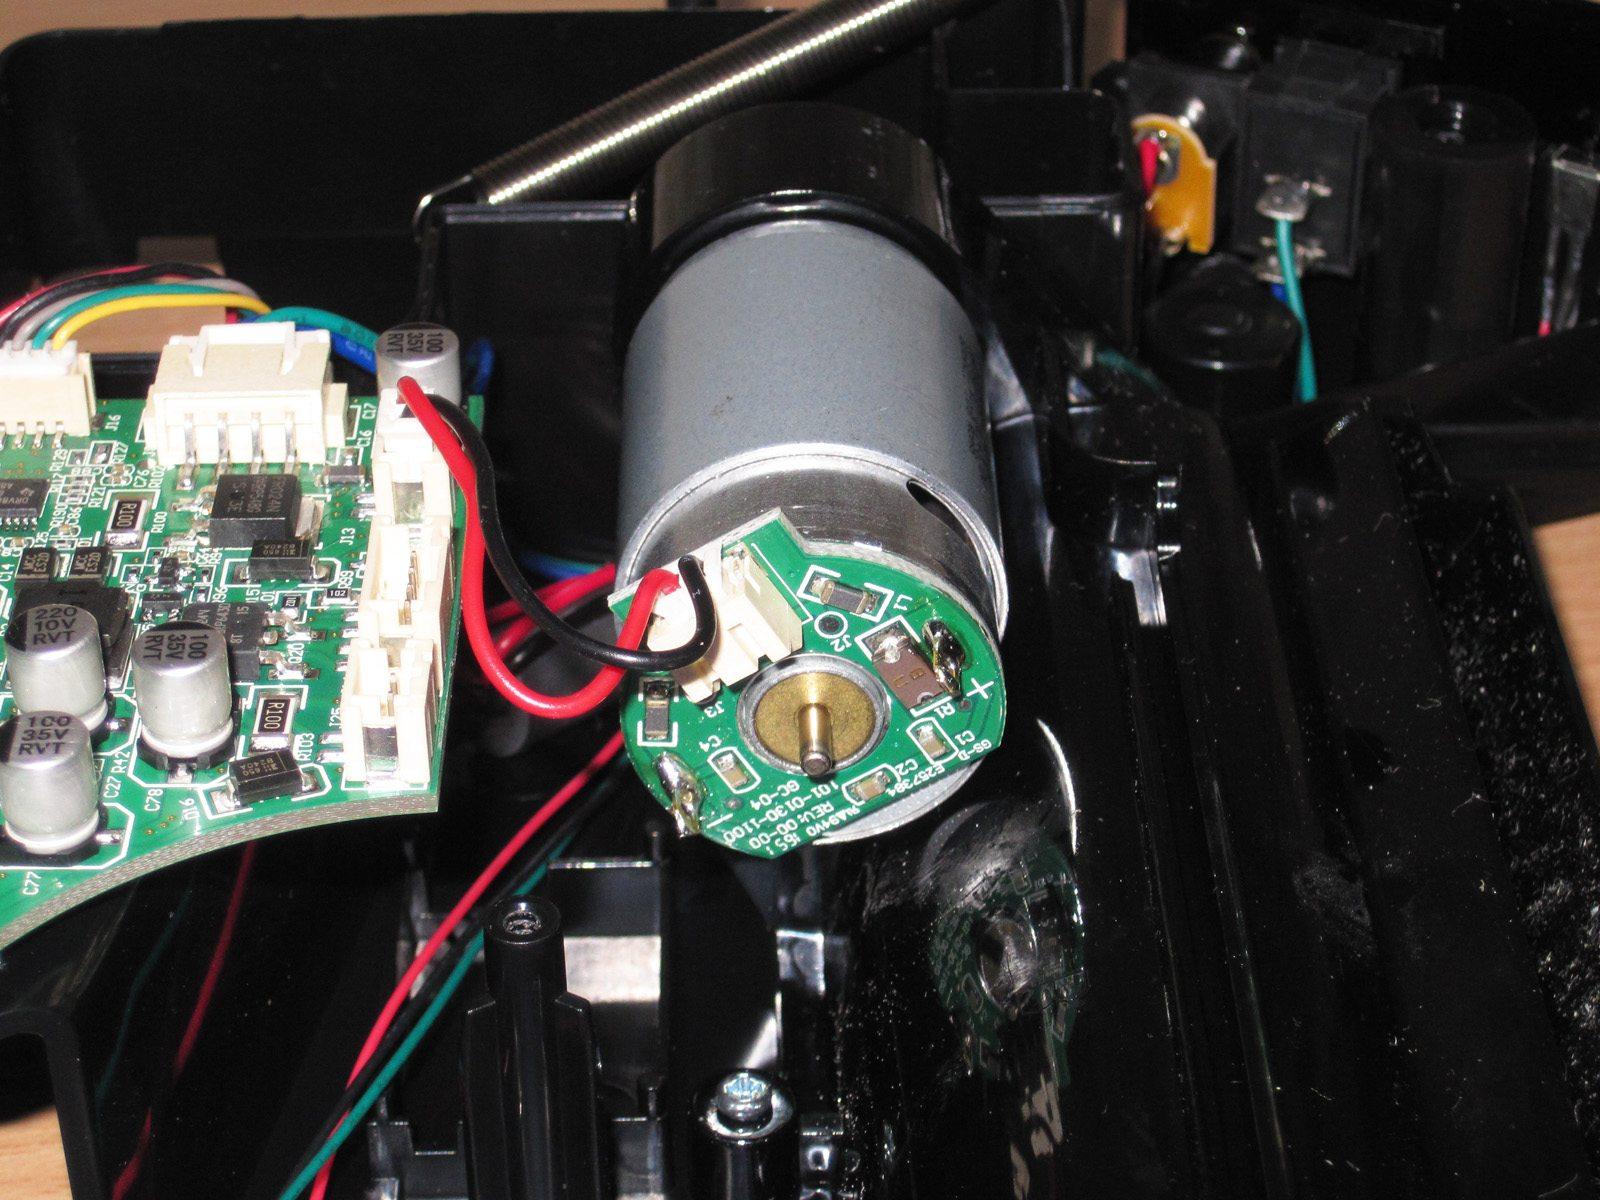
Some of the wires inside are also held in place by hooks molded into the housing.
These wires run from the brush motor. Here's a photo of the motor label, just in case.

The turbine's air outlet is located next to one of the drive wheels. I don't think this is a very good design, since it will simply blow fine dust back into the air while also dirtying the drive motor. It would have been better to move the outlet to the rear or top of the housing. I may be wrong, but that seems more logical to me.
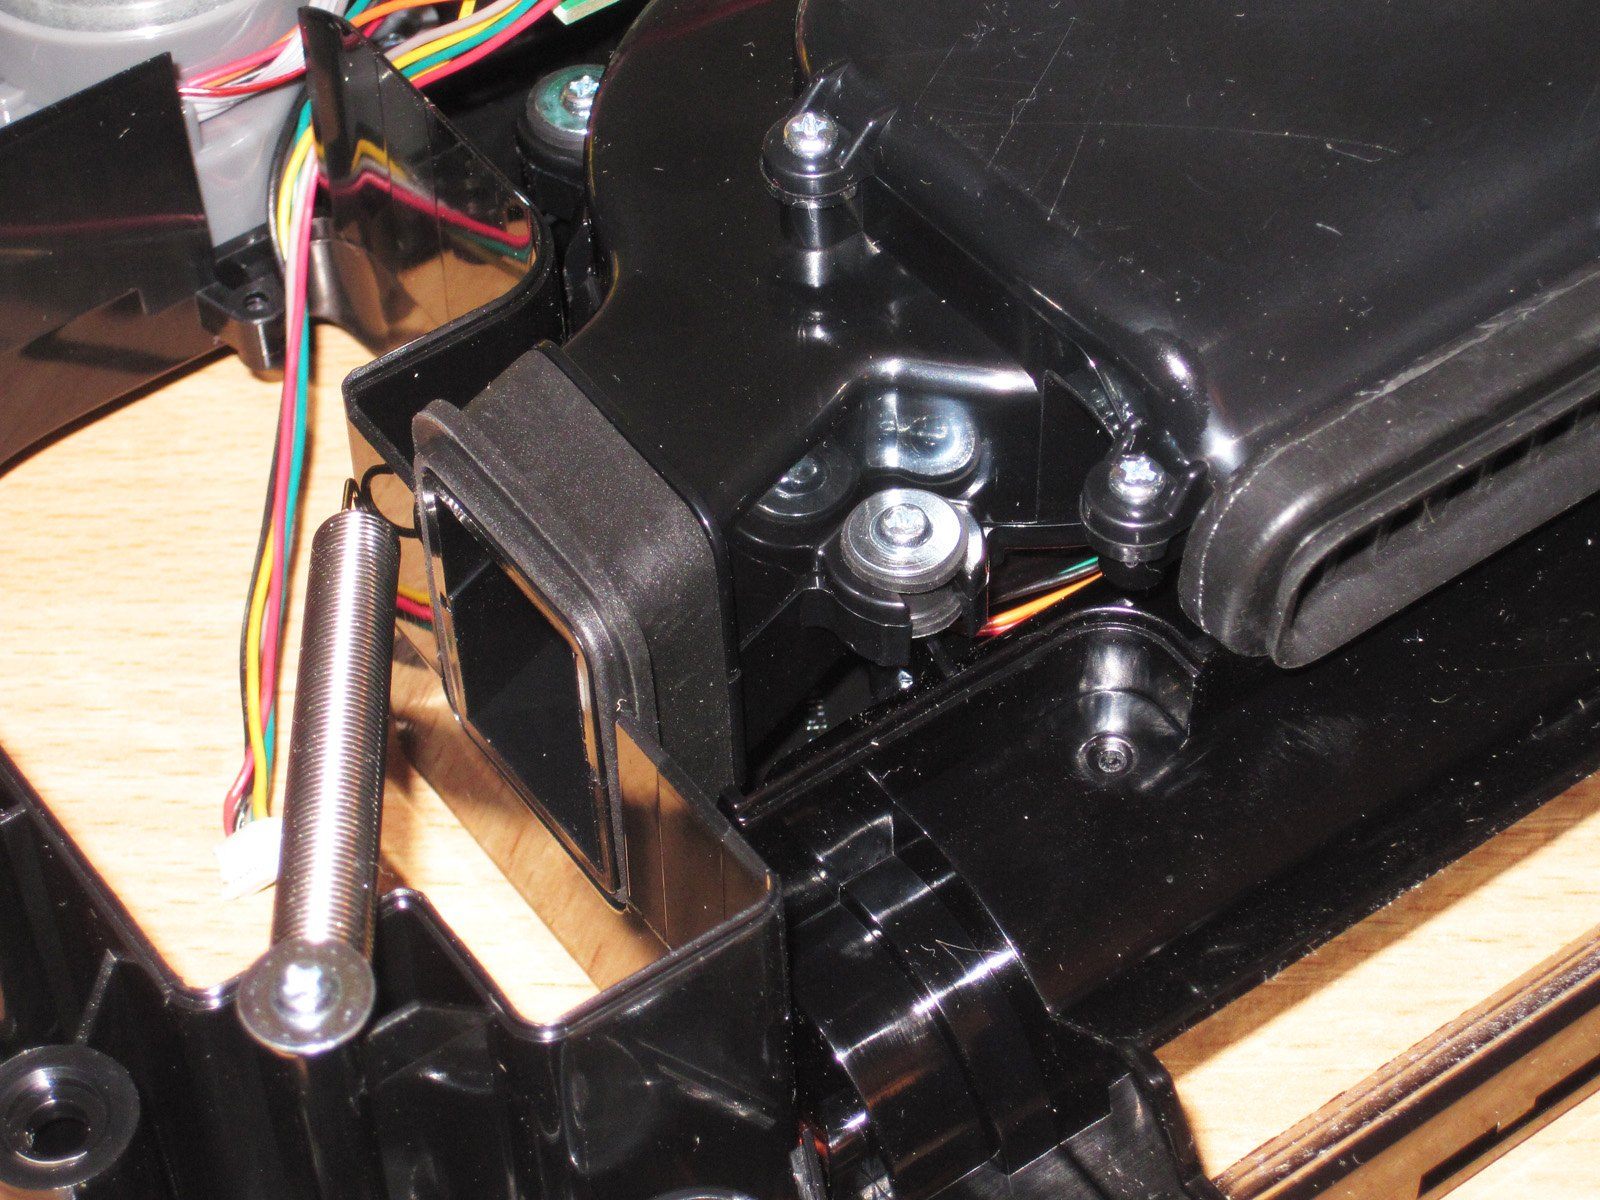
And here's the turbine itself. It has two modes: 600 Pa and 1000 Pa. The first mode is suitable for hard floors, and the second for carpets. The noise level is acceptable at low power; at high power, it becomes noticeably louder, roughly like a vacuum cleaner running at low power.
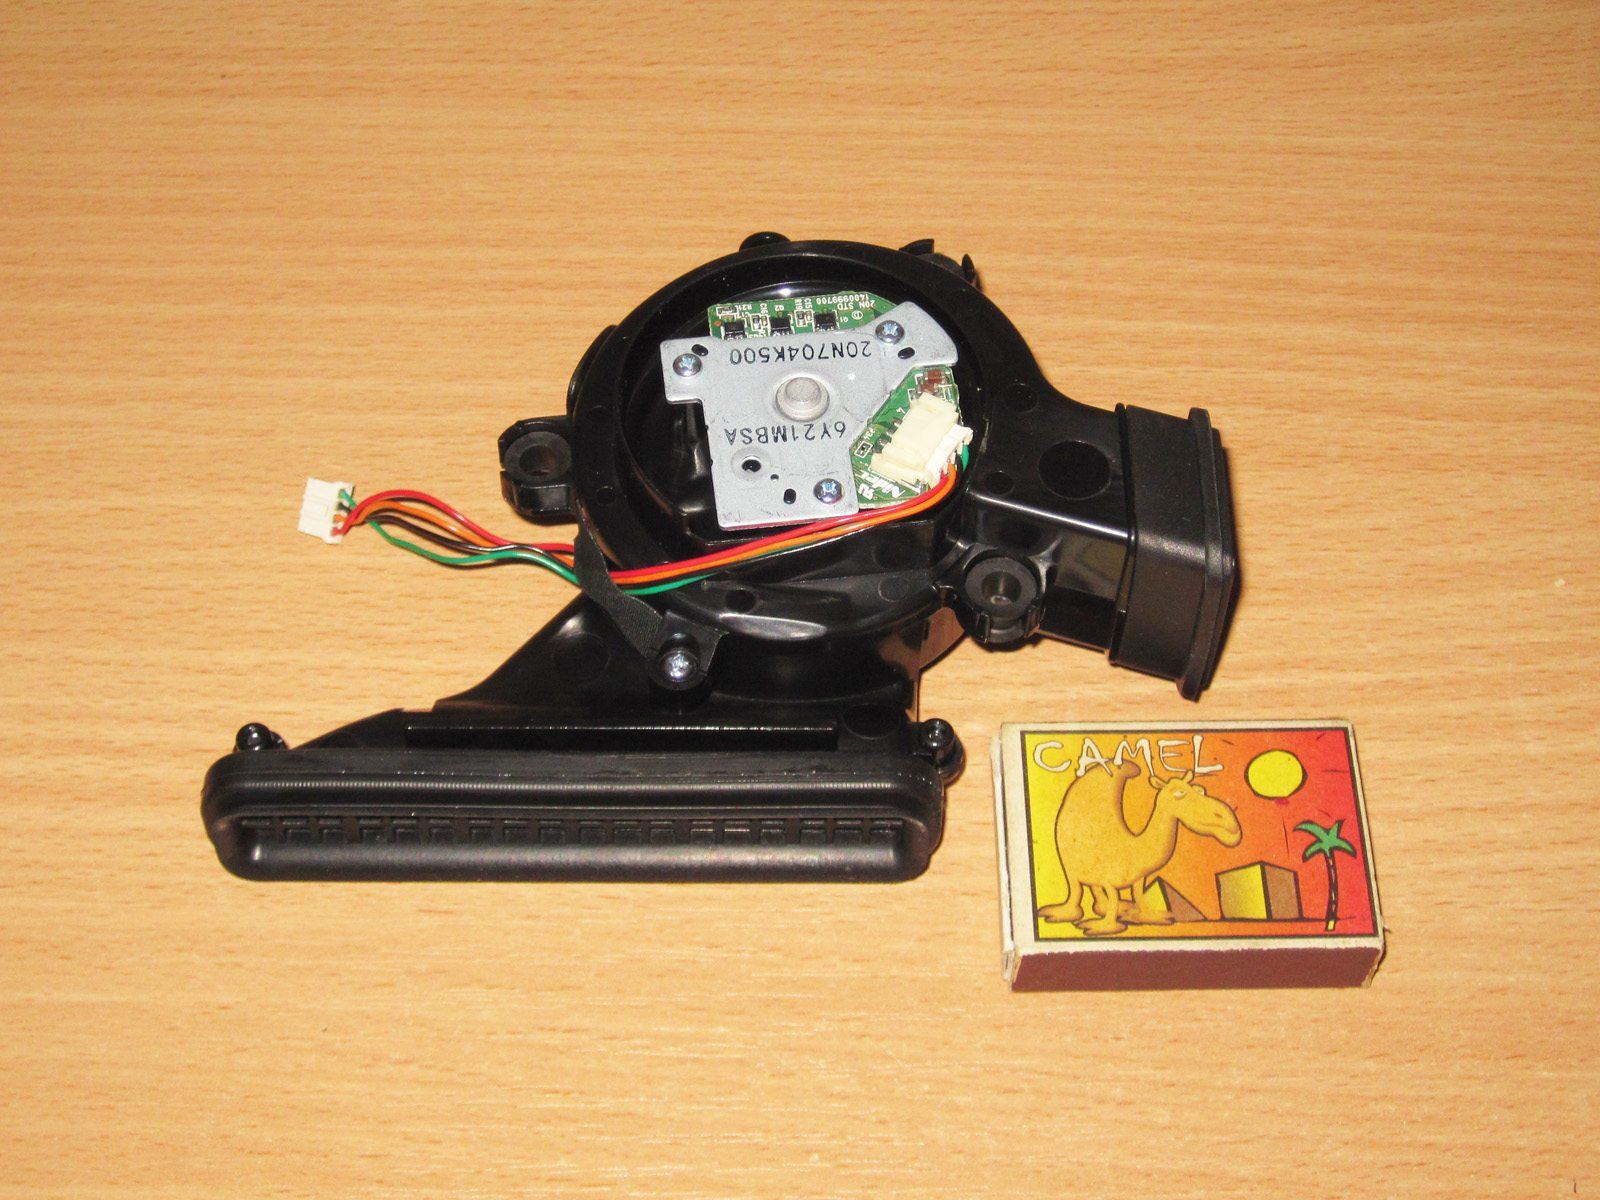
I came across some information saying that it uses a brushless motor. That's right—and it's made by Nidec, which is definitely a plus, since it's a fairly large company. Brushless motors are usually more powerful and last longer; their service life is most often limited only by the bearings.
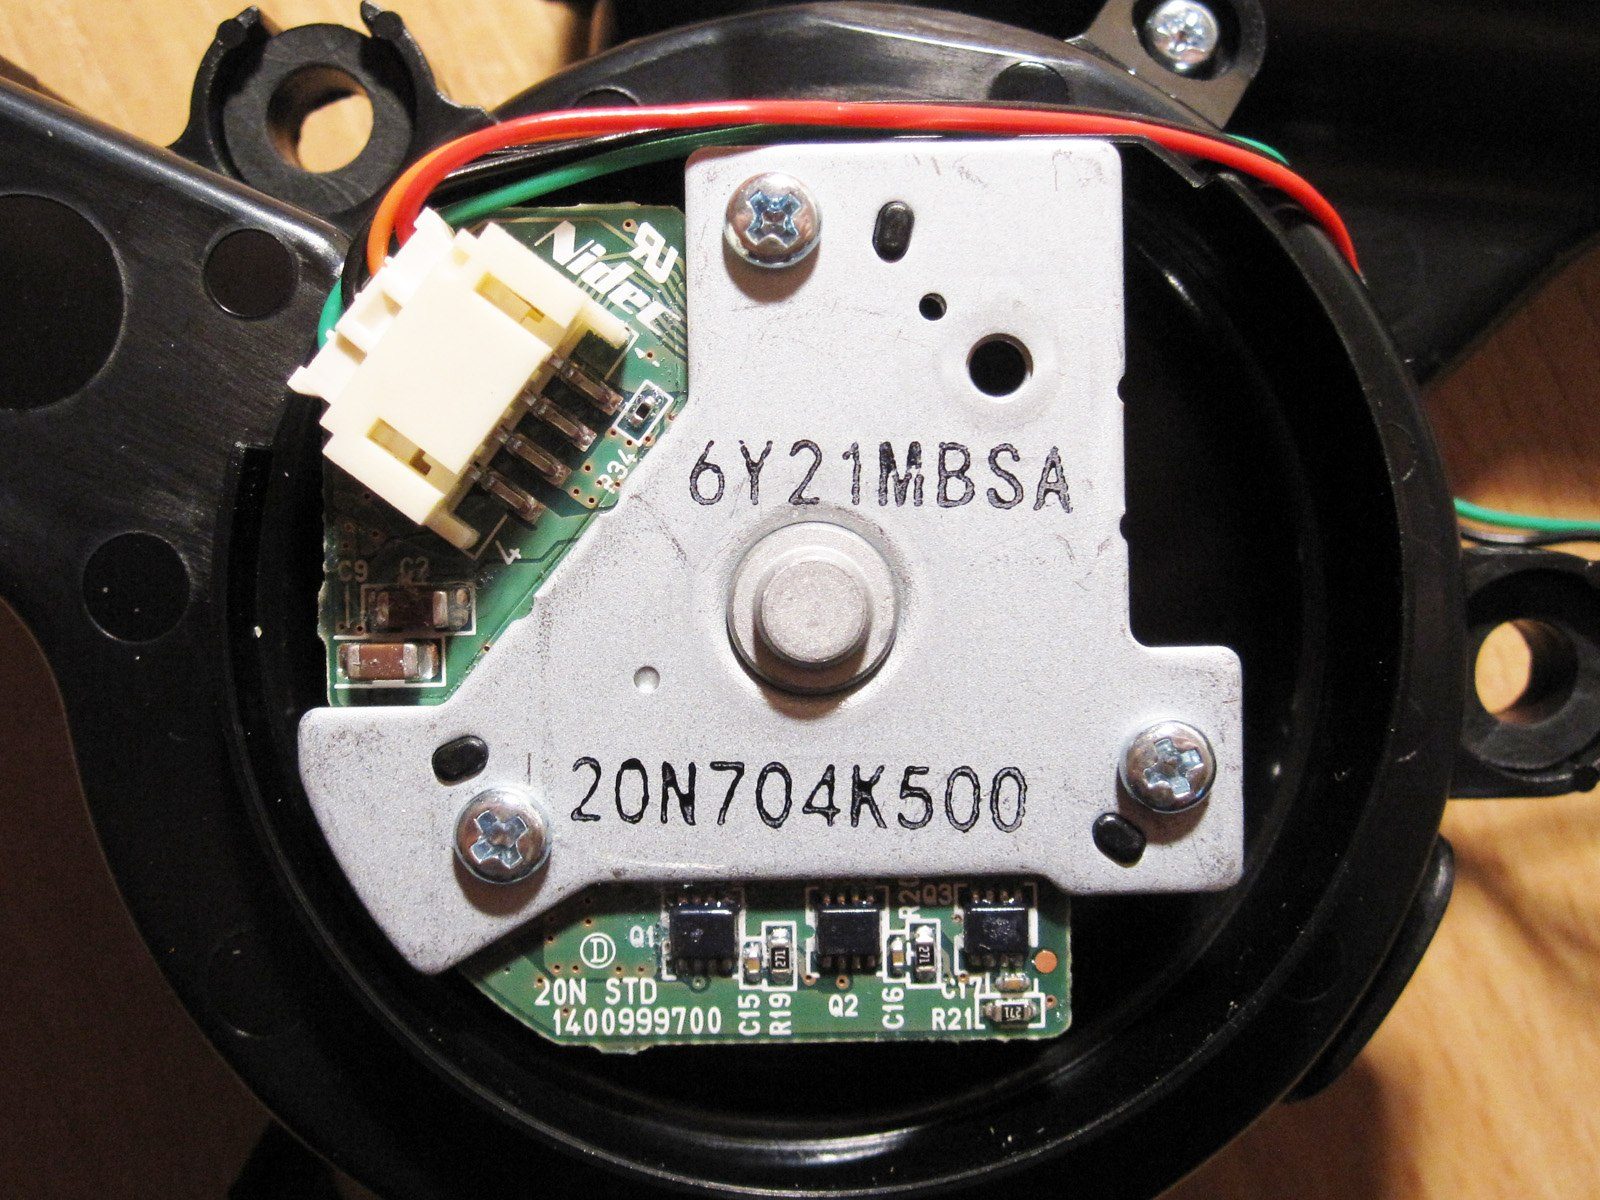
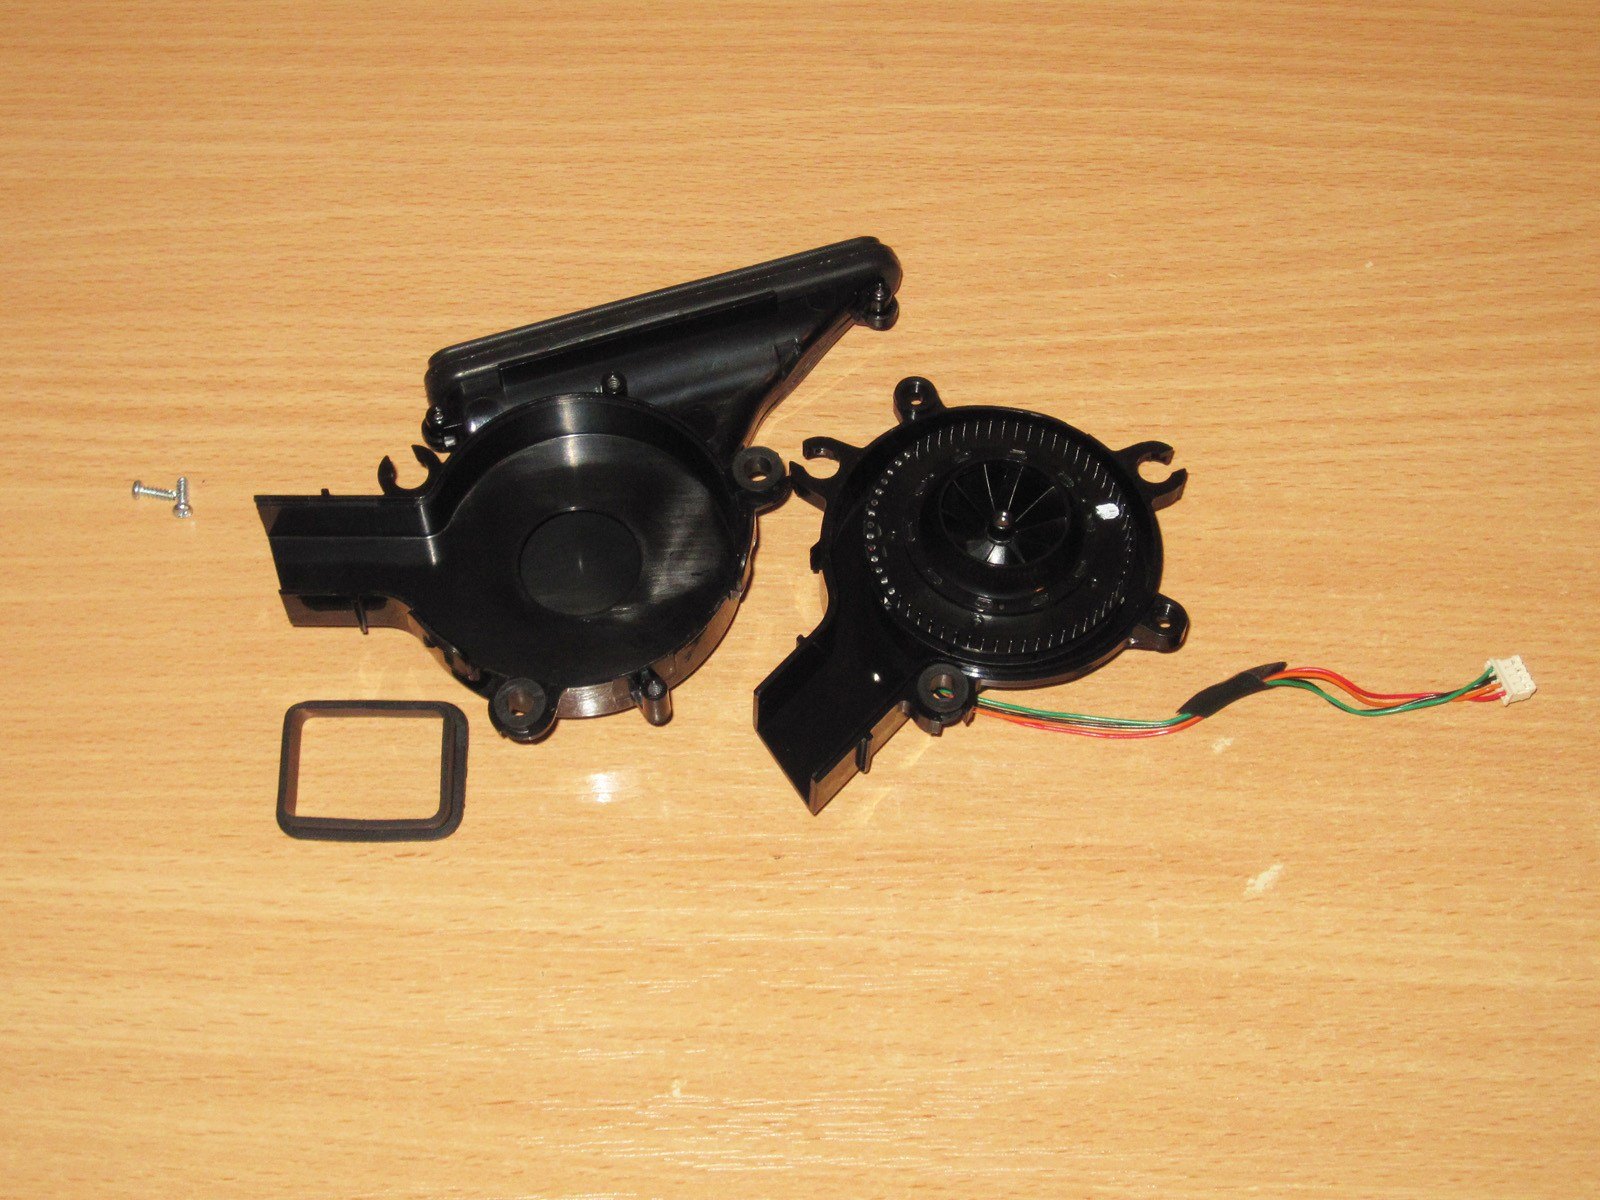
The assembly itself is very compact and relatively easy to take apart.
The impeller shows signs of balancing. That was actually why I didn't take it apart any further, especially since I was doing this before the tests.
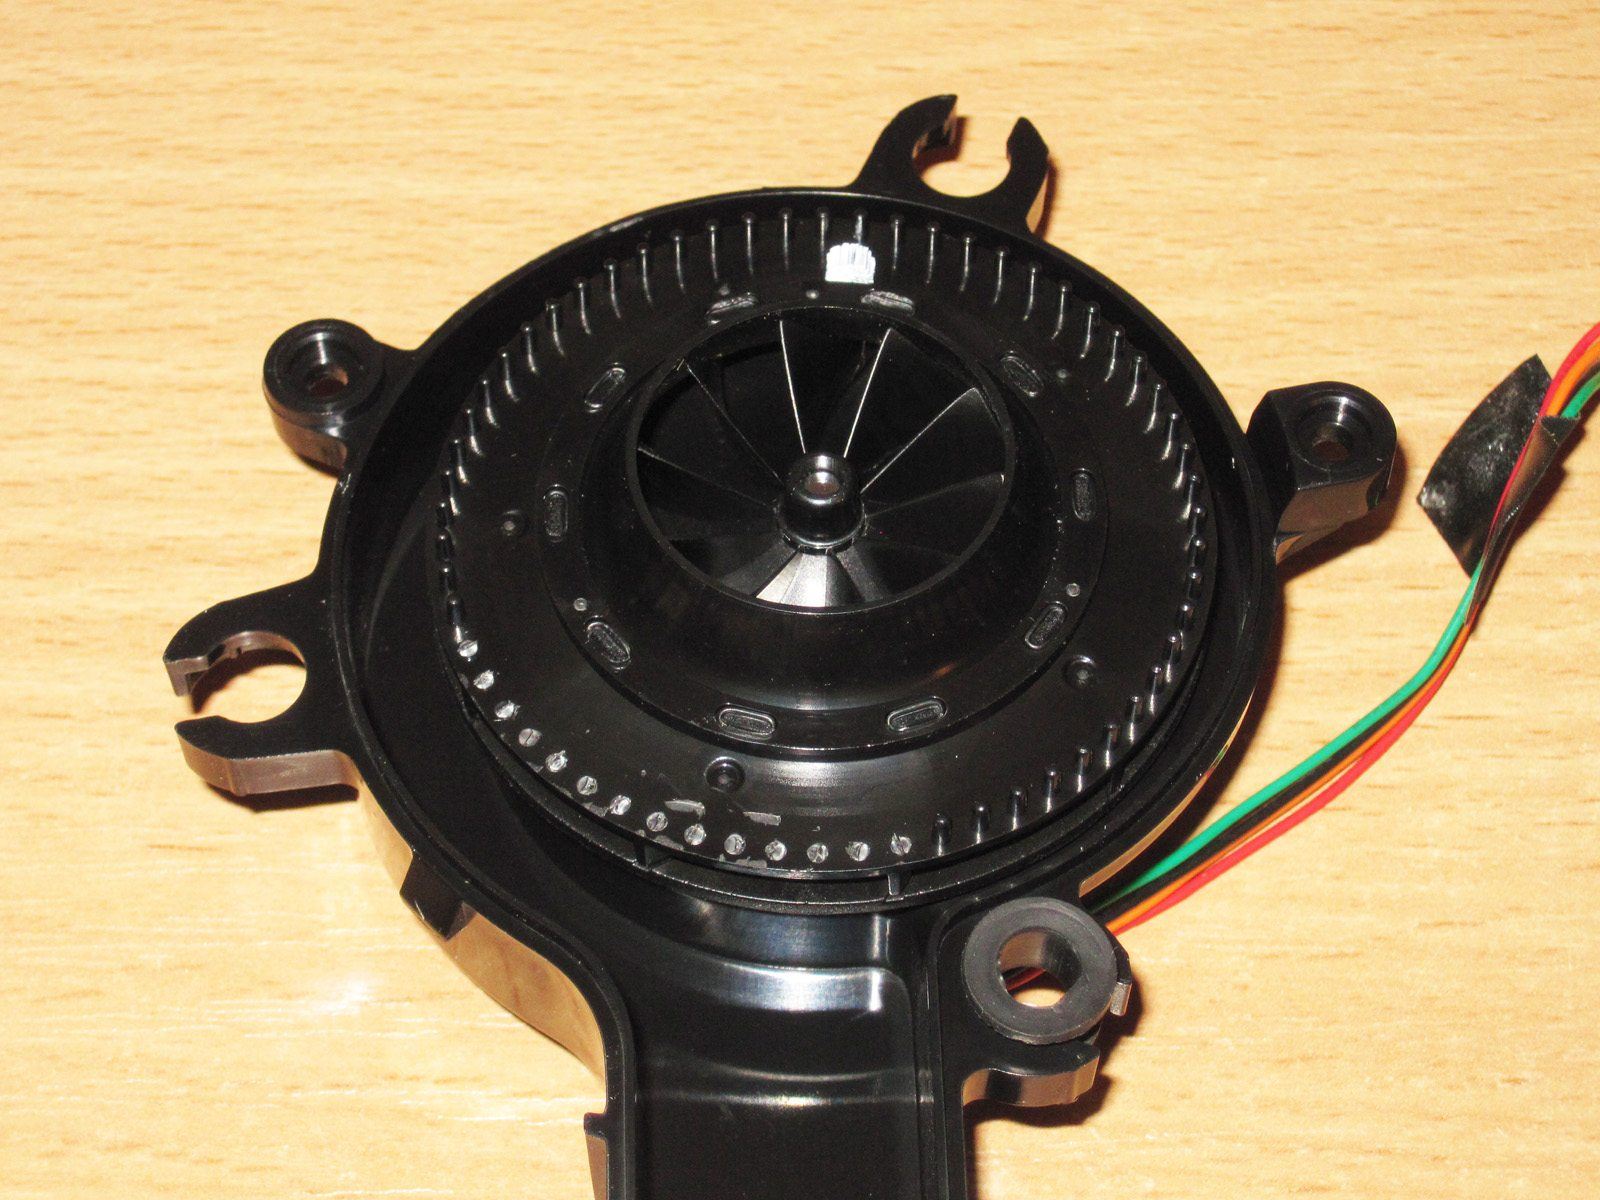
I couldn't get to the motor, but its size and design reminded me of the disc drive motors in computer DVD or CD drives. I think its fairly high power is achieved through improved cooling.

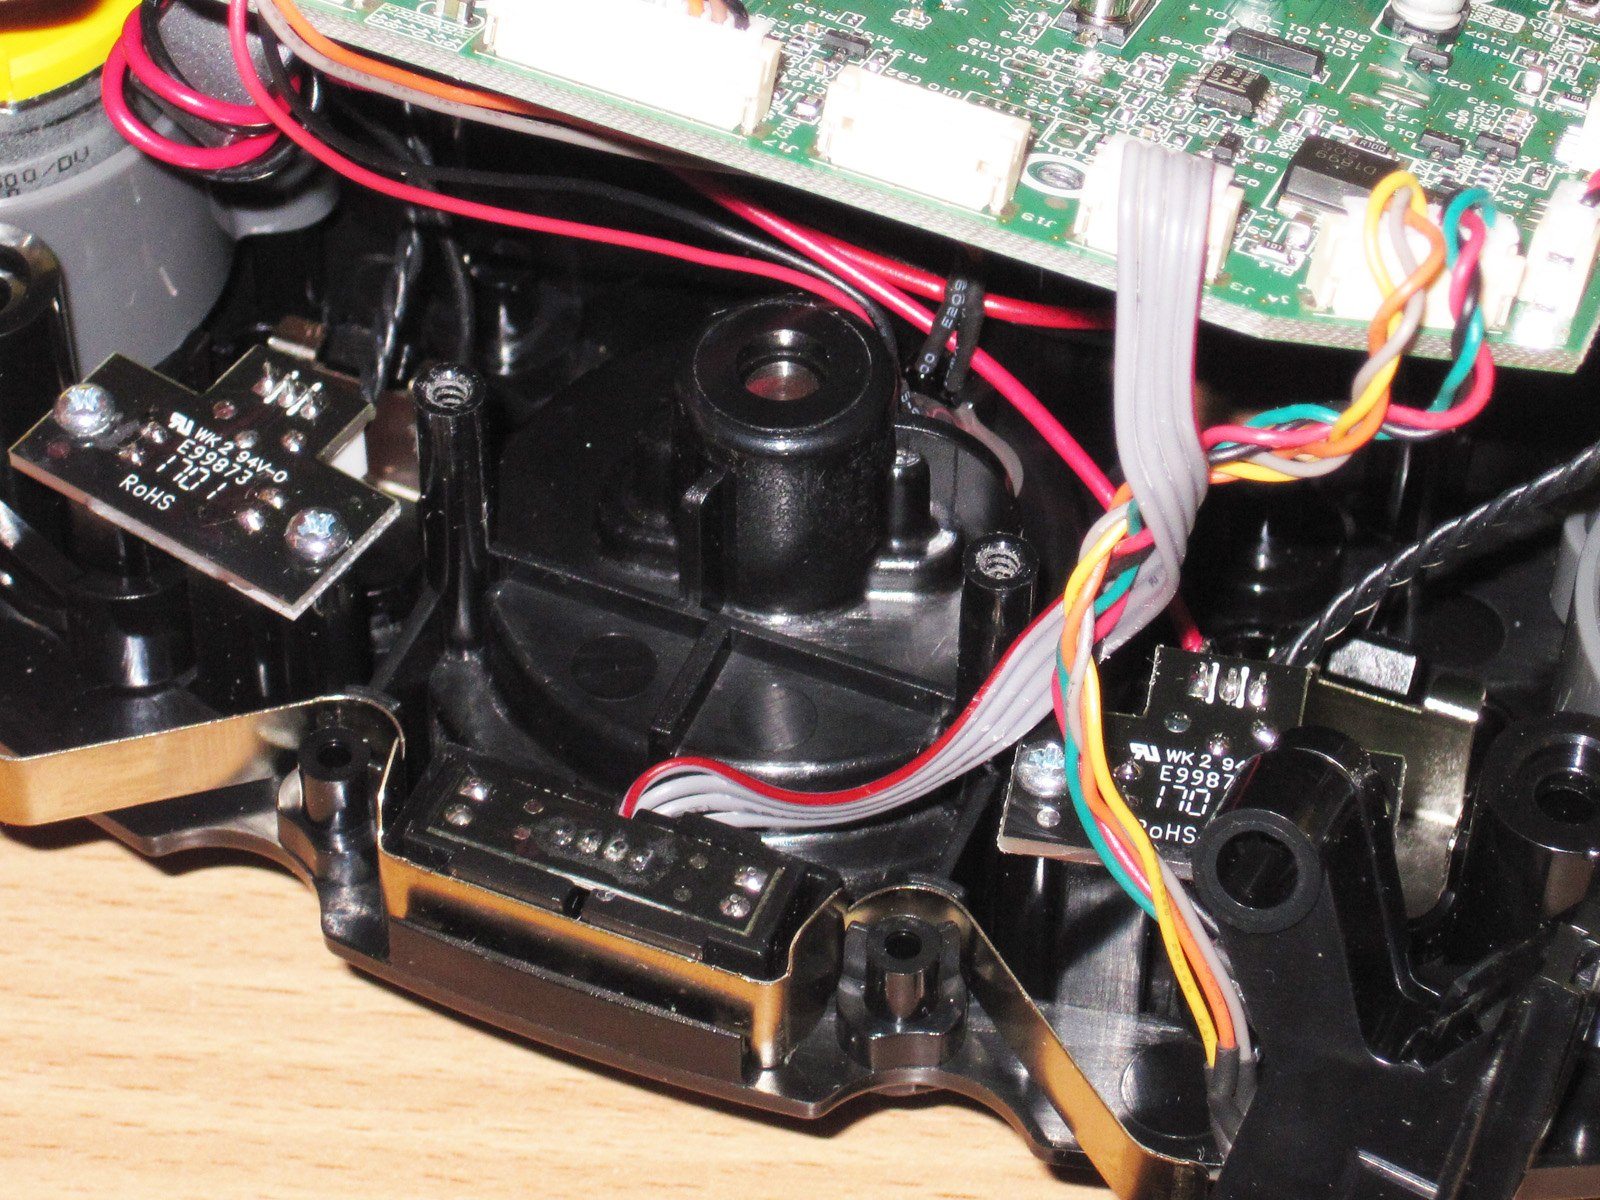
As I mentioned above, the front section isn't rigidly attached to the housing. Pressing on it activates one of two sensors. They're optical sensors rather than the usual microswitches, which is also something of a plus. Or rather, that's not quite right: contact switches are also quite reliable, but they're a little slower and have to be replaced if they fail. Here, you just need to clean off the dust. If I were building a similar device, I'd probably use contact switches, although optical ones are arguably better.

There's also a forward-facing sensor that detects when the vacuum approaches an obstacle.
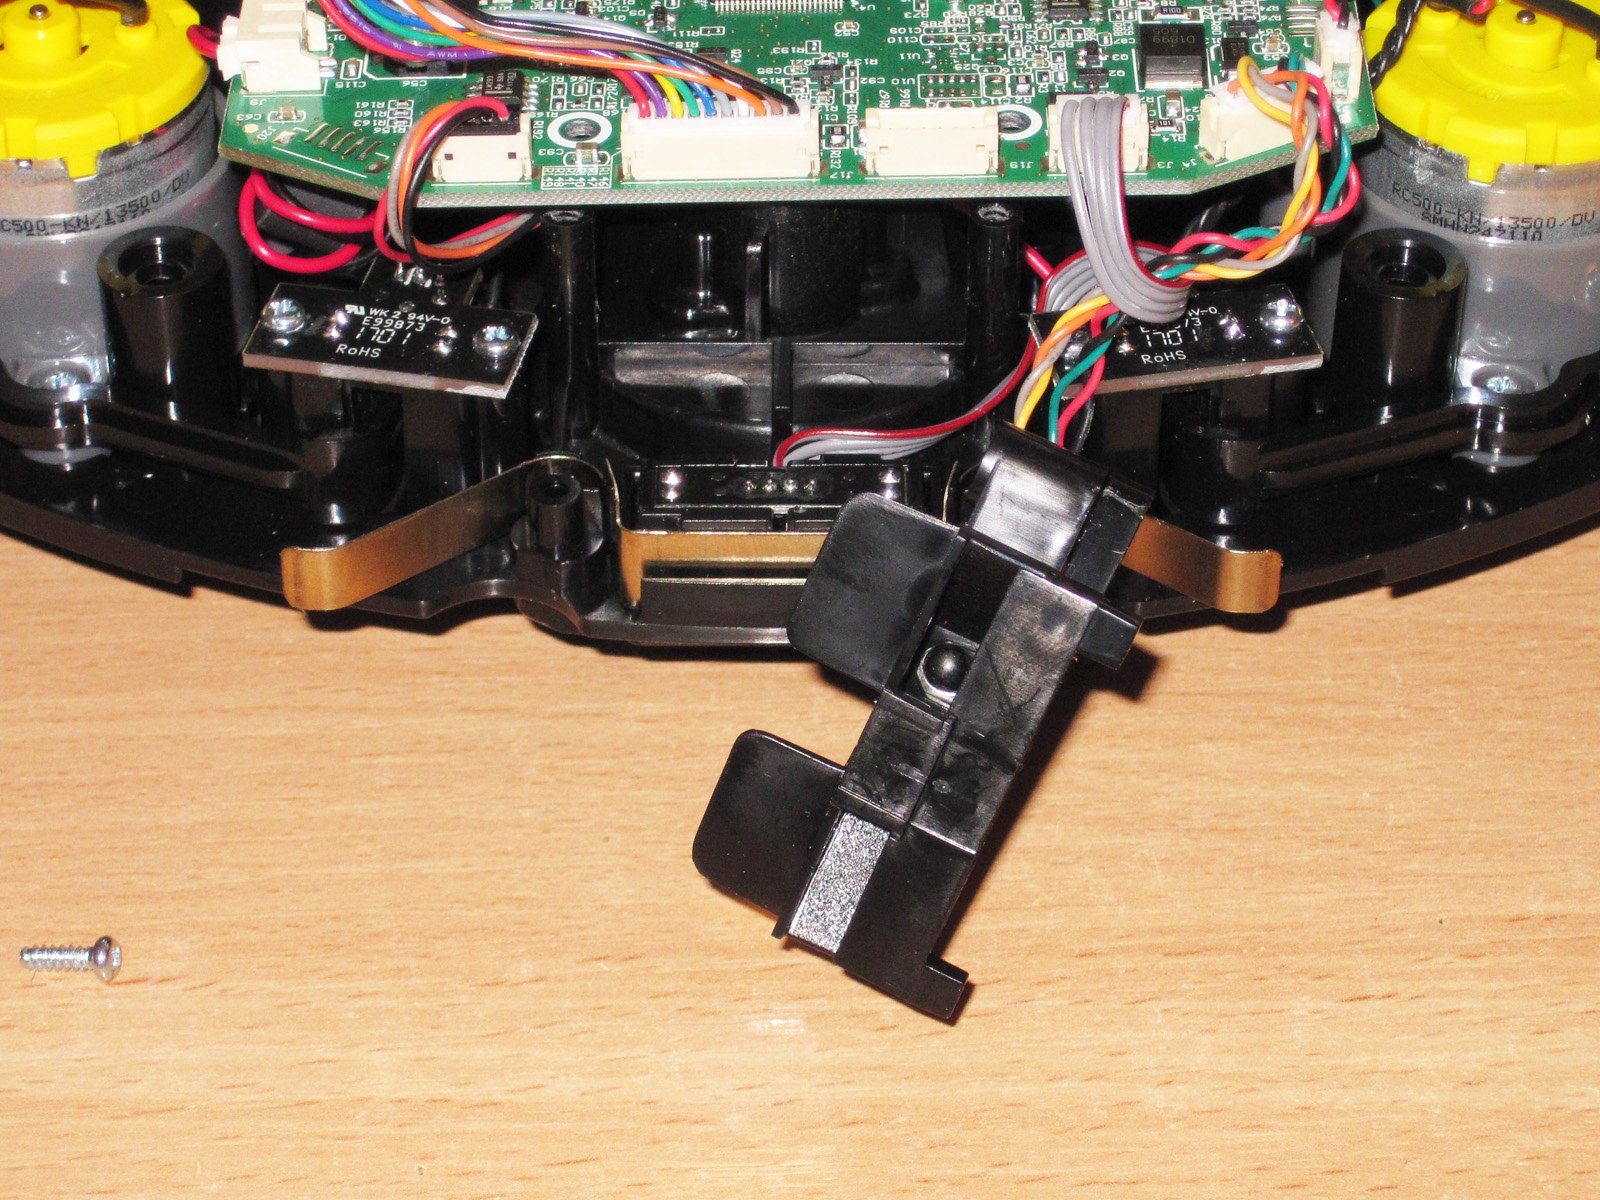
Another sensor is installed under the front caster. It presumably counts the distance traveled, though I can't say for sure. The important thing is that dust from the wheel tends to clog this sensor, so the wheel is removable—but I only found that out much later.
I also checked the battery capacity. By the way, I've seen reports that it contains Sanyo batteries. I could of course open it up and check, but in this case I was only interested in the capacity.
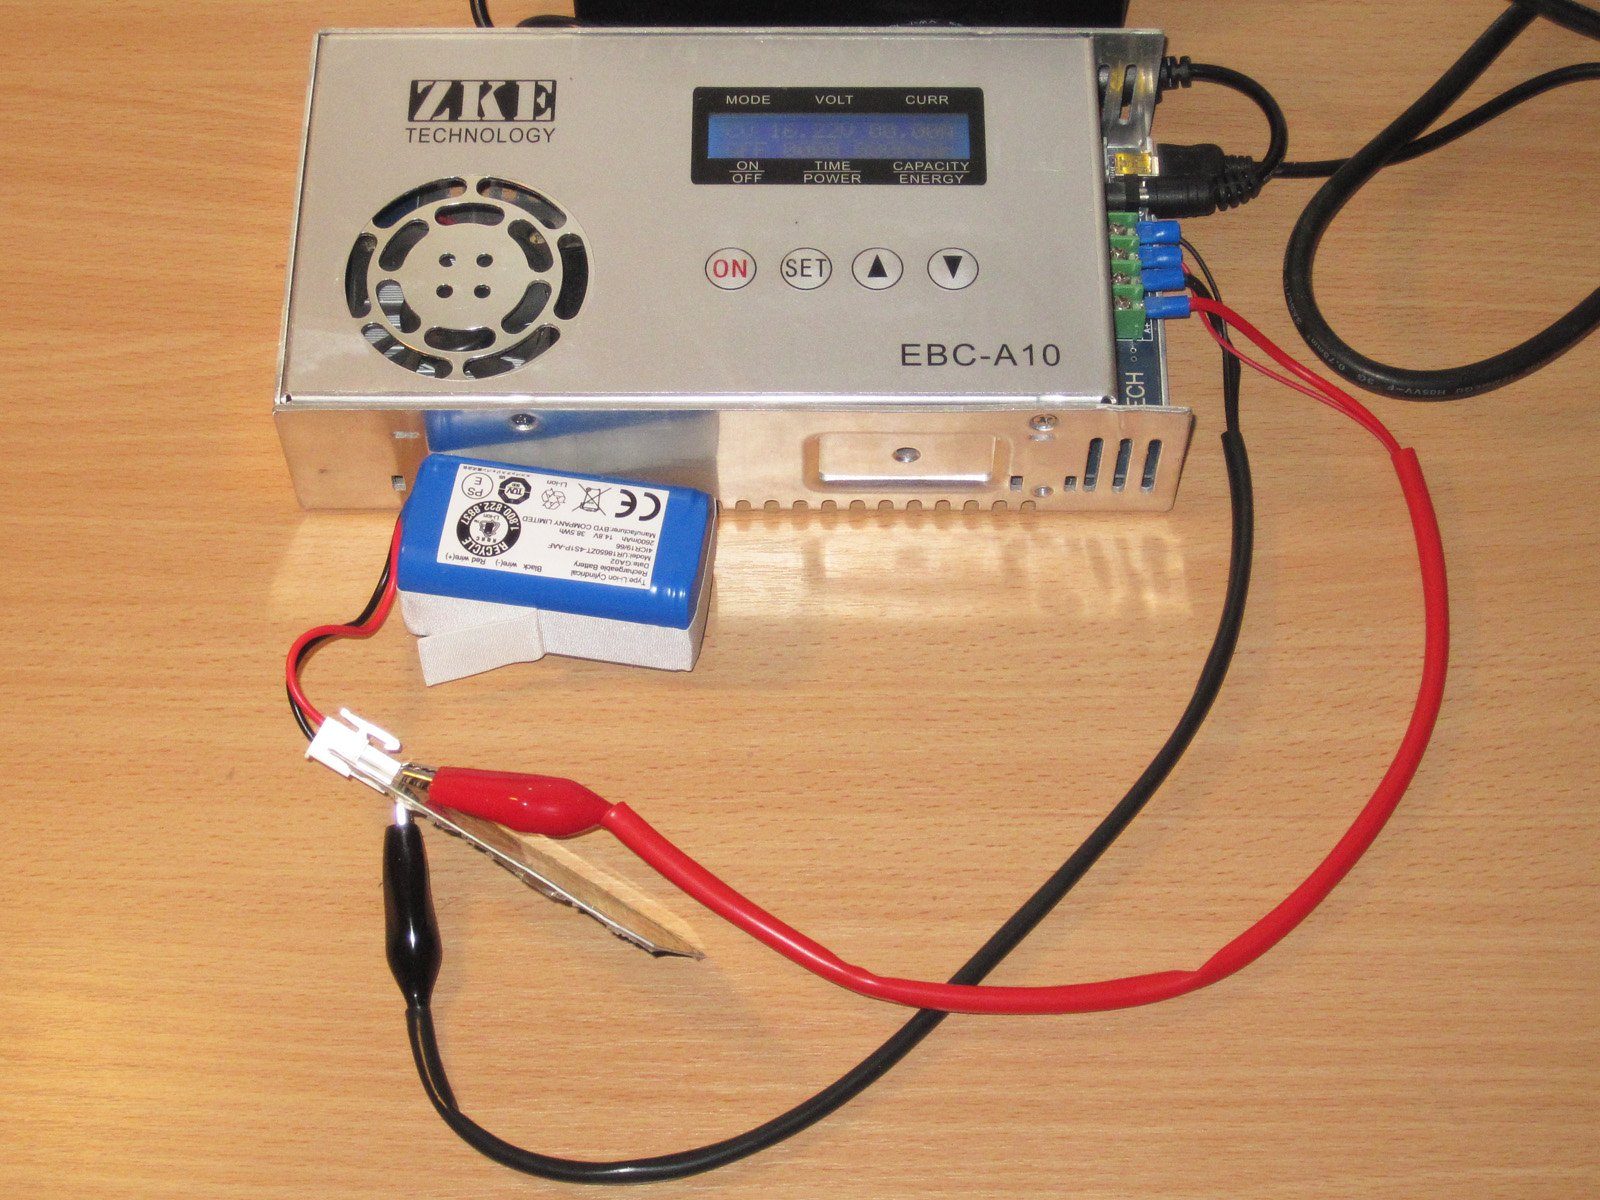
Discharged to 2.8 V per cell, the capacity was about 2500 mAh, compared with the rated 2600 mAh. That's a little odd for a name-brand battery.

Now we can move on to the tests and how it works. But first, charging.
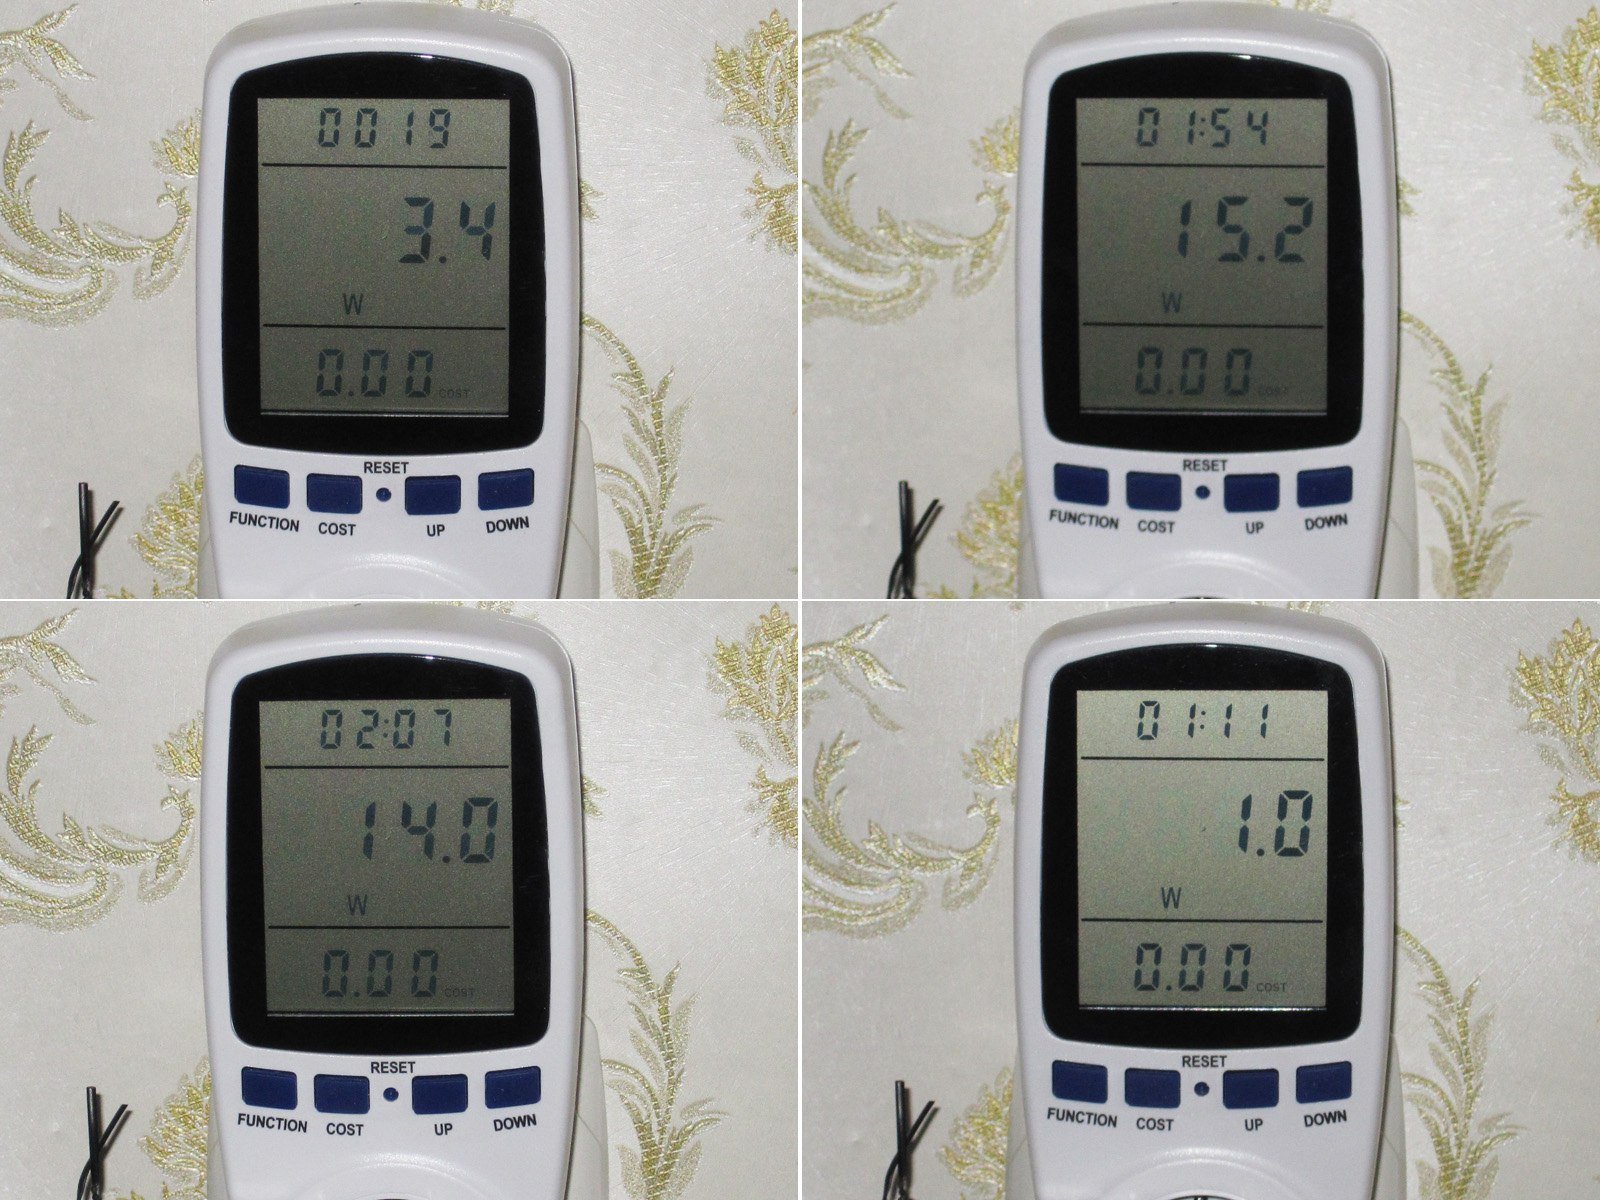
Once the vacuum docks at the charging station, it starts charging at a low current. After about two minutes, the charging current reaches its maximum and power consumption is around 15 W. Just half a minute later, consumption drops slightly to 14 W.
As charging nears completion, the current drops further until charging is switched off completely. At that point, power consumption is 1 W.
As I mentioned at the very beginning, I used the vacuum for about two weeks, so I can share a few conclusions.
As a way to keep things clean, it works quite well. The photo below shows the results after two cleaning runs in a three-room apartment. Most of the dust came out because it was able to get into places you can't reach when mopping the floor.
Using a vacuum cleaner doesn't eliminate the need for wet cleaning; you can just do it a little less often and see less dust the rest of the time.
But comfort comes at a price.
You have to put away all the wires. If you don't, they'll get tangled around the brushes.
If your curtains reach the floor, it will only clean up to the curtains. And if there's a 10-20cm gap between the curtains and the wall, that area will stay dirty.
The easiest thing is to put away anything it could get tangled in and shut it in a room for about 40 minutes. The room will be clean.
If you leave the doors open, it will start roaming around the whole apartment, which is inconvenient.
The automatic algorithm is both not very well thought out and the mode you'll use most often. The problem is that the robot moves almost randomly: it goes over some spots five times and others only once.
The upside is that it navigates around obstacles properly. If there are table or furniture legs, it will clean around them, circling each obstacle.

I don't see much point in testing how it cleans a large area, so I'll just show a few examples of the things I was most concerned about.
First, corners, since it's always hard to get dust out of a corner. For the test, I sprinkled some dust into a corner (fortunately, this is reversible) and started the vacuum.
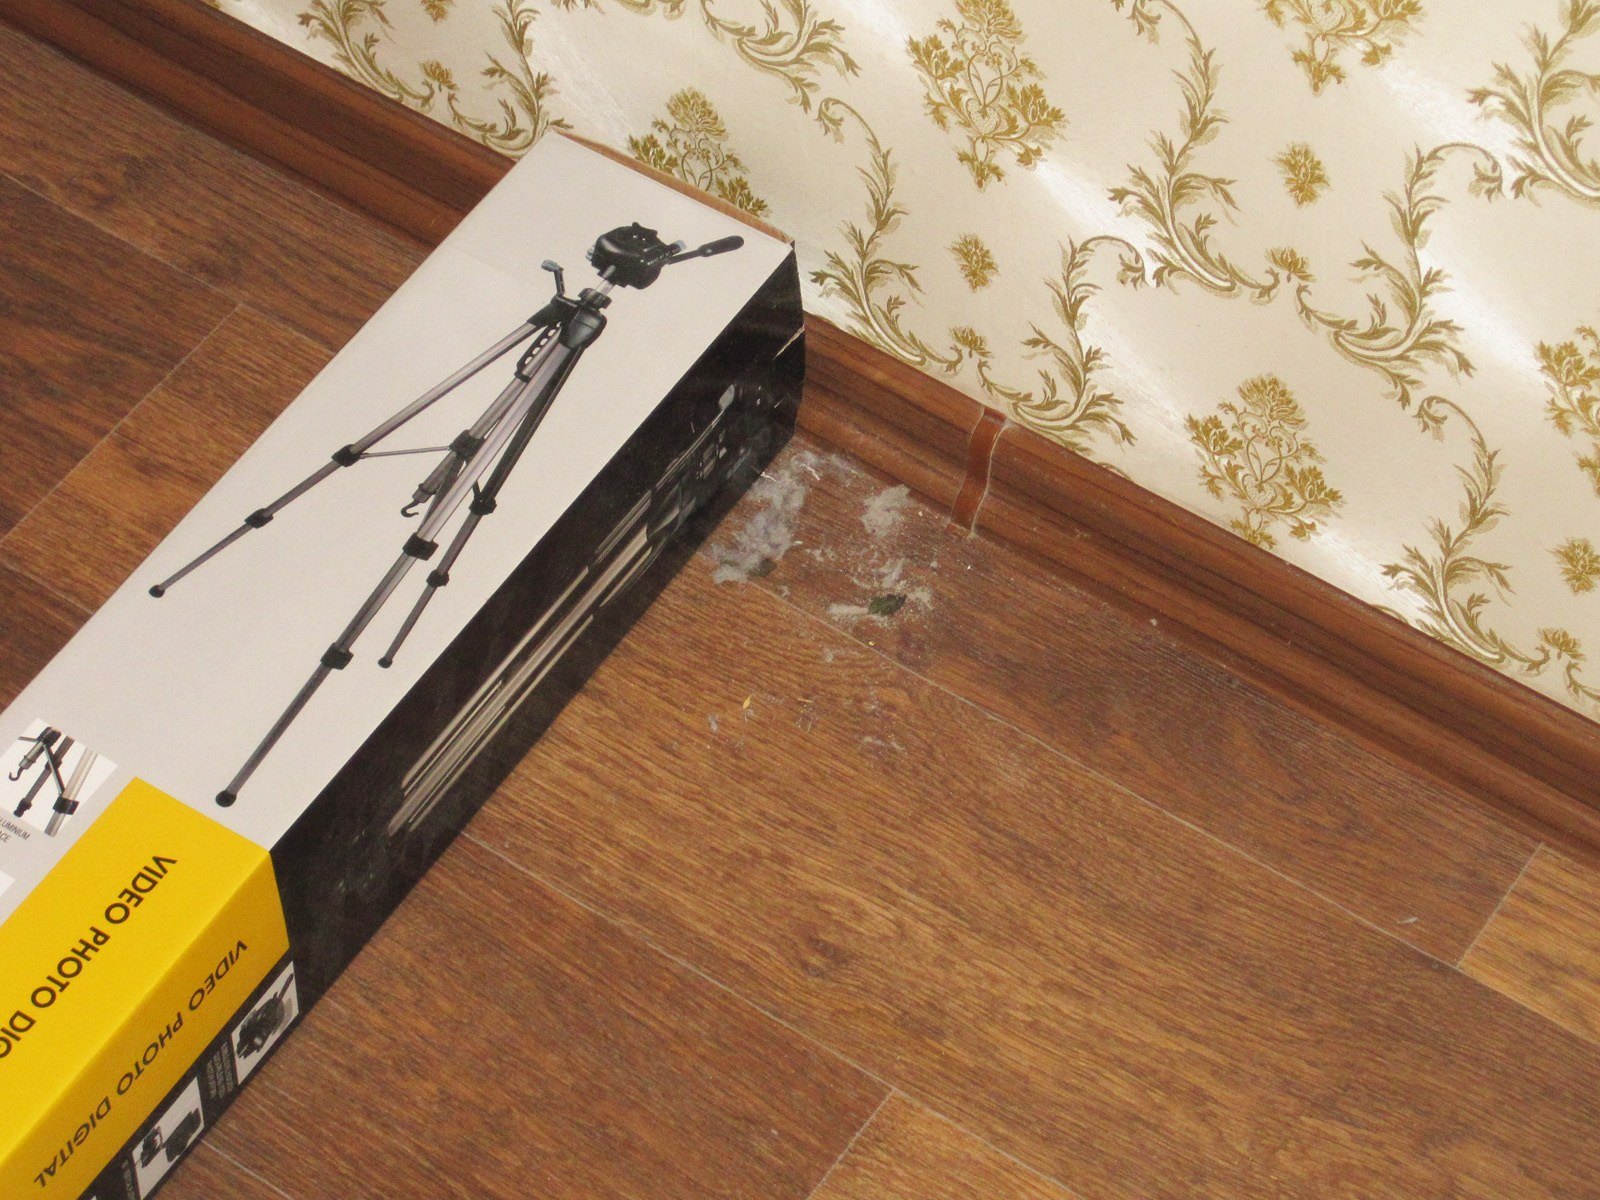
The vacuum didn't clean the corner right away because it was in automatic mode, but it did eventually get all the dust out. In my opinion, the result was pretty good.

Another test was to see if it could pick up a pile of clipped component leads, since that's a pretty common sight for me.
I poured some leads onto the floor from a little bag.

It didn't pick them all up, but if you watch the video, you'll see that it first scattered some of them with the brushes, then kept heading off in the wrong direction, so it mostly just passed them by.
Still, it picked up most of them without any trouble, leaving about five on the floor.

Video of cleaning the corner and picking up the "scrap metal."
The hardest part was getting it into the corner. It absolutely refused, so I eventually switched on perimeter-cleaning mode.
I'll also demonstrate the different operating modes.
1. Spot mode: in this mode, the vacuum always runs at maximum power.
2. Random mode: here I switched between normal mode and higher power during the test to compare the noise levels.
3. Perimeter-cleaning mode: during this test, the vacuum nearly escaped from its enclosed area.
And now for obstacle climbing. This test isn't particularly relevant in my case, since I don't have any thresholds, so the vacuum can move freely around the whole apartment. But I tested it out of curiosity.
1. Automatic return to the dock. If you move the vacuum, while it's in standby, closer to the dock, it will climb onto it automatically after a minute. In all the videos that follow, I sent the command using the remote.
2. 10mm OSB, followed by 18mm particleboard.
3. 18mm particleboard.
4. 10mm OSB + 2mm shim, 12mm total.
Before the brief summary, I'll explain why I went into all this detail. Looking at the fairly substantial and complex internals got me thinking: why doesn't the manufacturer start making... kits based on this platform?
After all, we've got a microcontroller control board, six motors, about ten sensors, a remote control, even a power supply and charging dock. Develop software for programming these robots, and you'd have a great educational toy that's actually functional.
I remember seeing a cool moon rover with microcontroller control in a magazine back in my day, but unfortunately I never got to see one in person.

Of course, you can buy anything these days, but for example, a robot like this costs about one and a half times as much as this vacuum. What are you paying for? The vacuum is much more complex.

So here's my suggestion to the manufacturer: make something similar based on this platform, but at a lower price. They already have the platform for it.
And now for the summary.
The device itself is interesting and, what's more, quite useful. If the developers worked a little on the movement algorithm, it would be even better; for now, the random movement isn't much help. The vacuum definitely picks up dust, and one battery charge is enough for me to clean my entire three-room apartment.
I was pleased with how well it cleans; in my opinion, the results are very good. What I didn't like was having to make sure there were no wires or other clutter on the floor before cleaning.
It lacks a “virtual wall,” so I have to solve that problem with whatever I have on hand.
In operation, it’s a bit like a living creature. I think pets will be happy with it, although a different vacuum model is recommended for homes with pets. Since I don’t have any animals, I chose the A4 for its higher suction power, but in practice even the lowest setting is enough.
Besides, I think it simply looks nice :)
That’s about it, I think. As always, I’m looking forward to your comments.
$169.99
This page was found when searching for:
kc365-14162 аналоги, kc365-14162 двигатель 12v, редуктор колеса робот пылесоса, https://www.kirich.blog/obzory/obzory-bytovoy-elektroniki/278-robot-pylesos-ilife-a4-malenkiy-domashniy-pomoschnik, ilife a4s мотор колеса, 20n704k500 rfr gjlrk.xbnm, ilife a4 плата, kc365-14162, материнская плата пылесоса для ilife v50 схема, запчасти для ilife4 датчик, электродвигатель кс 365 12v, nidec электродвигатели пылесосов, эл. двигатель kc365-14162 12v, электродвигатель kc365-14162, kc365-14162 двигатель, материнская плата робота пылесоса, материнская плата для пылесоса ilife a4, 9z31mht 20n704r500, kc365 14162 12v/160620, kc365-14162 12v/160620, kc365 14162 12v/160620 купить, 20n704r500 распиновка, nidec 20n704k500 ремонт, 20n704k500 начал свистеть, двигатель кс365 14162 12v/190620
kc365-14162 аналоги, kc365-14162 двигатель 12v, редуктор колеса робот пылесоса, https://www.kirich.blog/obzory/obzory-bytovoy-elektroniki/278-robot-pylesos-ilife-a4-malenkiy-domashniy-pomoschnik, ilife a4s мотор колеса, 20n704k500 rfr gjlrk.xbnm, ilife a4 плата, kc365-14162, материнская плата пылесоса для ilife v50 схема, запчасти для ilife4 датчик, электродвигатель кс 365 12v, nidec электродвигатели пылесосов, эл. двигатель kc365-14162 12v, электродвигатель kc365-14162, kc365-14162 двигатель, материнская плата робота пылесоса, материнская плата для пылесоса ilife a4, 9z31mht 20n704r500, kc365 14162 12v/160620, kc365-14162 12v/160620, kc365 14162 12v/160620 купить, 20n704r500 распиновка, nidec 20n704k500 ремонт, 20n704k500 начал свистеть, двигатель кс365 14162 12v/190620
The figures from this review are in the measurement database: Other devices
Discounted products
You may be interested in


Discounted products
Support the project
All the content on the site and the advice are free, but we’d be grateful for your support of the project and the channel!
Discuss on the forumHave a question or some experience to share? Discuss the article with the author and readers: the forum is a convenient place to share schematics and photos.
Go to the forumOnly registered readers can comment. It takes a minute to sign up, and you can log in with the same account you use on the forum.
Log inRegister