
LS-300W-24V power supply: looks good, I like it
593.82₴
To keep up with new posts on the blog, I recommend following me on Instagram. I’ll post notifications about new articles there and might also share something interesting from time to time: link to my account
You can also subscribe to updates and new articles on the Telegram channel - https://t.me/KirichBlog
I’ll keep this brief, since this model is almost identical to the LS-300W-12V. The only difference is the output voltage—24 V instead of 12 V—and, accordingly, the current: 12.5 A instead of 25 A. I’ll add it to the review of this product line later.
Part one - link
Part two - link.
The packaging is the same, and it likewise highlights that the components are new, the transformer has copper windings, and, most importantly, that it delivers full power. In other words, the manufacturer claims that this power supply can run continuously at its maximum rated power, unlike the PMPO ratings on car stereos.

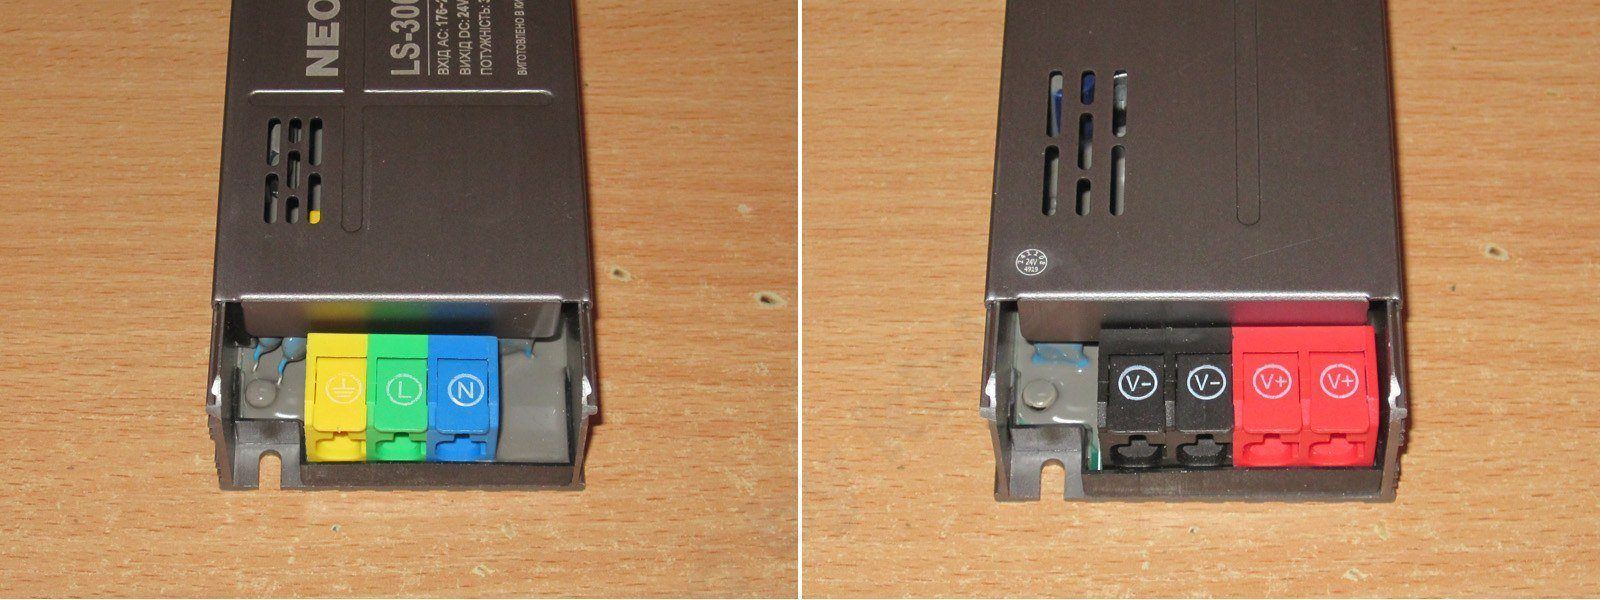
It connects via the same type of terminal blocks as the other models, which is convenient.
The board is potted with compound, but as a reminder, this series of power supplies is not waterproof—it's only moisture-resistant, for example against condensation.

1. The input has a proper filter, including not just an inductor and a pair of X capacitors, but also a thermistor and a varistor. The thermistor, though, has nothing to do with filtering.
2. A pair of 120 µF capacitors.
3. The input bridge rectifier and transistors are screwed to the case, which acts as a heatsink.
4. PTA18N45 transistors, presumably rated for 18 A and 450 V.

1. The power supply uses an LLC topology, as is clear from the inductor, transformer, and capacitor.
2. The output uses synchronous rectification. The transistors are under the potting compound, but they’re definitely there. The output winding is made from a copper busbar, which is a good choice both for heat dissipation and for reducing the skin effect.
3. The rectifier transistors are marked 46N10A. If I’m reading the marking correctly, they’re rated at 4.6 mΩ and 100 V.
4. The output capacitors are rated for 35 V: three standard 1000 µF capacitors and one 470 µF polymer capacitor. The polymer capacitor is made by JSH, and the standard ones are made by Aishi.

During testing, I happened to notice that one of the input capacitors was sitting slightly above the board. It looks like it was accidentally bent and then secured with potting compound.
I put the top cover on, and my concern turned out to be justified: with the cover closed, it presses against the capacitor, which isn’t good, especially in a vibrating environment.

The total input capacitance is 211 µF, which is quite reasonable for the narrow input voltage range and rated power.
The total output capacitance is 3433 µF, which is also quite acceptable given the polymer capacitor.

Like the previously reviewed models, this power supply also lets you adjust the effective power when running an LED strip.
I say “effective” because the power is adjusted by changing the output voltage, not with PWM.
Below are the results at 25%, 50%, 75%, and 100%. There’s also a soft-start function, though that’s mostly for aesthetics: when powering LED lighting, it prevents the lights from hitting you in the eyes when switched on.

I used one of the new loads based on the Atorch BW600 controller for testing. I’ll come back to it later.

Thanks to its LLC topology and synchronous rectification, this power supply has very good efficiency, reaching 93.2% at a load current of around 7–8 A. The scale at the bottom is marked in 1 A increments.
I have to say, the efficiency here is genuinely impressive.

Ripple was checked with no load and at currents of 5, 10, and 15 A, i.e. even at a current higher than the stated maximum.
At high frequency and maximum current, the total ripple was about 180 mV, with the main component no more than 75 mV. This is also a very good result, considering the output voltage.

At low frequency, the ripple was about the same, but there was also ripple at 100 Hz. Given everything else, this could only be critical if you use this power supply for an audio amplifier; other household devices should have no problems.

Checking how the output voltage varies with load and temperature.
1. Cold power supply, no load.
2. Hot power supply at 16 A.
3. Hot power supply, no load.
The voltage varies by no more than 200 mV with load (or rather, overload), and even less with temperature—about 15 mV. These are very good results.

The warm-up cycle consisted of 5 stages, at 4, 8, 12.5, 15, and 16 A. The stated maximum current is 12.5 A.
To cut down on the number of photos a little, I’ll show the most interesting results, at 8, 12.5, and 16 A.
The thermal images are shown in this order: overall view and transformer temperature, inverter transistor temperature, then the inductor, synchronous rectifier controller, and one of the transistors.
Rather than list every reading, I’ll just say that the temperatures are all fine. I don’t see any overheating, even at 16 A—well above the stated maximum current. At that point, the power supply was delivering 380 W, compared with the rated 300 W.
At 12.5 A, the power supply is practically cool :)

I left checking the protection trip threshold until the final stage, and here I have to complain a little: 17.4 A is a bit much. The protection has a fixed threshold: at 17.3–17.4 A, the power supply works normally, but if you go just above 17.4 A, it drops the voltage and the protection trips.
Yes, that’s a very high current, but on the other hand, the power supply works normally at 16 A, which isn’t much below the protection threshold, so there’s a good chance it would also work at 17 A. Still, if I were the manufacturer, I’d consider lowering the protection threshold to 14–15 A.

That’s about it for the power supply tests. I’ll write up my conclusions below, but first I wanted to come back to the new version of the Atorch load.
During the power supply tests, I noticed another “quirk.”
I tried to show two shortcomings in one photo, and both are software-related.
1. We’re testing the power supply, and everything is fine.
2. But suppose the power supply’s protection trips and it drops the output voltage below the set threshold. The load switches off and displays the test results screen.
3. Here, the power supply’s protection has supposedly reset and normal operation has resumed because the overload is gone. Meanwhile, a countdown starts on this screen—about 10 seconds, I think.
4. When the countdown ends, the load... switches back on. At the same time, a second software bug appears: it sets the current to almost 9 A, which then gradually drops to the set value.
Honestly, I don’t know what idiot wrote the software, but I’ve already spotted several issues:
1. Auto-restart, which is completely unnecessary—or at least they could have added an option to enable or disable it in the menu.
2. A current surge when operation starts. If you’re working with low-power sources, this will be a problem.
3. Why do we change a setting by turning the encoder, but confirm it with a separate button instead of pressing the encoder itself? Who came up with that? Let me get my hands around their neck.
4. According to a reader, the load can disconnect from the PC during a long automatic battery test. I haven’t checked this yet.
5. Some odd behavior in CV mode that wasn’t present in the 24MP.

As I said, you can set the current to 1 A, 0.1 A, or 3 A, but when the load starts, the current still rises to almost 9 A (in this case) and then gradually and very smoothly drops to the set value.
For now, I’m reassured by the fact that the load’s hardware is very well designed, though there is one easily fixed issue. The most critical problems can be corrected in software, and I really hope the developers address them.

Just out of curiosity, I decided to test the old 24MP version too. I ran the test in exactly the same way, then lowered the voltage and the load shut off. I raised it again, but the load stayed in standby. When I pressed the test-end button, it returned to normal operation as expected, with the load mode turned off.
Yes, it sometimes tries to start a test when there is no voltage at the input, even though a test shouldn't be started in that state. But it doesn't happen every time.

And yes, it also has an inrush current when switched on, but it's usually around 1.5–2 A and lasts a very, very short time. So while the BW600 takes at least half a minute to let the current settle, the 24MP does it almost instantly. In the photo, you can see that the load's ammeter registered the inrush, but the power supply didn't.

Conclusions.
Well, what can I say? I liked this power supply. I'd say I liked everything about it, but there are a couple of unpleasant points: first, the protection trips at too high a current; second, there's a capacitor sticking out.
Otherwise, I think it's excellent:
1. The construction is beyond reproach: everything is neatly assembled and potted with compound.
2. The components are clearly new, generously rated, and quite high quality—for example, the transformer and capacitors.
3. Thermal performance is excellent. The unit doesn't overheat even under overload, when it delivers almost 400 W instead of the rated 300.
4. Efficiency is also very good, which is why the thermal performance is so good. But the credit goes not just to the temperature, but also to the balanced heat distribution, with no components overheating before the others.
5. I have no complaints about the ripple either.
6. Soft start and power adjustment are nice bonuses.
7. The price: less than 15 bucks for a great 300 W power supply with passive cooling? Show me a cheaper one.
That's all from me. I hope this was useful, and as usual, thanks to Vitaly for providing the sample for testing.
593.82₴
This page was found when searching for:
зарядное из компьютерного блока питания lc-b300atx
зарядное из компьютерного блока питания lc-b300atx
This model is included in the summary table: Comparison of power supplies: ripple, efficiency, and temperature rise
The figures from this review are in the measurement database: Power supplies
Calculate manuallyAll calculators
Discounted products
You may be interested in



Discounted products
Support the project
All the content on the site and the advice are free, but we’d be grateful for your support of the project and the channel!
Comments5
Discuss on the forumHave a question or some experience to share? Discuss the article with the author and readers: the forum is a convenient place to share schematics and photos.
Go to the forumOnly registered readers can comment. It takes a minute to sign up, and you can log in with the same account you use on the forum.
Log inRegister
Comments are published in their original language.